Find out how to create a game on Scratch for beginners! Learn how get started coding in Scratch, and how to complete a video game in less than one hour.
Coding is a fun and useful skill, and it’s not challenging to get kids excited about coding when you explain to them that their favorite game, app, or social media channel is built with code. Plus, it is a lot more intuitive to code on Scratch, especially compared to using traditional text-based languages like C++ or Java. For this reason, Scratch is the perfect environment for kids to learn to code.
Follow the steps below to create a fun game on Scratch. Then, explore more games to build at the end of this blog, and discover endless possibilities on our Scratch Projects page.
Want to learn more about Scratch? Enroll in our award-winning online coding classes led live by experienced teachers, and designed by Stanford, MIT, and Google professionals. Start learning how to code games in beginner-friendly Scratch coding classes with our free introduction class.
The Basics For How To Create A Game On Scratch
Here are a few key concepts to understand before we jump into making our game.
1. Understanding block-based coding and visual coding
Scratch uses a visual type of code made of pre-built blocks of code. These blocks click together, and each one corresponds to some action taken in the program, so it’s easy for kids to quickly see the connection between placing a block and seeing an action on the screen. The blocks are colorful and visually stimulating, providing an exciting and fun space for kids to make games while learning about coding fundamentals.
2. Sprites
Sprites are the in-game characters and objects that inhabit a game in Scratch. Every new project in Scratch comes with a pre-loaded Sprite, but there is also a large library of objects to choose from, ranging from fantasy characters to science fiction robots to balls and letters. Scratch programmers can also design their own sprites using a paint tool. It’s also easy to import images from one’s computer or from the Internet, so you can incorporate almost any character or image into your game.
3. Code blocks
There are eight main types of blocks in Scratch. Each block type is color-coded and controls a specific aspect of the program. Most of the blocks are pretty straightforward: Motion blocks control a sprite’s movement, while Looks blocks control its appearance. Sound blocks add music and sound effects. Other blocks control more of the programming aspects of the game: Events blocks are used to run code, either by clicking the green flag icon or by clicking on particular sprites within the game. Control blocks allow for repetitive actions, such as loops, as well as Boolean expressions, or conditional statements, which allow for certain actions to only occur under specific conditions. Sensing blocks allow for sprites to interact with each other. Operators and variables allow for keeping track of score, health, and other variables or incorporating mathematical equations into the program, which make games more interesting and well…variable. It’s even possible to build your own blocks, though this is a more intermediate skill we won’t go into in this tutorial. Larger pieces of code composed of several blocks are called scripts.
4. The Scratch user interface
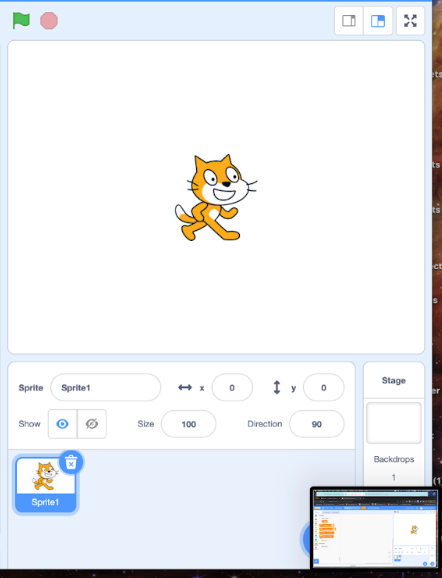
The Scratch User Interface (UI) is designed to be user friendly for kids. As you can see, on the left hand side of the screen there is a rolling menu with the various code blocks. In the center of the screen is the area to place and build scripts. On the upper right hand corner is the Stage, where kids can see their code in action. Below this are the sections for managing sprites and backdrops. There are other features under the hood, but learning the basic layout can be done in a matter of minutes.
5. Types of Scratch games
Scratch does not have limitless potential. It was designed by MIT’s Learning Lab to make coding more accessible to kids while providing a gateway into coding that is eventually supposed to be replaced by traditional text-based programming languages like Python or JavaScript. That being said, Scratch is very powerful, and kids can make video games of their own in a very short time, while more advanced users can build very complicated games and animations that are almost as fun to play as they are to build. We have a handy list of other game tutorials you can try after this one, but some of the best types of games in Scratch are chase games, clicker games, shooting games, and Flappy Bird style games.
Learn How To Create A Game On Scratch For Beginners
In today’s tutorial, we will walk you through building a basic Pong or Break Out Style game in Scratch for beginners. This game and others you build in Scratch should be considered learning tools. Each game should add tools to your toolbox and teach a new coding concept, but any can be added to infinitely and designed in unique ways that differ from the tutorial.
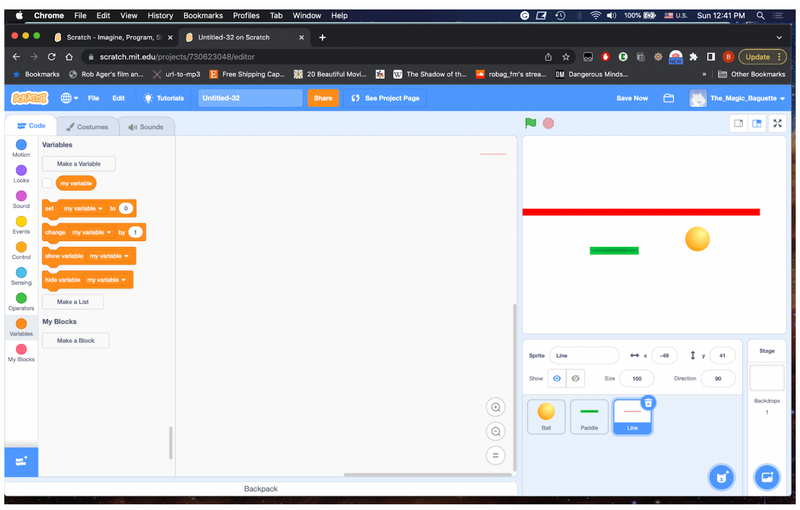
1. Add a Paddle, a Ball, and a Line Sprite
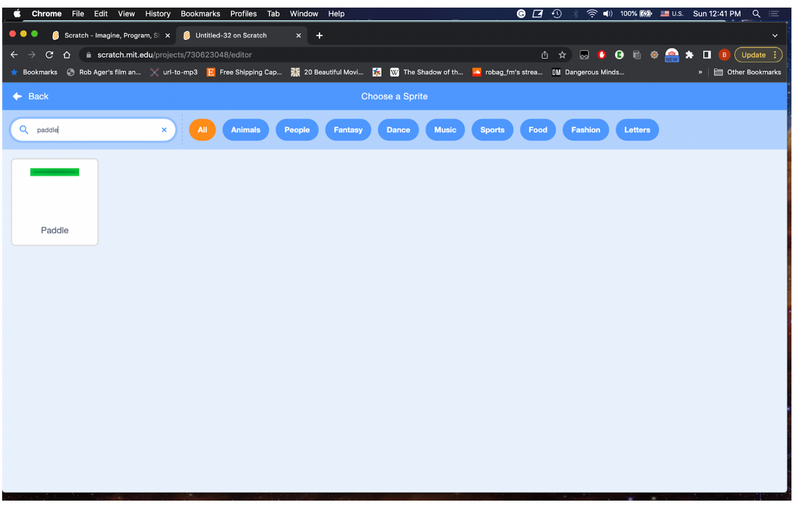
As a first step to building a Pong game in Scratch, you need three sprites. As each new project starts with a preloaded cat sprite, you can delete it by clicking the “trash can” icon next to the sprite in the lower right corner. Then let your mouse cursor hang over the circle with the cat face and the + sign in the bottom right corner. Click the circle. This opens the Sprite library. You can search for specific sprites. Search for the paddle and the line sprites, and choose another sprite as your ball. There are several balls, but you could also use a donut, a planet, or a piece of fruit instead.
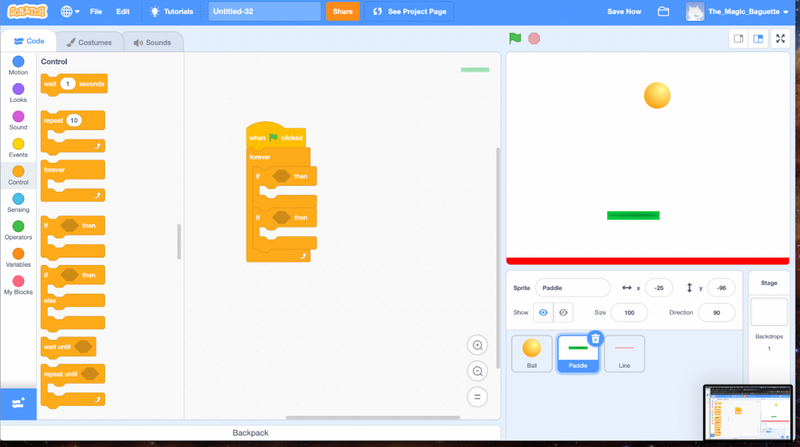
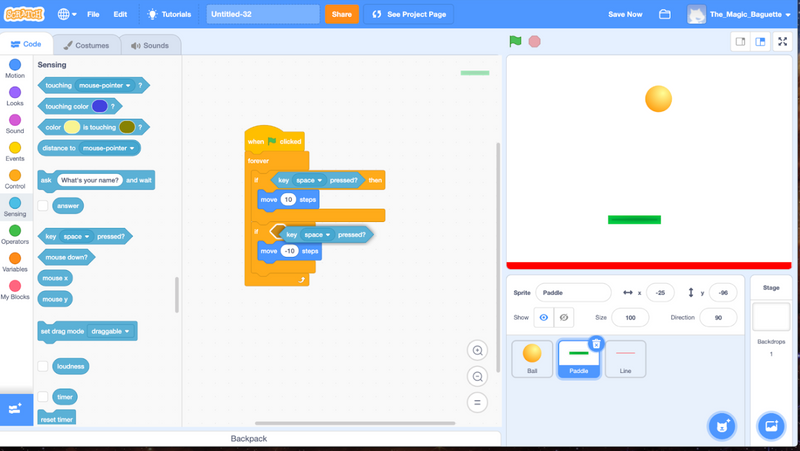
2. Code the Paddle
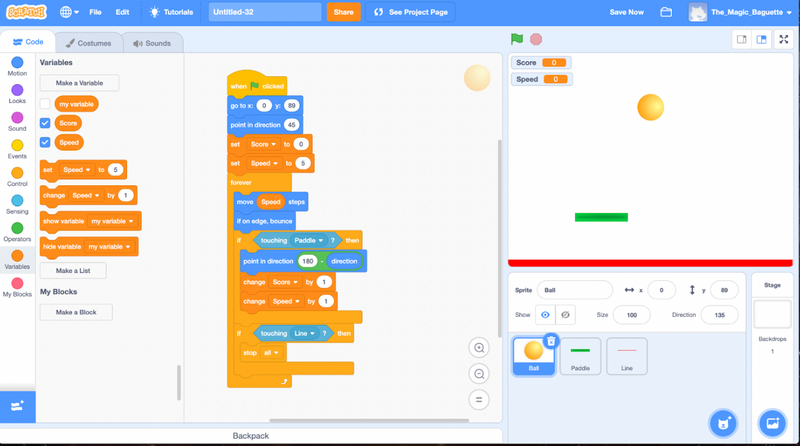
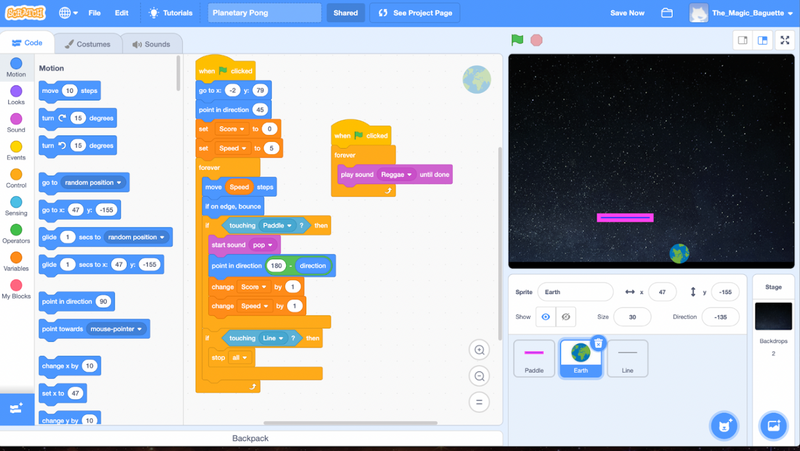
Our first step is to code the paddle sprite. Begin by adding the “When Green Flag Clicked” block from the Events menu. Then go to the Control menu, and you will add a “Forever” loop block, in which you need to place two “If … Then” blocks. These conditional blocks allow us to give directions to the program using the right and left arrow keys, which will move the sprite right or left, respectively.
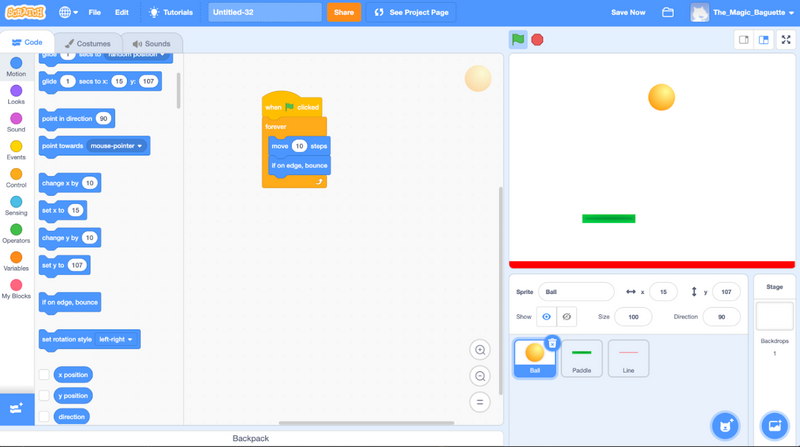
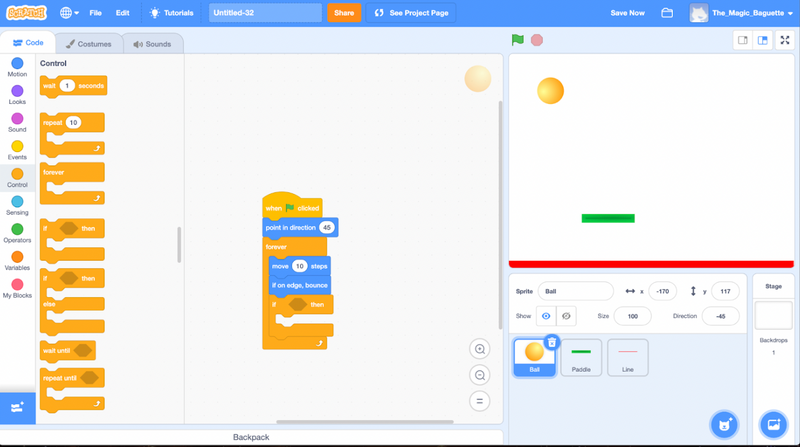
3. Code the Ball
Coding the ball to move in this game is the hardest part, but don’t worry, it’s not a scary challenge. Start by clicking the Ball in the lower right hand, Sprite management window. Just like the paddle, start with the “When Green Flag Clicked” block and a “Forever” loop. Inside the forever loop, use the “Move 10 Steps” block and the “If on Edge, Bounce” block from the Motion menu.
You will see that when you run the program, you can now control the paddle, while the ball moves side to side forever within the frame of the stage. However, we want the ball to move around at an angle. So, at the top of our code, before the Forever loop, we will place a “Point in Direction” block and we will set the value to 45. This will make the ball move diagonally and bounce off all four sides of the screen. This is the first step.
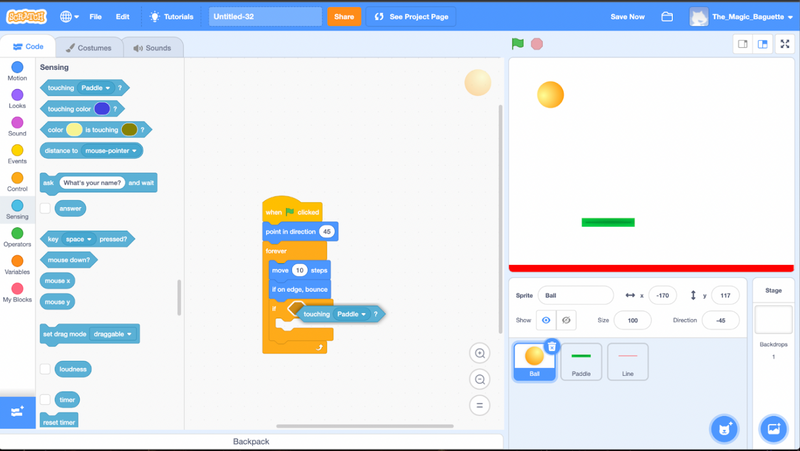
Now that the ball is moving properly, we want it to interact with the other sprites using the Sensing blocks. Within the ball’s forever loop, we will place an “If…then” conditional block with a sensing block “Touching Paddle.”
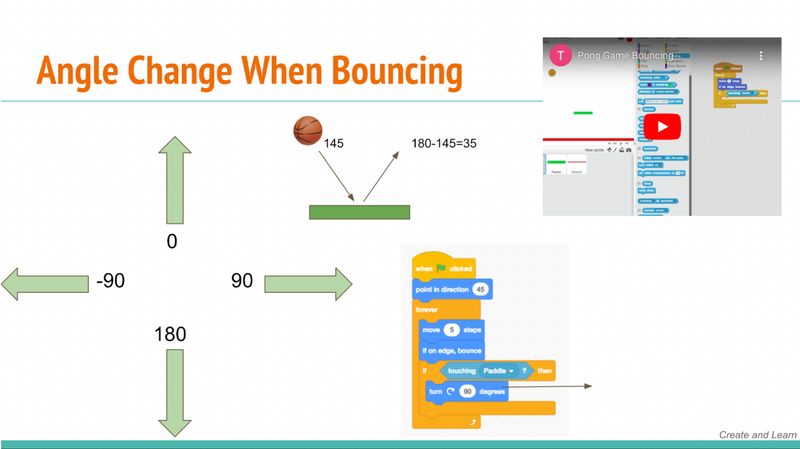
The next part is tricky: to make sure the ball moves at the correct angle, we need to do a little bit of arithmetic and geometry. In Scratch, the directions each have a value. Right is 90, Left is -90, Up is 0, and Down is 180. If you run your program at this point and watch the value of the Ball’s direction, you will see that the value equals either 45, 135, -45, or -135 at any given time. So to ensure our ball ‘bounces’ properly off of the paddle we need to set the direction to 180 - “Direction” every time the ball touches the paddle. This will ensure it moves up and away in the natural direction.
4. Win/Lose Conditions
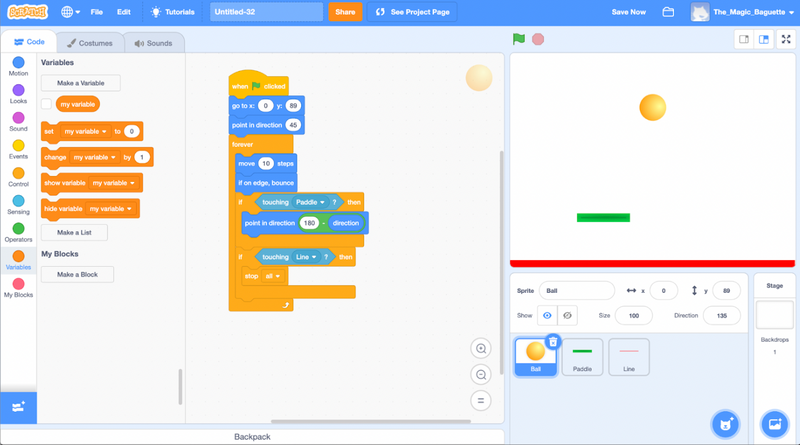
We have made the basics of the game’s physical mechanics, but it’s still not a game. Games require conditions for winning and/or losing. So to create a Loss condition, we will make the game stop if the Paddle misses the Ball and the ball touches the bottom of the screen. To do this, we will simply drag the Line sprite to the bottom of our Stage. Now, within the code of our Ball, we will add a second “If…Then” condition, but this time we will say, “If touching Line then” with “Stop All” inside it. Now, when the Ball goes below the Paddle, the player loses.
This creates some new problems that need to be solved. When I start the game again, the Ball will be stuck in the losing condition. So we need to add a set starting position to the Ball’s code. In the Stage, drag the ball to the top-center of the screen, then go to the Motion menu and grab the “Go to X:_ Y:_” and put it just under the “Green flag” block. The values should be set to the current place of the Ball. Now, when you run the game, it should start above the Paddle.
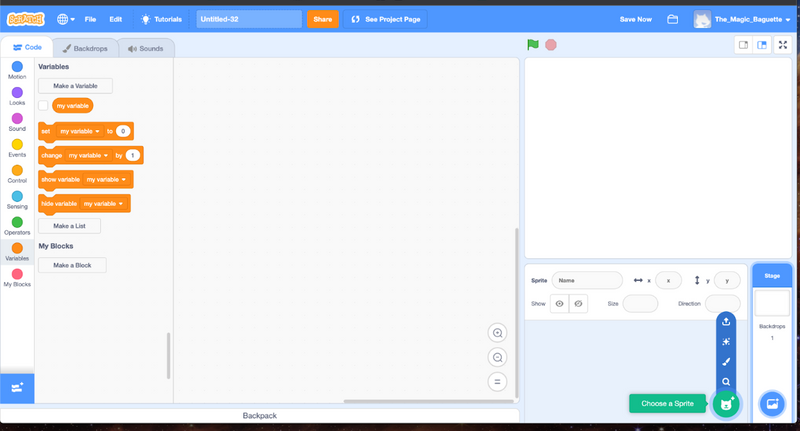
5. Keep Score
Variables are an important part of any programming language. Variables in games allow players to have a score, a health meter, and an inventory. Variables are like boxes in which you can store a specific value, which can change as the game progresses. Go to the Variables menu and click “Make a Variable”, which you can name, “Score.” Make sure “For all Sprites” is clicked. Now the Score variable should appear in our Stage. Within our Ball’s code, add the “Set Score to 0” block under the Green Flag block, and add “Change Score by 1” into the Forever loop where the ball interacts with the Paddle. Now every time you hit the ball you can get a point, and after starting a new game, the Score will reset.
To make the game more fun, you could create another variable to change the speed each time you hit the ball. If you add a Speed variable into the same “If…then” condition as the Score, you can increase the speed each time you hit the ball. You will want to set the Variable to a higher value, such as 5 or 10, and then add the variable into the Motion block controlling the Movement of the Ball.
You did it! You created a game. You can add to it, but the basics are there! Good work!
6. Improve Immersion
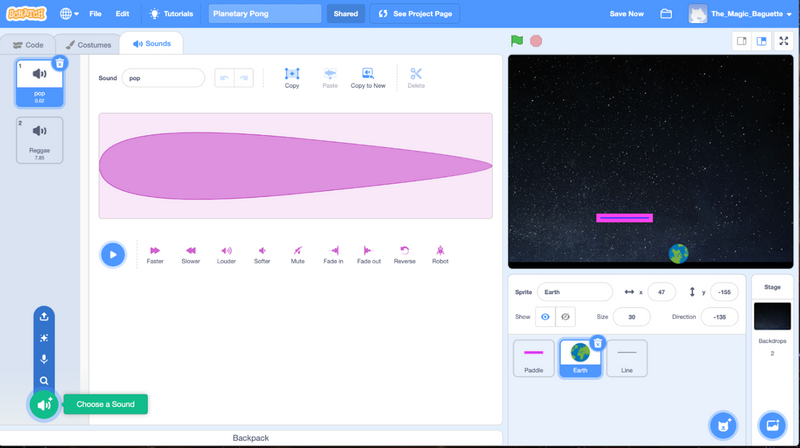
Games can be simple, and some of the best games, such as Tetris, Pong, or Asteroids are simply elegant. That doesn’t mean you need to be total minimalists. Try adding some sound by creating a separate forever loop that includes a Loop from the sound menu. You can also add a sound effect when the Ball hits the Paddle. Backdrops and color schemes are another great way to turn a basic game into a fun and immersive experience.
7. Test, Debug, and Share
Done? Not quite. A key step to game design is testing and debugging. You will run into problems if you go too far too fast. We suggest running your code every time you change something, to make sure your changes are going in the right direction. Debugging can help you ask questions such as: Is it working? Is it fun? Would I play it again? Could a new player understand how it works right away?
To help you, try sharing your new creation with others and ask them if they like it. Remember that game design and software development are collaborative processes involving large teams, so don’t worry if your game isn’t working perfectly at first. Find a friend, or take a free coding class to help you whenever you get stuck. Don’t give up!
Make more games on Scratch
1. How to make a Mario game on Scratch: In this tutorial, you'll learn how to make a Mario game in Scratch.
2. How to make a cross the road game in Scratch: Find out how to make an easy Cross the Road game on Scratch.
3. Make a jumping game in Scratch: See how to make a jumping game in Scratch.
4. Make a whack-a-mole game in Scratch: Whack-A-Mole is an awesome game about “moles” that pop up from the “ground”.
5. Make a flappy bird in Scratch: Find out how to make a Flappy Bird in Scratch!
6. Make a clicker game on Scratch: Basically, in order to play the game, the user clicks on a big cookie to earn a point per click.
7. Make a maze in Scratch: We’ll start from the beginning and demonstrate how to create your own maze, control the character’s escape, and more.
Create A Game On Scratch For Beginners
Now that you have made a beginner game in Scratch, consider trying something more challenging. Enjoy some other fun Scratch projects for kids. Finally consider signing up for a free Scratch class (pick the grade level that matches your student's grade), where your kids can learn game design from a professional developer.
Written by Bryan Gordon, a Create & Learn instructor. After ten years of working as an English teacher, Bryan began studying Math and Computer Science over the past few years. Aside from writing and teaching, he likes cooking, gardening, playing guitar, and hanging out with his cats, Baguette and Wally.