Enjoy playing Rock, Paper, Scissors? Wouldn't it be cool to create a Rock, Paper, Scissors game in Scratch?! Then you can play it anytime.
Scratch coding is a great way for kids and teens to start learning coding and building fun games, stories, and animation that they enjoy. To learn more, check out award-winning live online Scratch camps and Scratch classes (Scratch Junior class for K-2; Scratch Ninja class for grades 2-5; and Accelerated Scratch class for grades 5+) designed by experts from Google, Stanford, and MIT. Learners with previous coding experience may start from Part 2 of the classes above or enjoy Intermediate Scratch Game Building.
How To Make A Rock, Paper, Scissors Game In Scratch Step By Step
The completed project can be found here. Let’s learn how to make this project! Make sure you have a blank Scratch project open to begin creating your Rock, Paper, Scissors game.
1. Set up your characters and background.
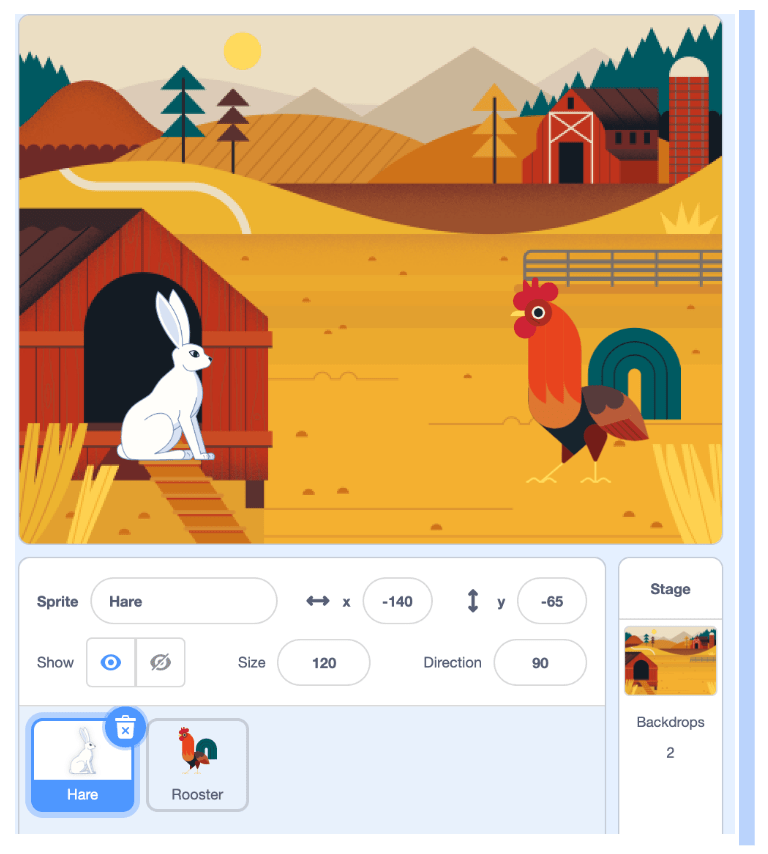
Let’s start off by choosing two sprites. Pick any sprite you desire! Think about the theme you want for the game. One character will represent the player and the other will represent the computer. After choosing two sprites, add a background for your game. Be creative!
2. Create your variables.
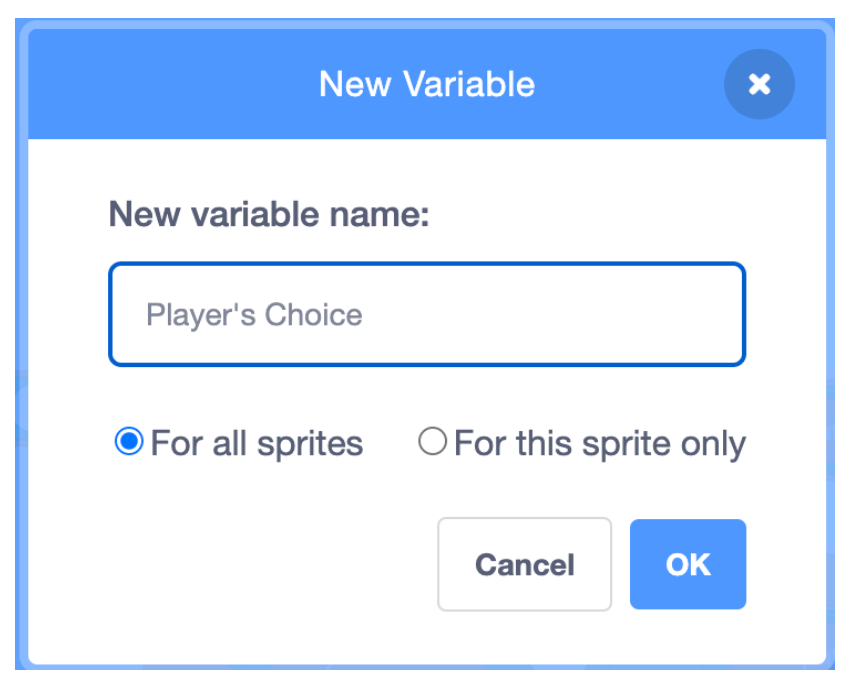
Next, think about the important information that is tracked while playing the game. This is stored in variables. . For example, we need to keep track of both the player and computer’s choice. We will also need to keep track of both the player and computer’s score. This means we will need to make 4 variables in total! We can do this by going to the ‘Variables’ category and clicking the ‘Make a Variable’ button. When you do this, make sure the ‘For all sprites’ option is clicked. Here is an example for one of the variables called ‘Player’s choice’
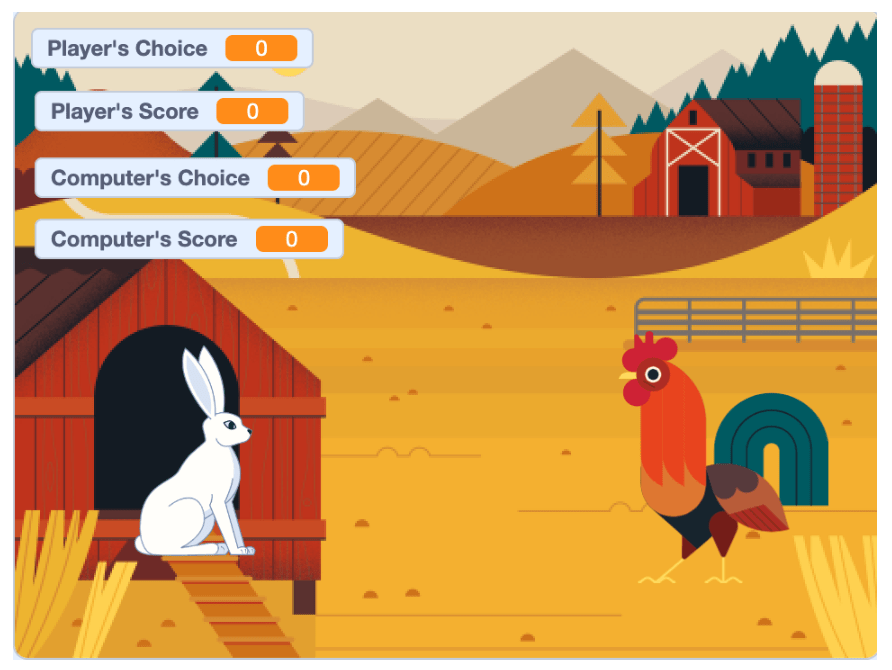
After you make all four variables, your screen should look something like this:
3. Reset variables to zero each round
The variables are reset back to zero each game Add this code in the player’s sprite:
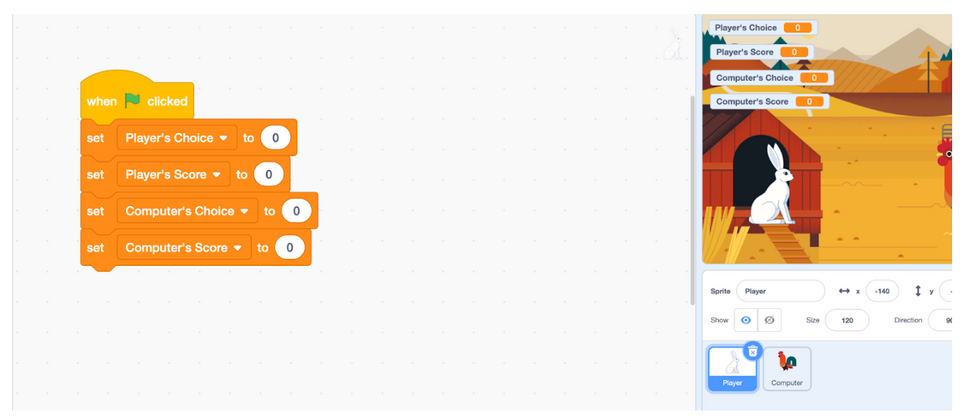
At the start of the game, the player and computer have not made any choices so the scores are zero for everyone.
4. Let the player choose Rock, Paper, or Scissors
Our sprites and variables are ready so we can start coding for the player. Look at the table below, It shows the keyboard key and the updated ‘Player Choice’ variable for Rock, Paper, or Scissors. If the player wants to choose Rock, they will need to press the ‘R’ key on their keyboard, and we will set the ‘Player’s Choice’ variable to equal 1. If they want paper, they will need to press the ‘P’ key, and the ‘Player’s Choice’ variable will be set to 2. Lastly, if they want to choose scissors, they will need to press the ‘S’ key, and the ‘Player’s Choice’ variable will be set to 3.
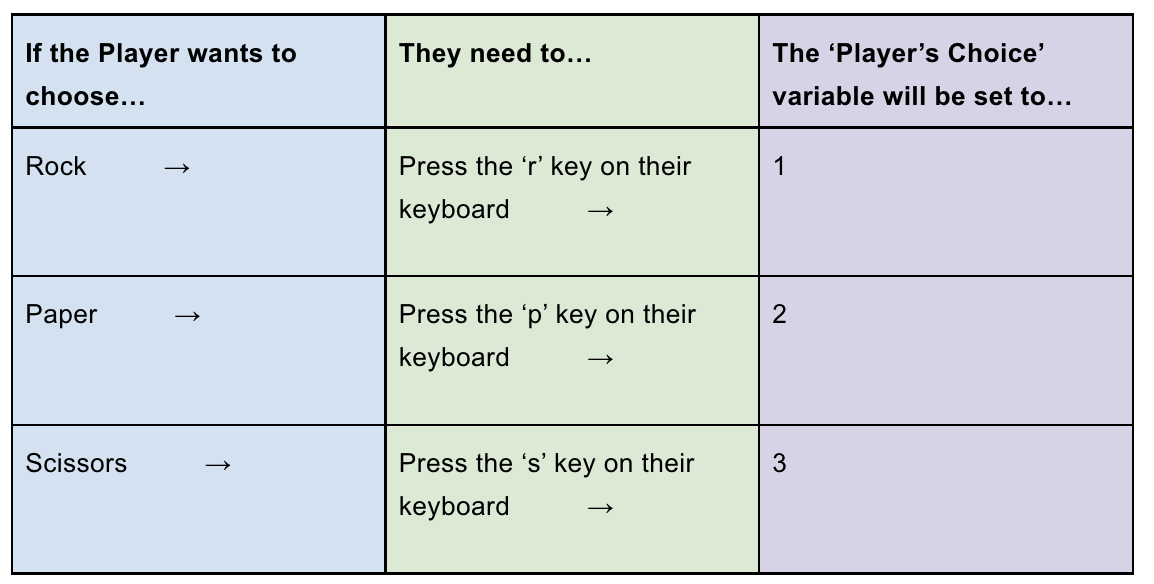
Make sure you understand what the table means before moving on.
Now, let’s see how this translates to code!
How to check if the player presses a key on their keyboard? (Hint: SENSE if the player presses a key.)
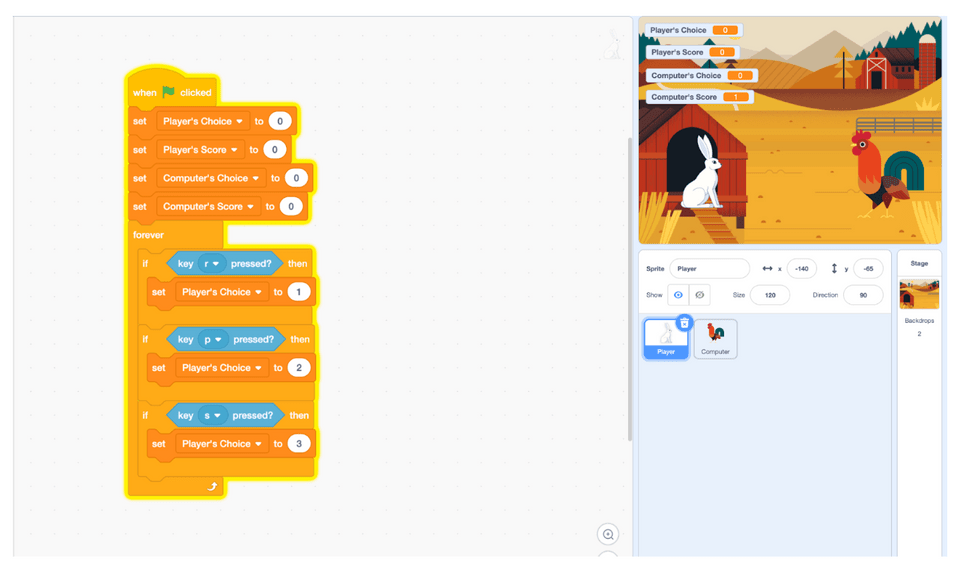
To do this, use 3 if-then blocks from the control category and key-space pressed blocks from the sensing category. Each if-then block will sense if the player presses a different key. Once you have all three if-then blocks ready, don’t forget to add a forever block around the entire thing. This ensures the game always checks if a key is pressed. Inside, each if-then block, we need to set our Player’s Choice to the correct value. The code should look something like this:
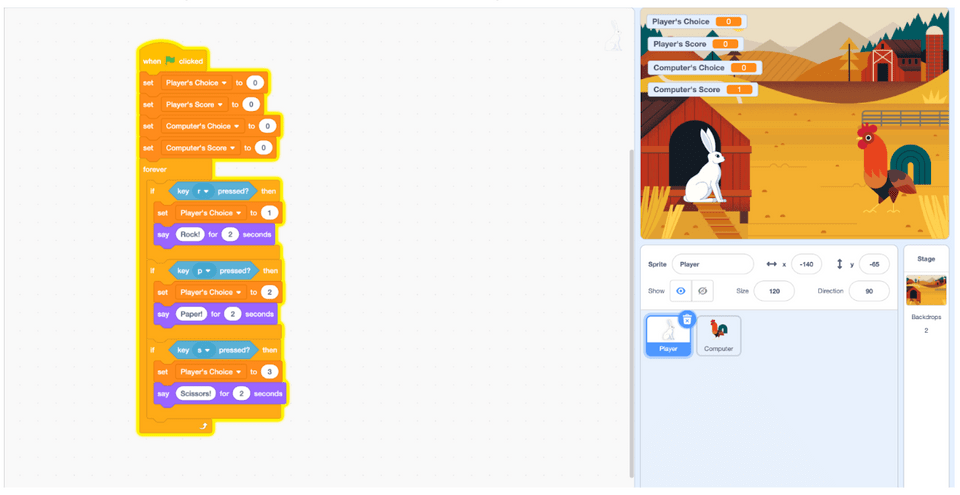
We can make this more interesting by making our sprite say something whenever the player chooses something. Your code can look something like this:
5. Let the computer know it has to choose Rock, Paper, or Scissors
Now, that we let the player make a choice, we have to let the computer know it can make its choice too. You are probably wondering why the player and computer can’t make their choices at the same time, but doing it this way makes it easier to get the correct order of events. Specifically, we don’t want the computer revealing their choice before the player gets to choose.
In order to make sure the computer knows it is its turn to choose, we will broadcast a message. You will find the block you need in the events category. Select and drag one broadcast message1 block into each of if-then blocks. Make sure to make a new message and call it ‘player made choice’. Your code should now look like this.
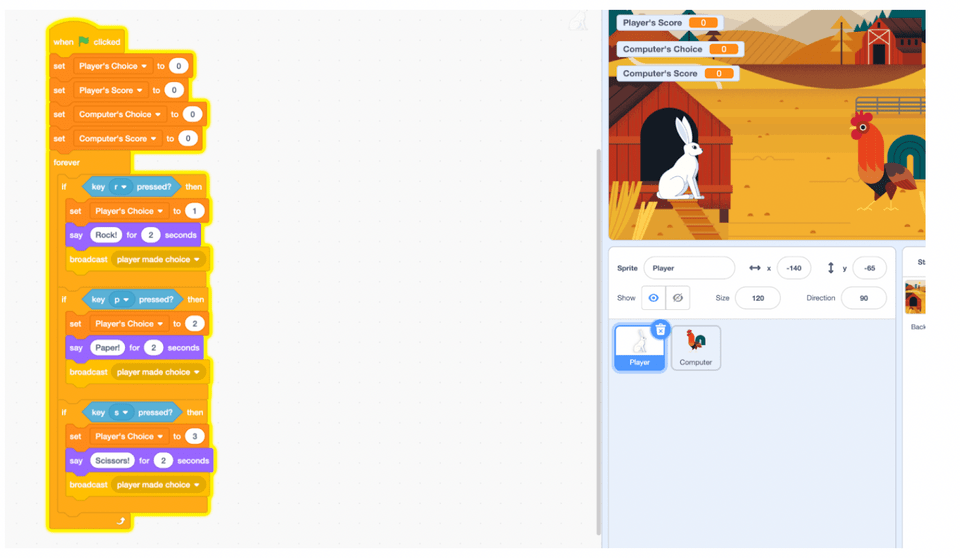
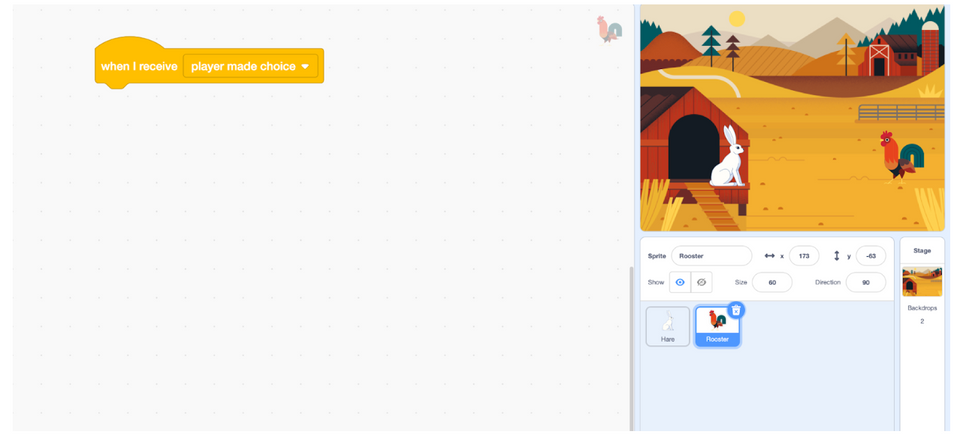
Next, the computer must be able to receive that message so we need a block from the events category again. This time, we need the ‘when I receive’ block. This block will activate the computer’s code after the player makes their choice. Your code for the computer should look like this:
6. Make the computer choose Rock, Paper, or Scissors
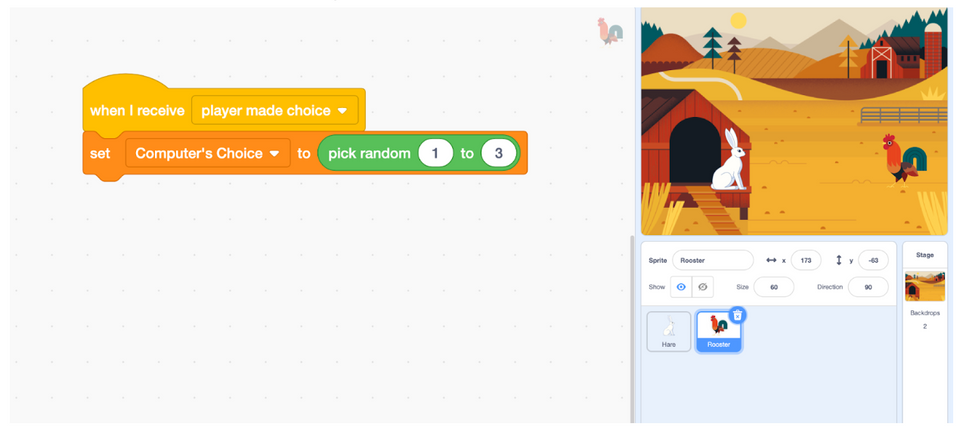
Now that the computer knows it is its turn to choose, we have to add code so it can actually choose rock, paper, or scissors. Since the computer cannot think for itself, we have to make it choose randomly. To do that, we will need the ‘pick random’ block from the Operators category. This will let us randomly choose a number.
Remember from the table how we said that Rocks is represented by 1, Paper is represented by 2, and Scissors is represented by 3? We need to set our variable ‘Computer’s Choice’ to the random number we’re making so we can keep track of the choice the computer makes. Your code should look like the following:
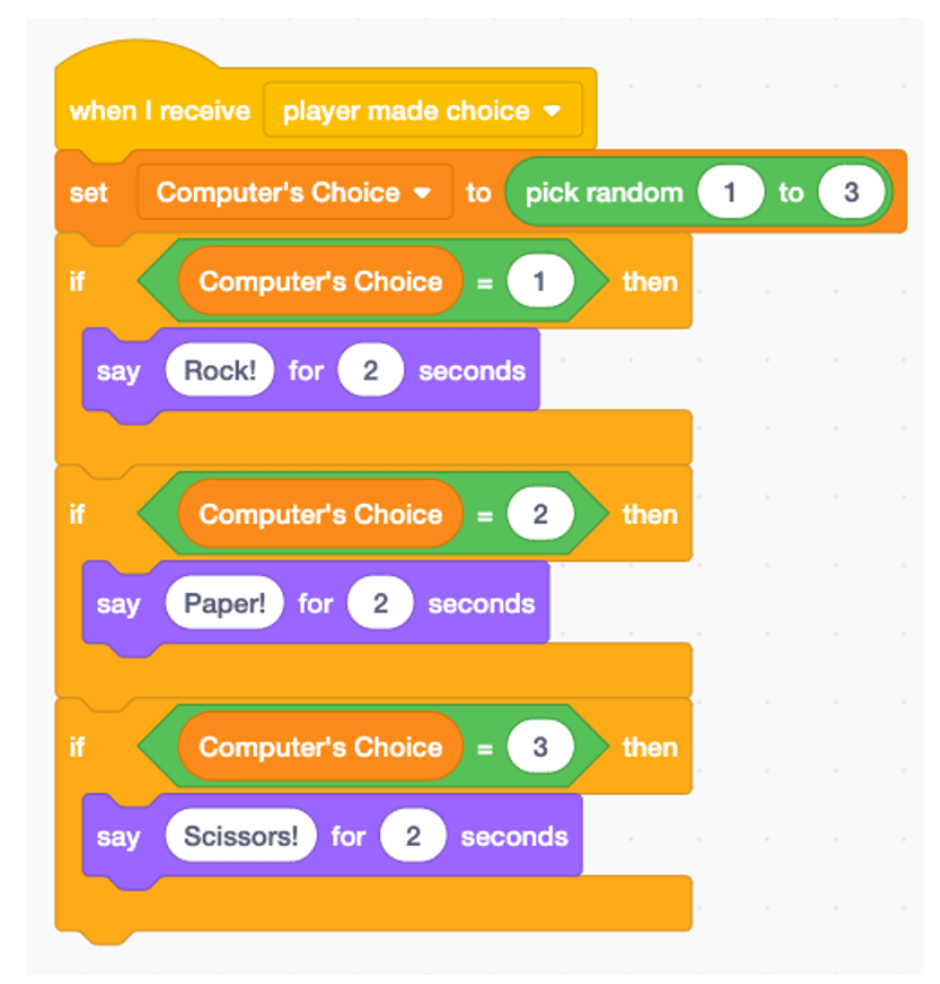
Now that the computer made its choice, we can make this more interesting by having the computer say it’s choice. To do this, we will check what number ‘Computer’s Choice’ is equal to. If it is equal to 1, we will make the computer say ‘Rock!’. If it is 2, the computer will say ‘Paper!’. Lastly, if it is 3, the computer will say ‘Scissors!’. How can we check if one thing is equal to another? We will use the ‘=’ block from the Operators category with an if-then block!
Your code for the computer should look like this now:
7. Calculate scores
Now that both the player and computer have made their choices, what comes next We need to check who won and update our score variables! How do we know who won?
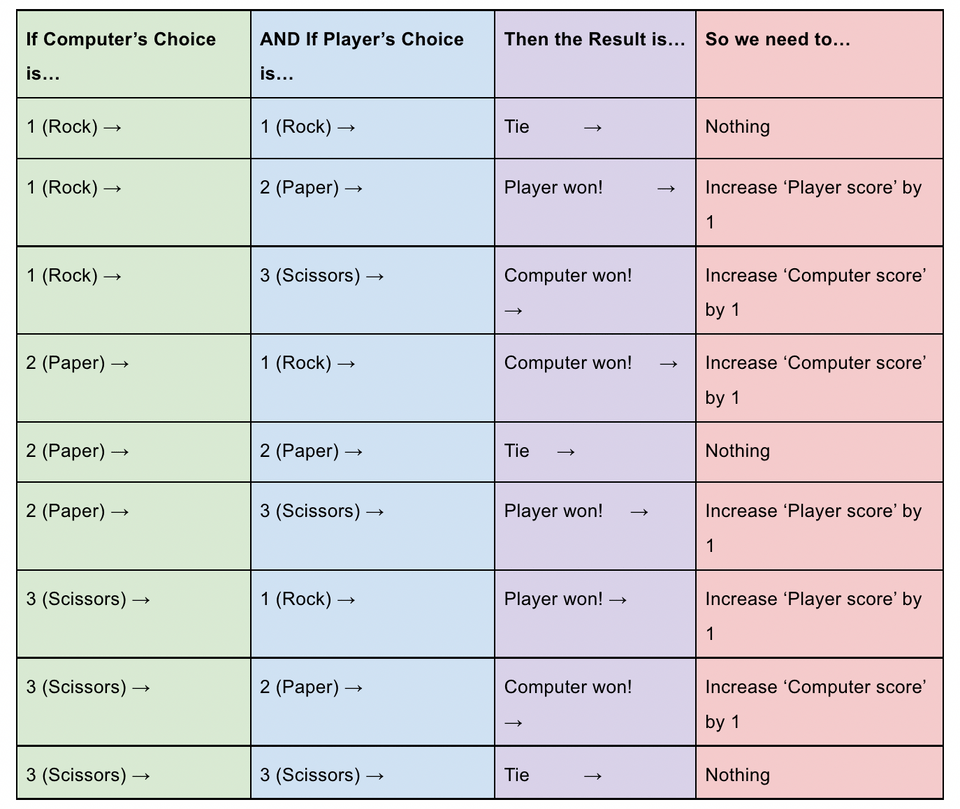
This is why our ‘Player’s Choice’ and ‘Computer’s Choice’ variables are so important! They store both the player and computer’s choices so we can compare them against each other to see who won.
Let us list out all the possible results:
Let's get started on turning this into code.
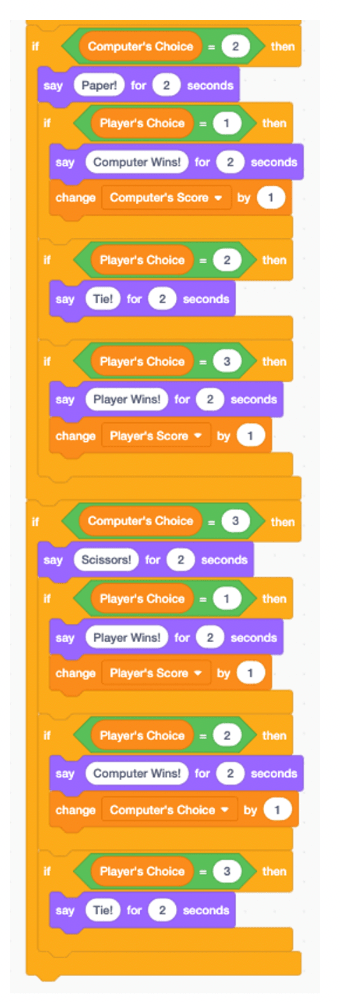
After the computer sprite announces what its randomly selected choice is, we can use conditional statements to determine the result. We will create three if-then conditional statements, one for each of the possible player choices. For example, if the computer selects 1 (Rock), then we will check if the player's choice is equal to 1 (Rock), 2 (Paper), or 3 (Scissors). Depending on the player’s choice, we will announce if the Computer Wins, the Player Wins, or if it is a Tie. We can also increase either the Player’s Score or the Computer’s Score depending who wins the point.
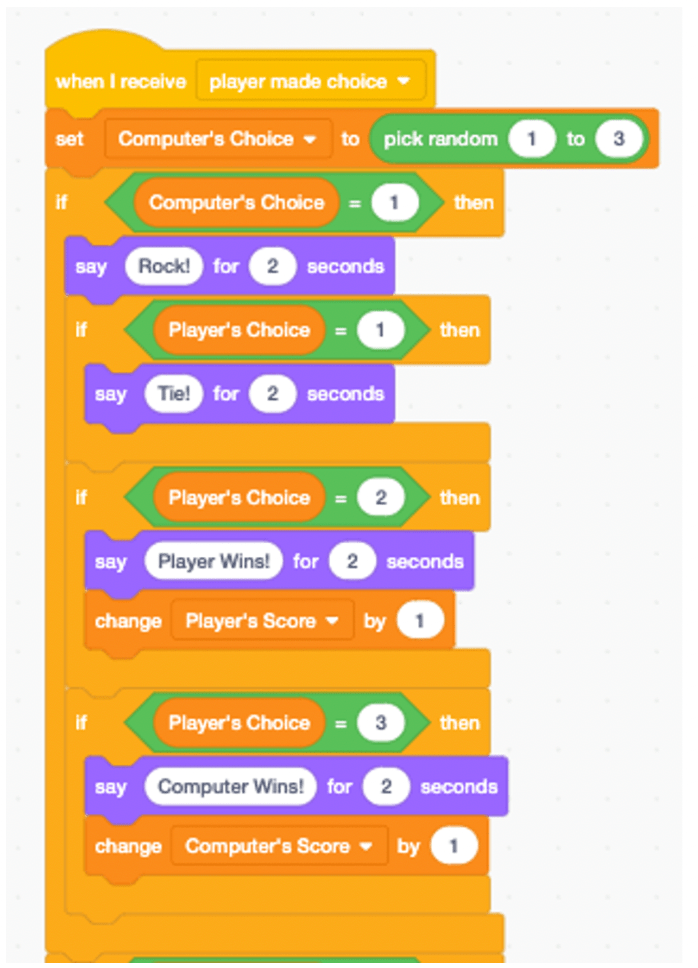
We will continue this process of adding three if-then statements into the conditional statements that check if the Computer’s Choice equals 2 (Paper) or 3 (Scissors).
8. Win or lose the game
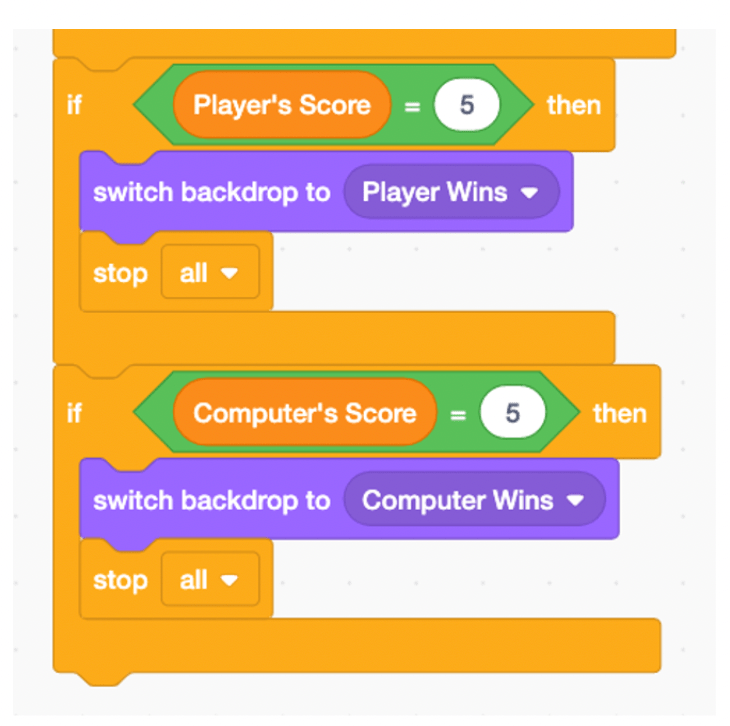
Finally, we can end the game if the Player’s Score or Computer’s Score reaches a certain target score. In this example, we will use the target score of 5 points, but you can customize this number depending on how long you want the game to continue.
First, create your backdrops that you will be using, one if the player wins and another if the computer wins.
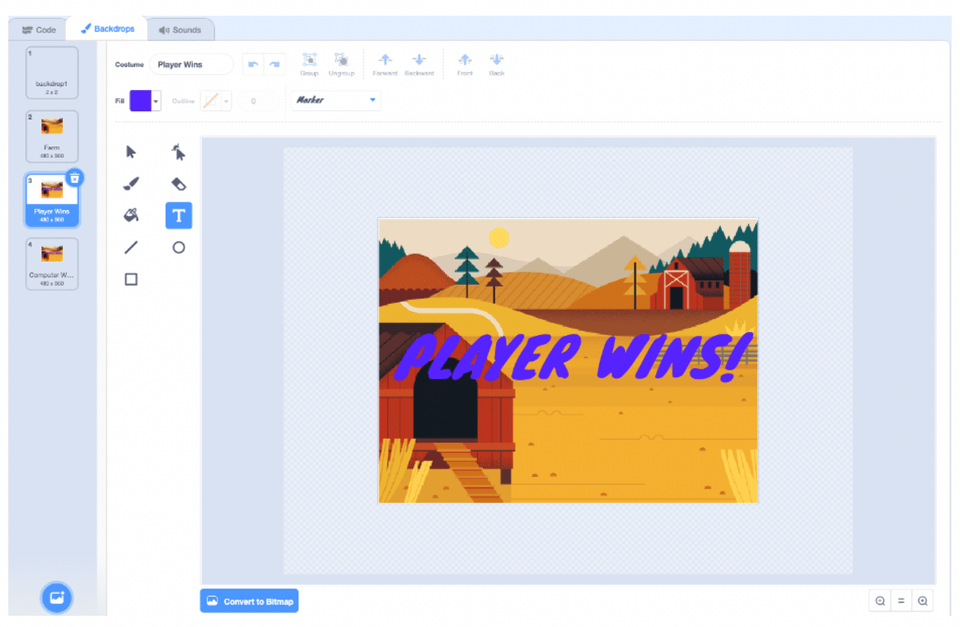
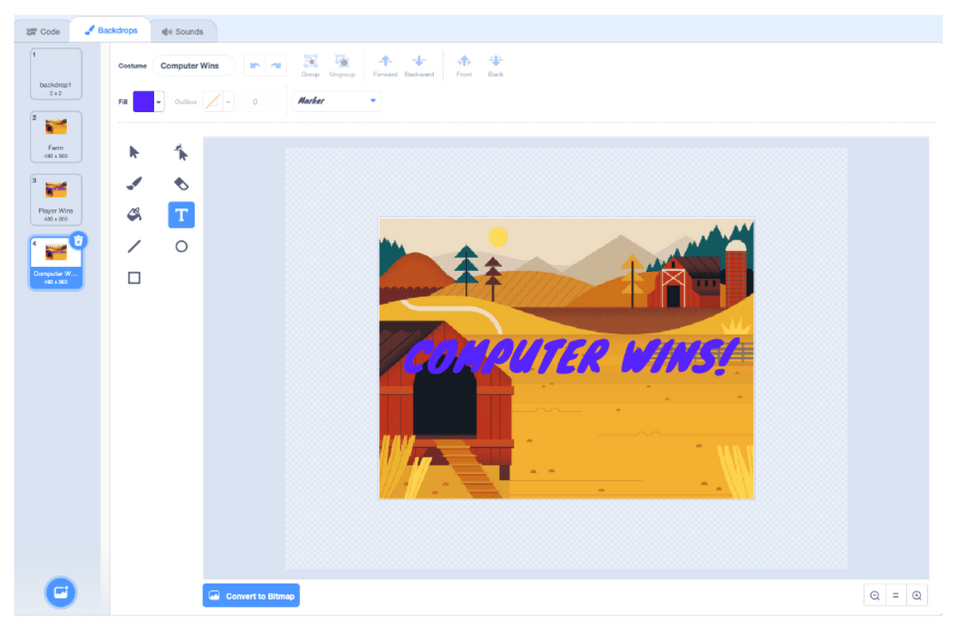
After your code calculates the score by determining who won the point, you will have the computer check if either the player or computer has reached the target score. If the Player’s Score or Computer’s Score variable is equal to 5 (your target score), then switch the backdrop and stop the code.
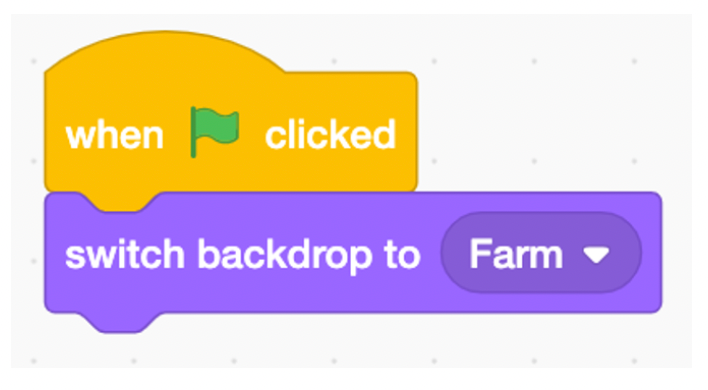
Don’t forget to switch the backdrop back to the one without text when you click the green flag.
Feel free to continue adding more features and abilities to this game. Some suggestions include adding background music, animating the sprites, or even creating a two-player version of this game. Be creative and most importantly, have fun!
Make A Rock, Paper, Scissors Game In Scratch
Up next, take on more fun challenges with the best games to make in Scratch. To learn more about Scratch coding with the help of a live expert in a supportive small group setting, enroll your student in an upcoming free Scratch class. They can even earn a certificate!
Written by Matt Kalnay, a Create & Learn instructor. After graduating from UC Davis with a B.S. in Biology, he joined Peace Corps Indonesia as an English as a Foreign Language Instructor. Following his return to the United States, he decided to pursue his passion in the field of Software Engineering and Web Development.


