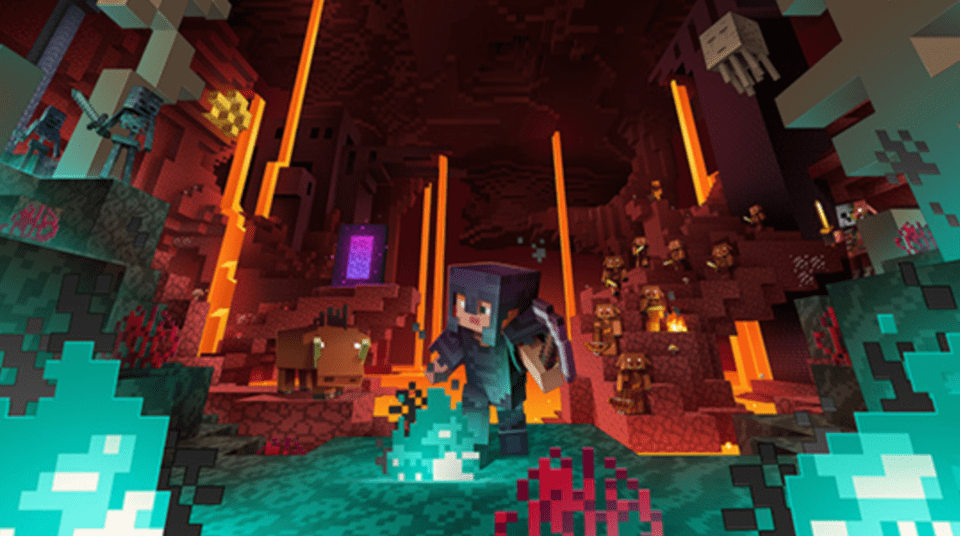
Does your child love playing Minecraft? Today you and your child will learn how to customize their own character to make the game even more fun. Minecraft skins are a good way to show their interests and personality to the people they're playing with, and frankly they just look awesome! So learn how to make a Minecraft skin in simple steps. Get some ideas for custom Halloween and Holiday skins you can make. Plus, discover some cool pre-made downloadable skins. And finally, see how to upload and use your creations.
To unlock even more cool features in Minecraft, enroll your child in our fun live online Minecraft Redstone class, designed by experts from Google, Stanford, and MIT. They'll learn how to incorporate advanced blocks such as Redstone, pistons, and observer blocks to build holiday lights, automatic doors, and even flying machines inside Minecraft. And they can learn how to make their own mods in our Minecraft Modding Quest class.
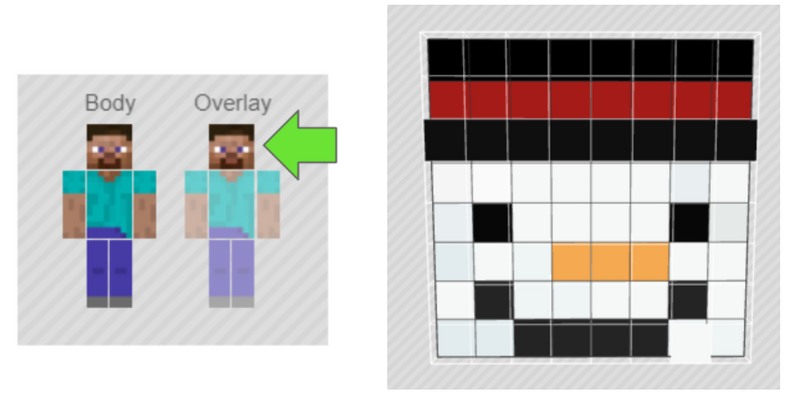
What Is A Minecraft Skin?
A Minecraft skin is a graphic download that changes the appearance of a video game character. A skin does not change the outcome of the game.
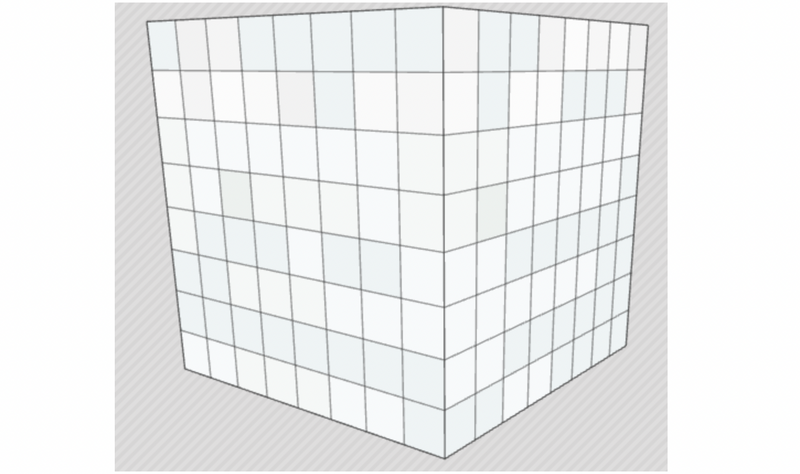
In Minecraft, it is helpful to think of the skin as made up of pixels. A pixel is one square of color on a screen. Minecraft skins come in two sizes - 64 x 64 pixels (a total of 4,096) and 128 x 128 pixels (a whopping total of 16, 384!). When you create a Minecraft skin, there are lots of pixels to fill in, but the various paint tools will help you do this rather quickly.
What Parts Make Up A Minecraft Skin?
The parts of a Minecraft skin include:
- The head - 6 visible sides
- The body's torso - 4 visible sides
- Arms - 6 sides visible
- Legs - 5 sides visible
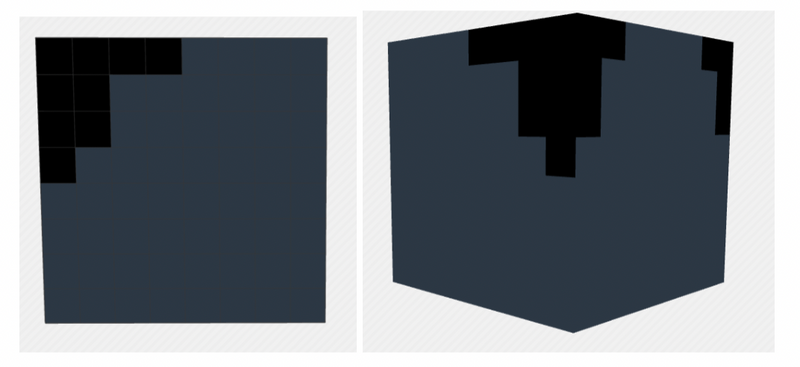
It's important to consider which surfaces of the skin are visible. For example, the top of the rectangular prism that is the legs is never visible. But the bottom of the head is visible from certain angles because it sticks out from the neck.
How to Make a Minecraft Skin In Simple Steps
In just seven quick steps you can make your own custom character experience! Let's get started.
1. Open the Skin editor
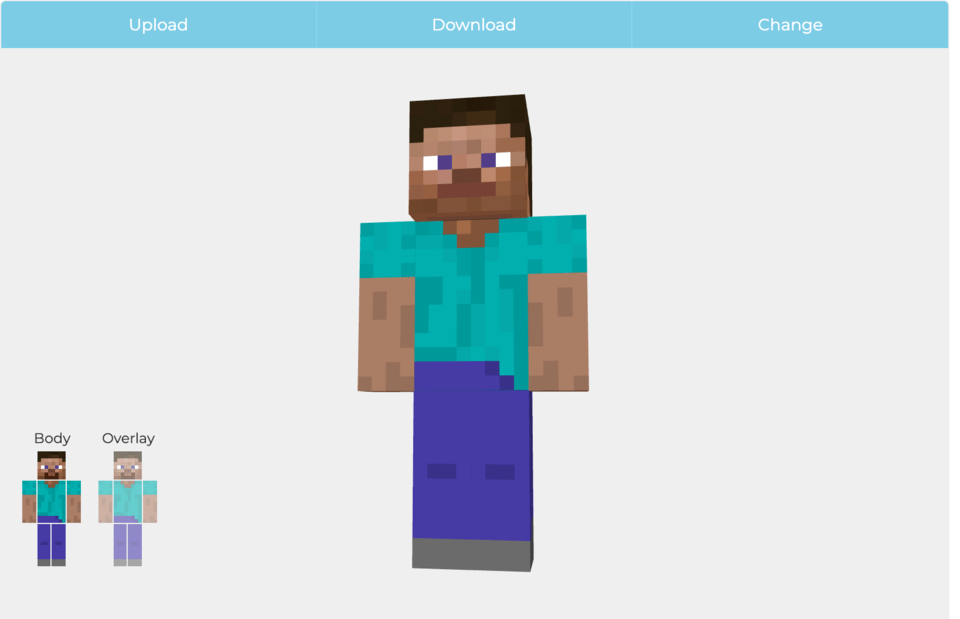
Start by heading to the Skin editor website. (Here are some of the best Minecraft skin makers to pick from. For this tutorial, we'd recommend using MinecraftSkins. To start with, the Steve character (male-identifying) shows up as the default skin.
2. Get familiar with the tools
Click and move your mouse to rotate the skin. With your mouse wheel you can zoom in and out on your skin. The color palettes is set using the colors below, and there are tools to draw, fill, and erase. The paint brush tool will fill 1 pixel at a time. Click and drag to continuously paint lines of pixels. The paint bucket tool fills an entire surface of the section of the skin you are on (such as the left arm). Remember, you can always click the undo button to go back a step!
3. Pick a character
Now you can pick a character to start building from - try to find one that is the closest to the skin you plan to create. You can also chose Alex (female-identifying) from the Model drop down under your skin. And you can pick any skin listed under New Skins or Top Skins to edit.

4. Pick a color palette
If you look closely, Steve’s shirt has at least 3 shades of teal. Most Minecraft skins use multiple shades of the same color to give texture and depth to the characters. So click each square on your character's shirt to change the color. Try adding 3-5 colors you like using the paint brush! To fill in big sections quickly you can use the paint can.
Most skin editors have tools to help you with shading. MC Skins has a cool spray paint tool that will automatically make a shade lighter and darker than your selected color, making a mottled appearance with 3 shades. MinecraftSkins uses a “lighten color” and “darken color” tool to help make your shading palette. To use it, simply select your color in the palette and click the light or dark star to increase or decrease the brightness of that color. You don’t need to change the color very much for shading your skin.
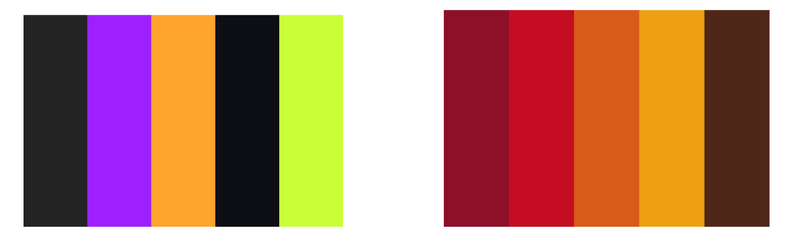
If you need ideas for color palettes, check out this helpful tool.
5. Make the face and hair
Zoom in so you only see the head. Choose 3-5 colors for your color palette for the head.
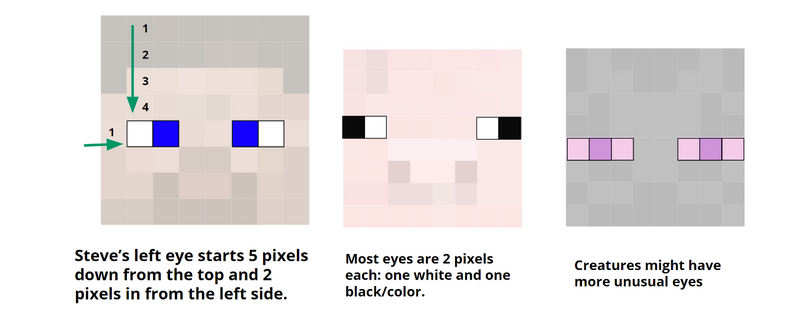
The placement of the eyes is one of the trickiest parts of making a face - they are usually farther down on the head than you would expect. Take a look at the placement of Steve’s eyes below. Each eye is 2 pixels - one with color and one for the whites of the eyes. Other types of skins, such as animals and creatures might have more unusual eyes that are spread out more, use more pixels, or taller than the typical human eyes. Bigger eyes (2 x 2 pixels) can also give your human characters more of an anime look.
Next, locate where the mouth and nose of your character will go. Many skins will have no mouth at all, while others will have 4-6 pixels in a row for the mouth. Remember that you can always look up images as a reference.
Make the hair for your character next. When choosing hair color, it is best to choose 2-3 shades of the same color to keep the hair from looking completely flat. Adding some hair over the eyes can give you a swooped bangs look. Longer hair can be tricky because some of the hair will cover the top of the torso.
Do you need ears? Horns? Anything else on the head? Remember to add these details and then fill in the sides, top, bottom, and back of the head.
6. Create the clothing
Start coloring the torso. Decide what kind of neck line you want on the shirt - most shirts do not go straight across the neck and shoulders. Use a darker shade of the shirt color to outline each surface of the torso, and a lighter shade to fill in the shirt. Adding shading - even a little bit - will give your skin depth and make it look more realistic. Plaid shirts, patterned shirts, and striped shirts will take more patience but look really great when finished! Or try making a sports jersey, a hoodie, a jacket, or overalls on the torso of your character.
After the torso is complete, work on the arms and legs of your character. Again, use a darker shade of the clothing color to outline, and a lighter shade of the same color to fill in the clothing. For the legs, try pants, ripped jeans, shorts, a skirt, dress, or kilt for your character. If your character wears shoes, reserve the bottom 3-4 pixels of the legs for sneakers, and more if you want boots or another higher type of shoe.
Remember to click and move your mouse to rotate your character and see all sides. If you make any mistakes you can use the undo button to remove them.
7. Save it
Click the download button to save your skin. It will save as a .png file. Don’t worry if you look at the file and it looks like your skin is laid out in a strange way - that is how it should look until it is uploaded to Minecraft! Make sure you save the skin to your photo library to make it later accessible in Minecraft. To do so, tap the image and hold until a menu appears and select Save Image. Open Minecraft and press the Store button. Then press the Custom Skin model. Press the Choose New Skin button. You now have the option of applying your skin to a Steve (Male) or Alex (Female) model. Now press the Confirm button to confirm this is the skin and model that will be used for your player from now on.
Here's a video that can walk you through the process step by step:
How To Upload Your Minecraft Skin
For Java edition just follow these simple steps:
- Step 1: Hit the download button on the skin editor.
- Step 2: Name your skin something you will remember and make sure you save it in a place you won’t forget!
- Step 3: Open the Minecraft Launcher.
- Step 4: Select “Skins” (highlighted in yellow).
- Step 5: Click “New skin.”
- Step 6: Select “Browse” and find your skin.
- Step 7: Save and play!
Here is a guide which shows how to add skins in Bedrock edition. You can add skins in Java by opening the Minecraft launcher, clicking on skins in the top left corner, selecting add new skin, selecting browse, and finally selecting the skin file you want to upload.
Learn how to upload your skin to the free Minecraft Education Edition here.
Make Your Own Halloween Minecraft Skins
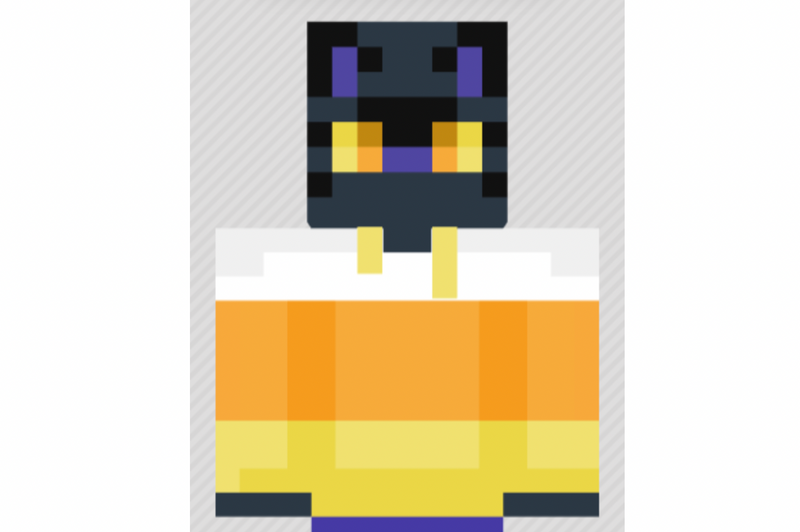
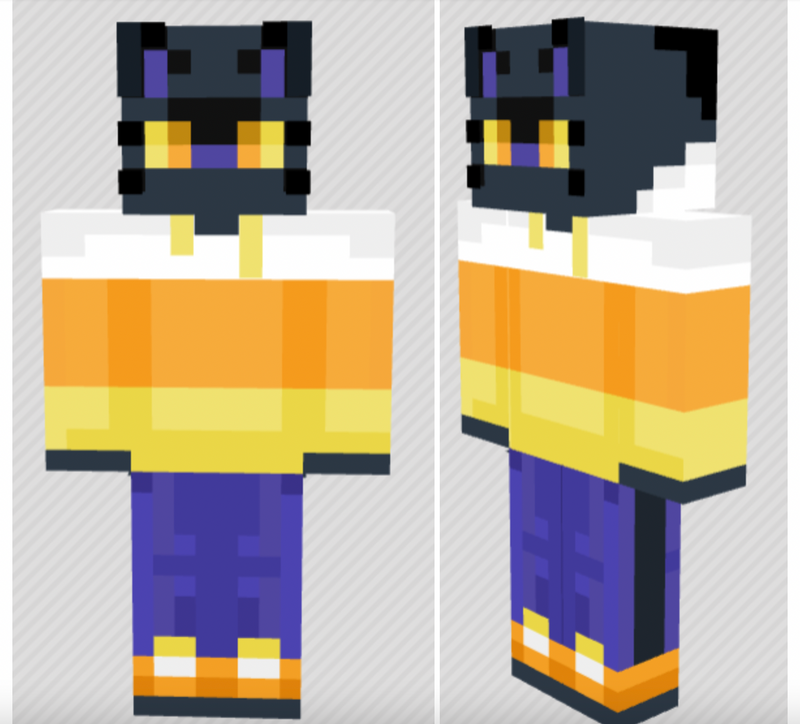
Learn how to make a black cat with a candy corn sweatshirt
Let's make a cool black cat with candy corn hoodie skin. So we can on the prowl for some Halloween treats with this Black Cat Halloween skin! Here's how.

1. Open the Skin editor
Start by heading to your chosen Skin editor website. Here are some of the best Minecraft skin makers to pick from. And here's how to use a Minecraft skin editor. For this tutorial, we used MCSkins, but any skin editor will work. Choose either Steve or Alex for your base skin - whichever is closest to your idea for a skin design. You will want to be familiar with the basic tools of a skin editor such as brush, spray paint, color picker, and paint bucket before following the tutorial below.
2. Pick a Halloween color palette
You know you want the jack-o-lantern head on your skin to be orange, but what other colors should you choose for a Halloween skin? Here are a couple of Halloween color palettes to help you design your skin.
Black cats, white skeletons, orange pumpkins, and yellow candy corn are some of the colors that come to mind. Bright slime-green is also a great Halloween color, as well as shades of purple and even neon pink. A common Halloween palette uses lots of black with pops of color with orange, green, and purple. Alternatively, you could also go an earth-toned route by using warm fall colors like orange, maroon, brown, and gold together.
Set your color palette up first so you can paint quickly and easily.

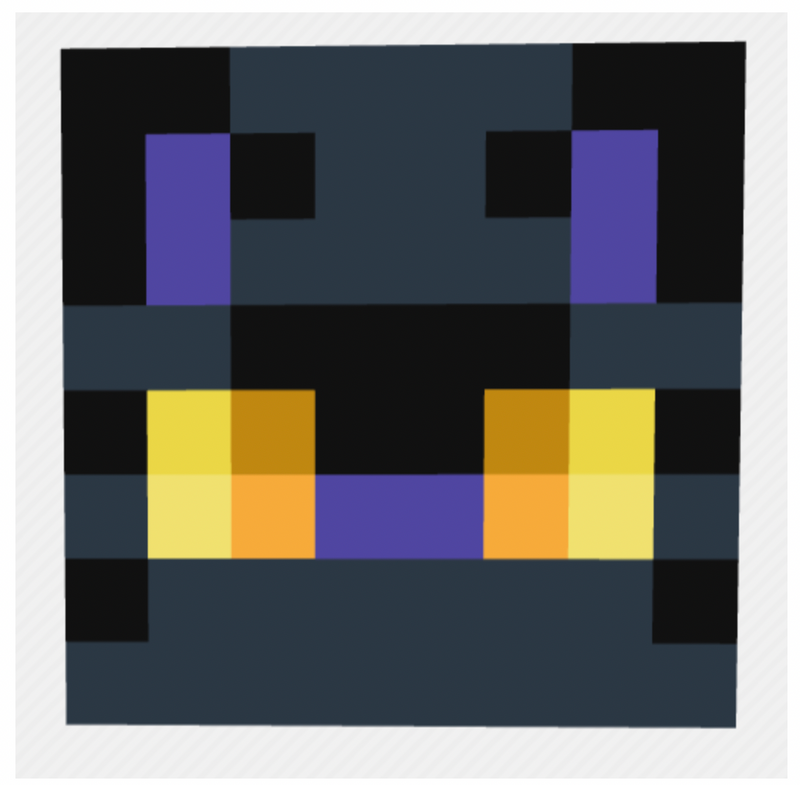
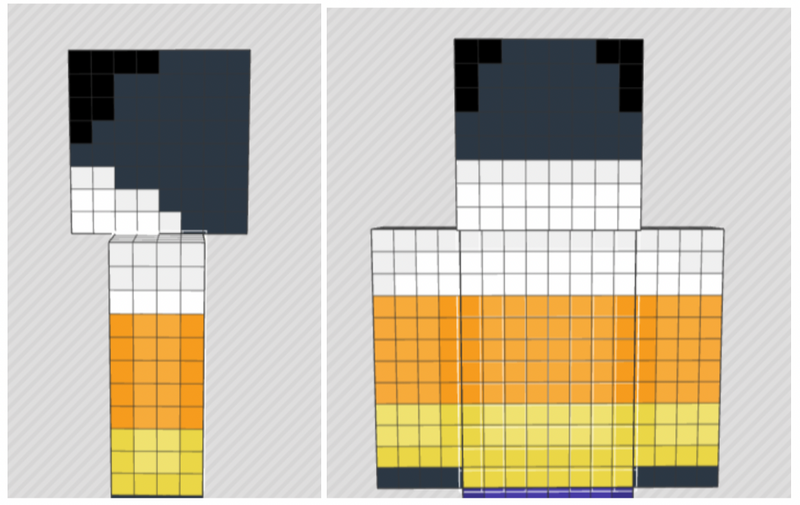
3. Paint the cat's face
First, paint the cat’s face. Start by filling with the dark grey color, then paint the black and purple sections. Finally, add the eyes. Notice how there are two shades each of yellow and orange to give the eyes some depth.
4. Fill in the head
Now fill the sides and back of the head with the same gray color. Add a few details of black on the sides and back of the head.
5. Paint the sweatshirt
Now let’s paint the hoodie. Start by filling all the sides of the arms and torso with a lighter orange.

5. Add the details
Next, paint the bottom 4 rows of the torso yellow and the top 3 rows white. On the sleeves, make 1 row at the bottom grey to show the cat's paws sticking out.

Let’s give the hoodie some texture and depth with shading. We want a slightly darker shade of yellow, orange, and white. Use the color darken tool on your skin editor to add these to your palette. On MCSkins, the color darken tool looks like this:

Shading on skins clothing usually is towards the edges of each segment, such as where the arms touch the torso. Shade a similar pattern on the back and sides of the torso and arms. To finish the front of the hoodie, add some hoodie strings.
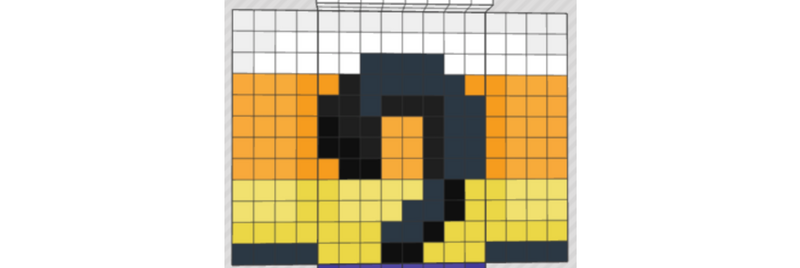
6. Create the back of the hood
Next, let’s add the hood to the back. If you know how to use overlays on your skin editor, you can paint the hood on the overlay. If not, simply paint the hood directly on the back and sides of the cat’s head. After you have added the hood, paint the cat’s tail. It is almost like the shape of a question mark. Use shading with a few different shades of dark gray.
7. Add pants and shoes
Great! We are almost done. Time to paint the pants and shoes. Paint 1 row on the bottom of the legs dark gray, 1 row dark orange, and 1 row light orange. Add white and yellow details and follow the pattern around all 4 sides of each leg.
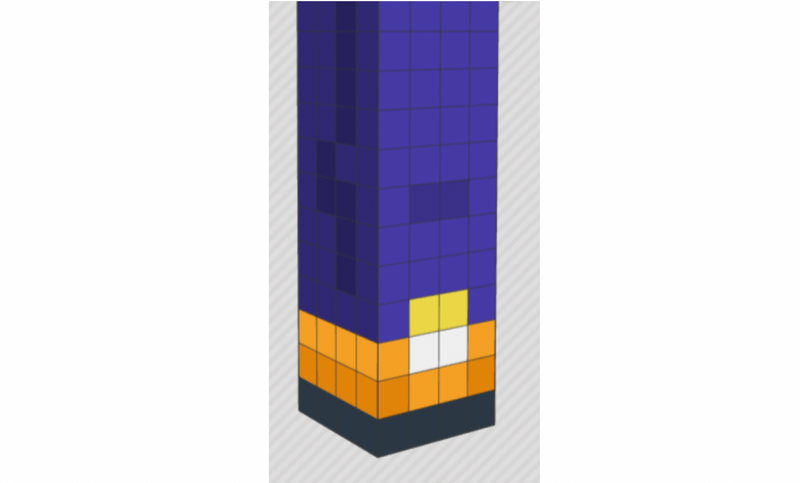
Finally, choose a color for the pants and use the darken color tool to add some shading. If you would like, add a sporty stripe on the outside of each leg.

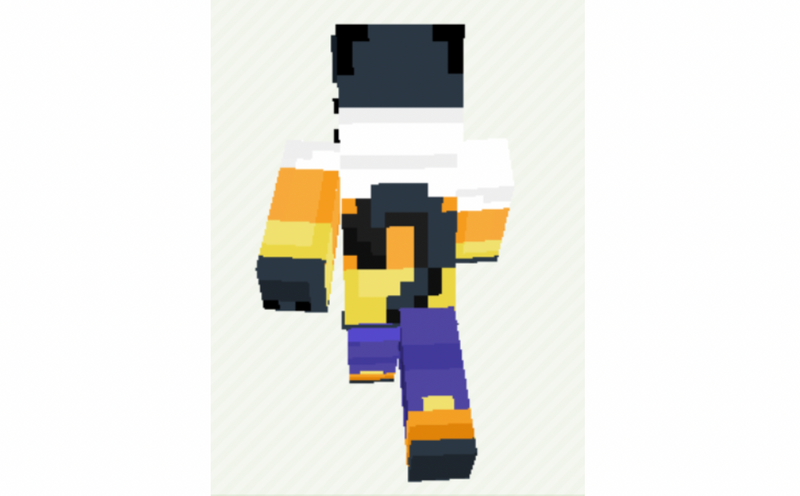
You did it! Here's what your skin should look like now:
If you want to view or edit this skin from a template, you can find it here.
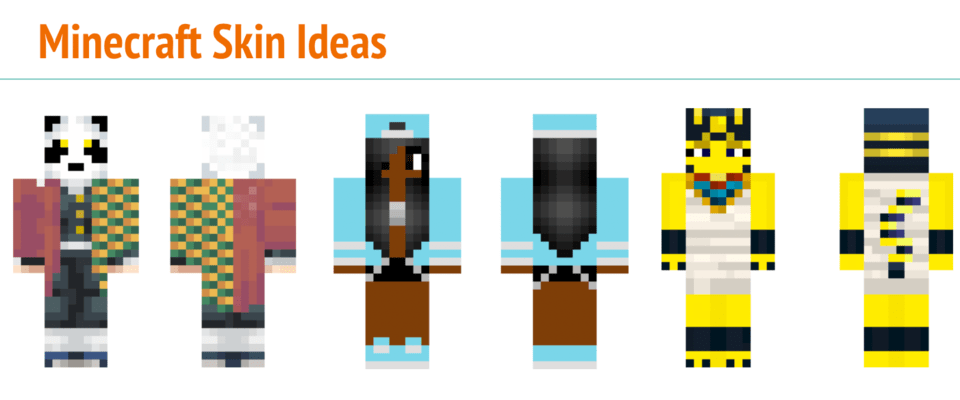
Explore More Halloween Minecraft Skin Ideas
Here are seven more Halloween Minecraft skins to inspire your creations. Use the images for reference to start from scratch, or follow the links to open each skin in an online editor and start with a template.
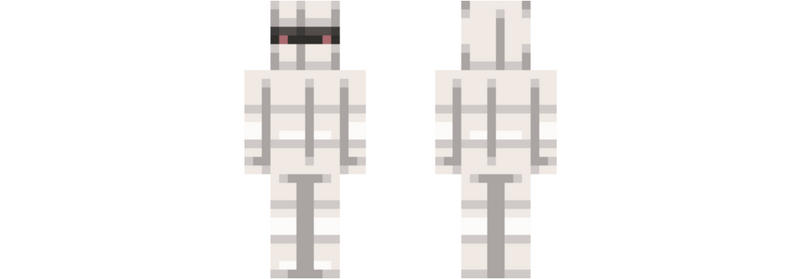
1. Minecraft Mummy Skin
A mummy is a great skin to start with if you don’t have much experience creating skins. Choose three tones of gray and create a horizontal stripe pattern to create the look of bandages wrapped around the mummy. Finally, finish the mummy by adding some eyes - maybe with a creepy, glowing color!
2. Trick-or-Treater Minecraft Skin
This trick-or-treater is wearing a pumpkin mask and regular street clothes and shoes Any skin can be turned into a trick-or-treater by changing the face and drawing a black line around the sides and back of the head to indicate a mask. Why not give Steve and Alex a Halloween makeover by adding a mask?
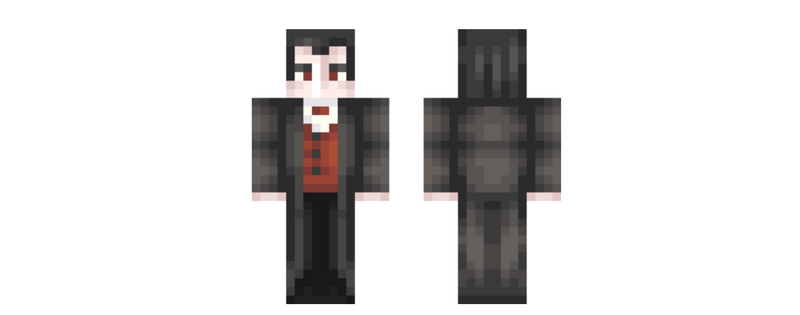
3. Vampire Minecraft Skin
This vampire is styled in a long dark coat and a collared shirt. Even though we cannot see his fangs, his hairstyle and pale white skin mark him as a vampire. Use multiple shades of dark gray and pay special attention to the shading of the coat to keep your skin from looking flat.
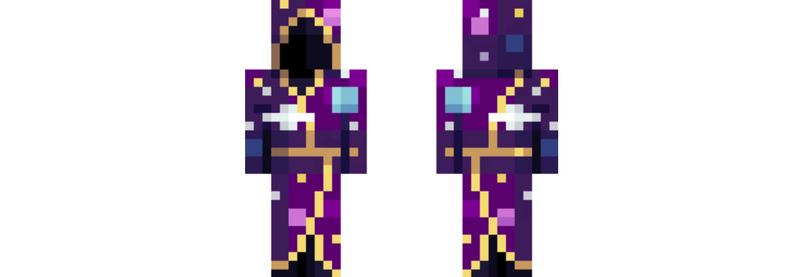
4. Sorcerer/Sorceress Minecraft Skin
This sorcerer looks powerful and mysterious because you can’t see the face. It’s a much more colorful and fashionable alternative to a grim reaper! Use several shades of purple for the robe and adorn it with bright jewel tones of your choosing to get this look.
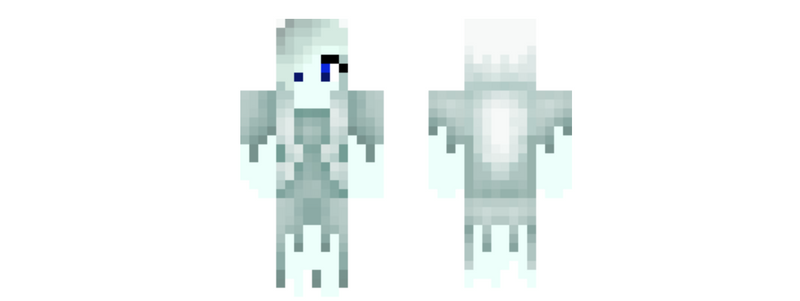
5. Ghost Minecraft Skin
By adding raggedy clothes and very light tints, you can turn any regular skin into a ghostly one. This ghost skin uses a monotone color palette. To create it, choose one base color, then lighten the tints to be almost white so your skin looks faded and barely visible. Very spooky!
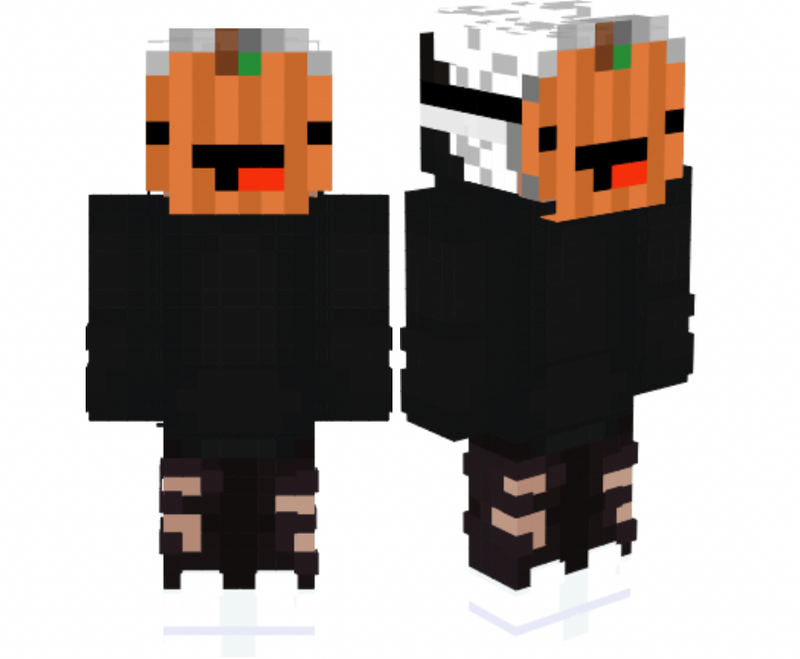
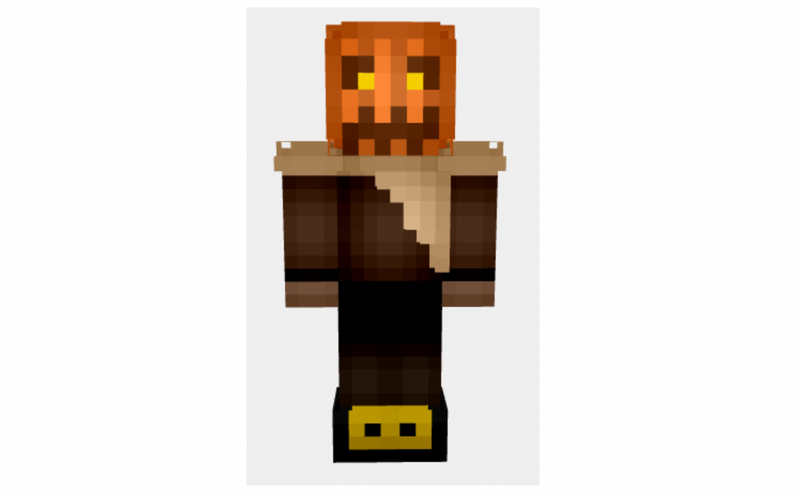
6. Jack-O-Lantern Scarecrow Skin
Use warm fall colors to make a jack-o-lantern wearing a brown sweater and pants and buckled boots for this scarecrow skin. Don’t forget to add some straw sticking out to give it a “stuffed with straw” look. The shoes and pumpkin head can be created on the overlay to make them take up more space - a pumpkin head would be pretty big after all!
7. Skeleton Costume
Use shades of black and white to create a skeleton costume for any other skin. Make sure to leave a black space between each row of ribs to get this skeletal look. Once their bones are showing, they’re ready for trick-or-treating! Adding a mask is optional.

Make Your Own Holiday Minecraft Skins
Choose from a host of cozy characters like a Grinch, snowman, reindeer, elf - or create something fun entirely of your own invention!
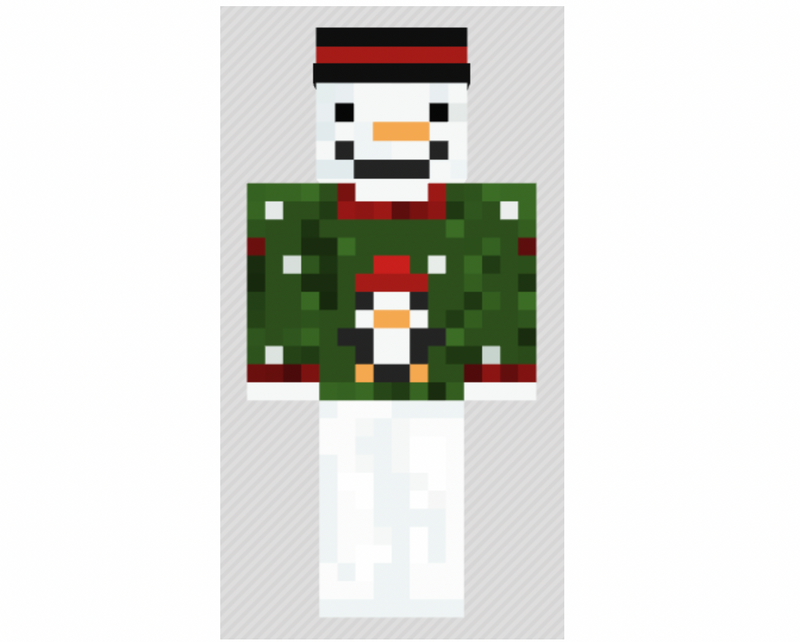
Step-by-step tutorial: Frosty the Snowman in a fun sweater
Let’s get ready for the snowy season with this Snowman skin! This skin was created in MCSkins, but choose your preferred Skin Editor.
Set your color palette up first so you can paint quickly and easily.

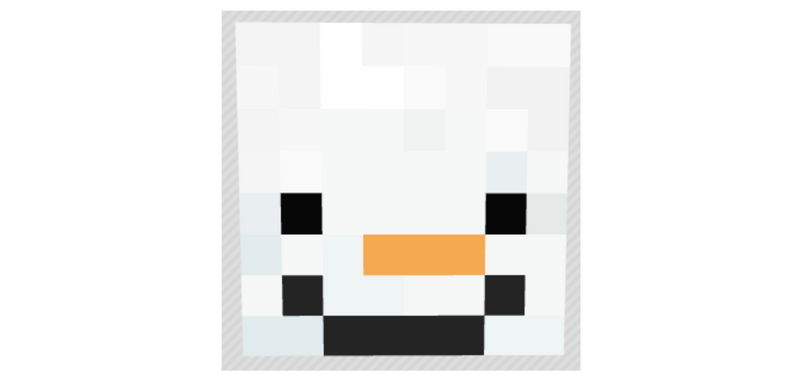
1. Paint the snowman's face
First, we will paint the snowman’s face. Start by filling with the white, then paint in some very light grey or very light blue shading. Add the eyes, mouth, and carrot nose.
2. Complete the back of the head
Now fill the sides and back of the head with the same white and light grey shading. For shading with white to look good, the darker colors should be very close to white. If you like using the spraypaint tool and find that it’s too dark, try adjusting the Spray Color Step to 3 (it’s 10 by default) in Advanced Settings.

Finish the head by adding two stripes for the hat and painting the top of the head black.
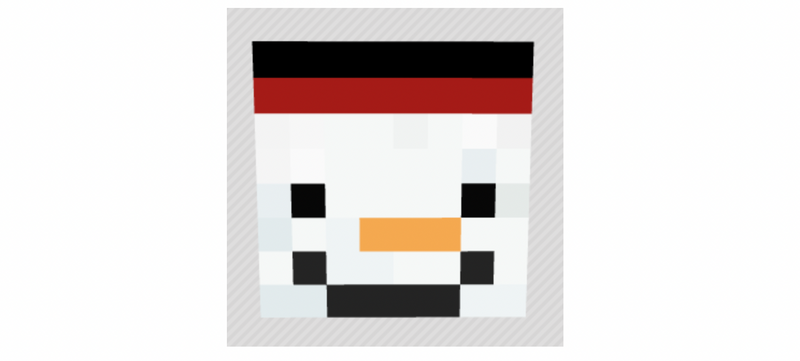
Add the rim of the hat by using the Overlay feature. This will make the hat rim sit slightly further out, giving it depth and making it look more realistic.
3. Add the sweater
Next, let’s add the fun Penguin Sweater! Remember, you can decorate your fun sweater with whatever picture and colors you choose. The idea is to be over the top and use a lot of different colors and a holiday image in the center. Start by filling in with the background color of your choice, then adding 1 row of white blocks at the ends of the sleeves to show Frosty’s hands.
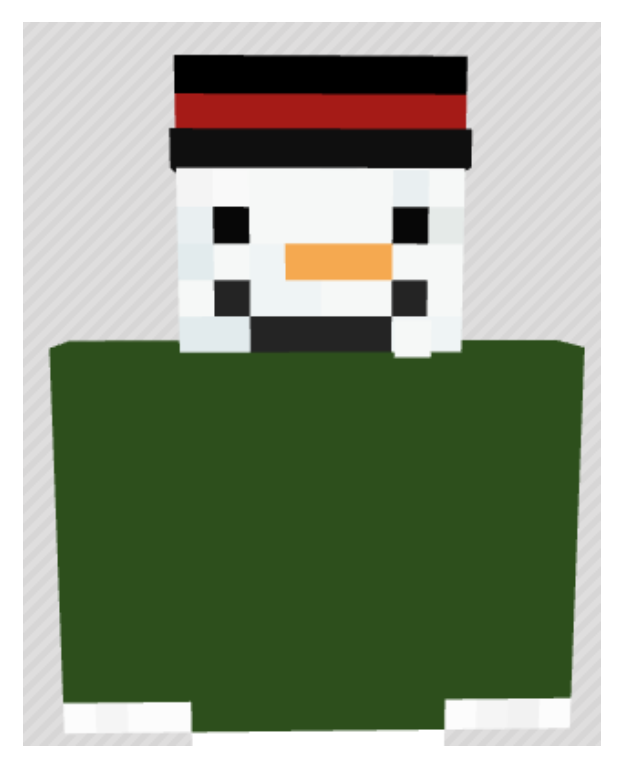
Next, paint the Penguin or whatever other design you choose in the center of the sweater. Other ideas include a candy cane, another snowman (!), reindeer, or string lights.

Now let’s add some shading and detail around your center sweater design. Use the spray paint tool adds multiple hues of green, then add a few random spots of white and red throughout the sweater. Finally, add a neckline and red trim around the ends of the sleeves. Frosty is looking pretty dapper!
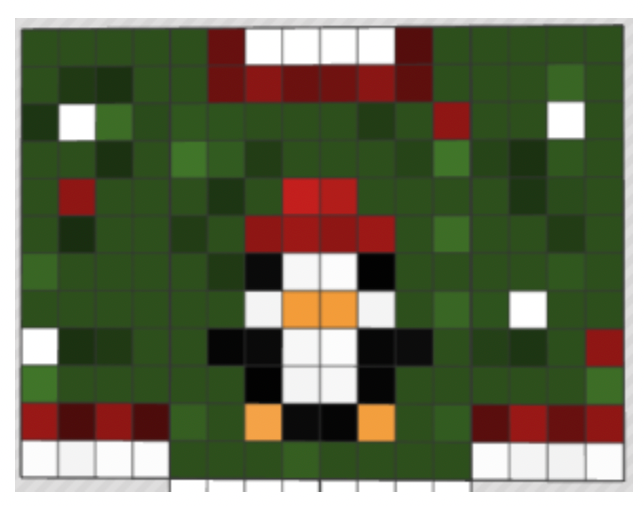
4. Shade Frosty's legs
The last step is to add some shading to Frosty’s legs. Remember to keep the Spray Color Step to 3 to keep your shades of white from getting too dark. Now he’s ready to get out and enjoy some holiday fun!
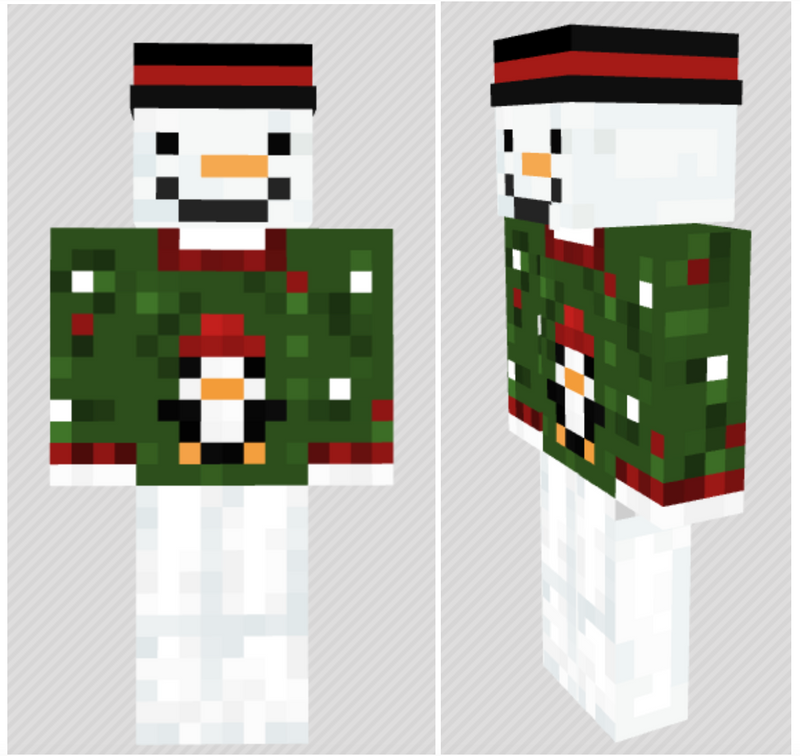
If you want to view or edit this skin from a template, you can find it here.
Explore more holiday skin ideas
Here are more holiday Minecraft skins to inspire your creations. Use the images for reference to start from scratch, or follow the links to open each skin in an online editor and start with a template.
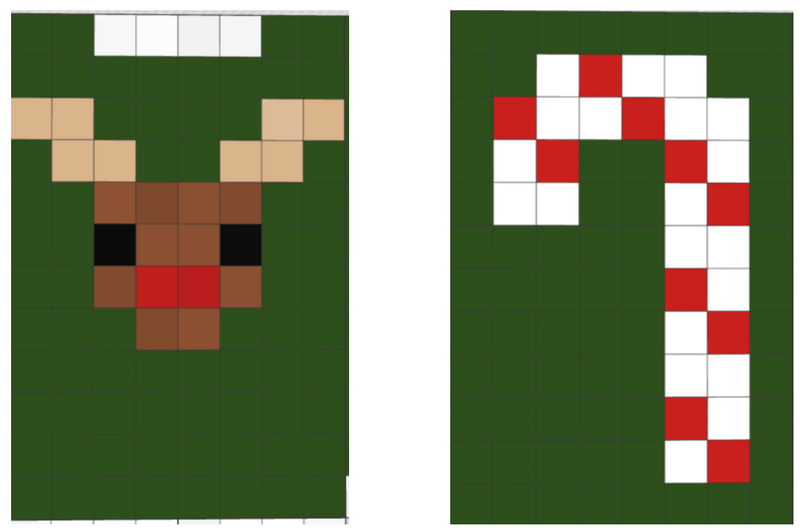
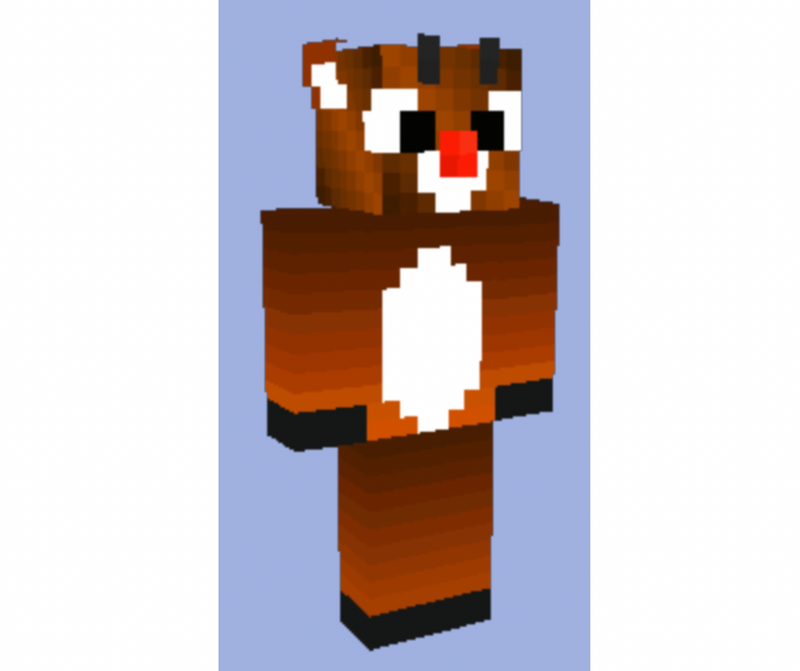
1. Reindeer Minecraft skin
Whether you make Rudolph or any of Santa’s other eight reindeer, this is a festive skin! Start with tones of brown to create the fur, then add a white belly and tail. Use black to add hooves and eyes. Finally, use an overlay on the head to add details like ears and antlers. If you’re making Rudolph, finish your reindeer off with a bright red nose!
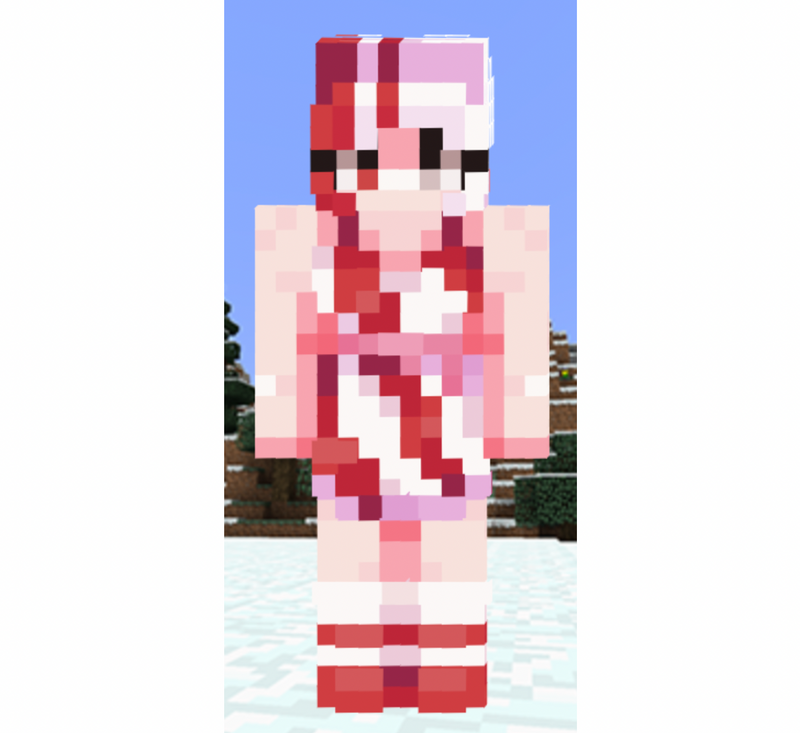
2. Candy Cane Girl
The sweet peppermint treat also translates into a sweet Minecraft skin! Use shades of red and white to create the classic candy cane diagonal stripe on your skin. Then add striped hair and red shoes to match.
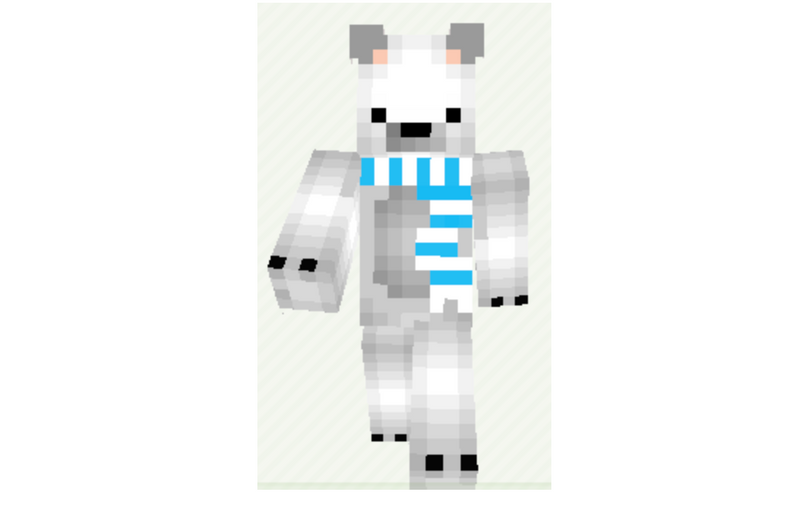
3. Polar Bear Minecraft skin
Give the largest land carnivore on Earth its due with this Polar Bear skin! The details are what will make your skin stand out. In addition to shades of light grey, be sure to include a festive holiday scarf and claws at the end of each limb. Finish off your Polar Bear with the ears created as an overlay.
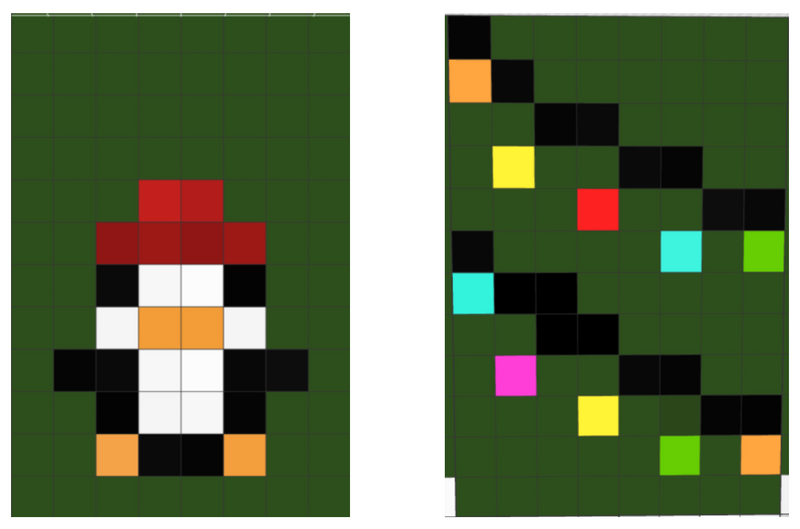
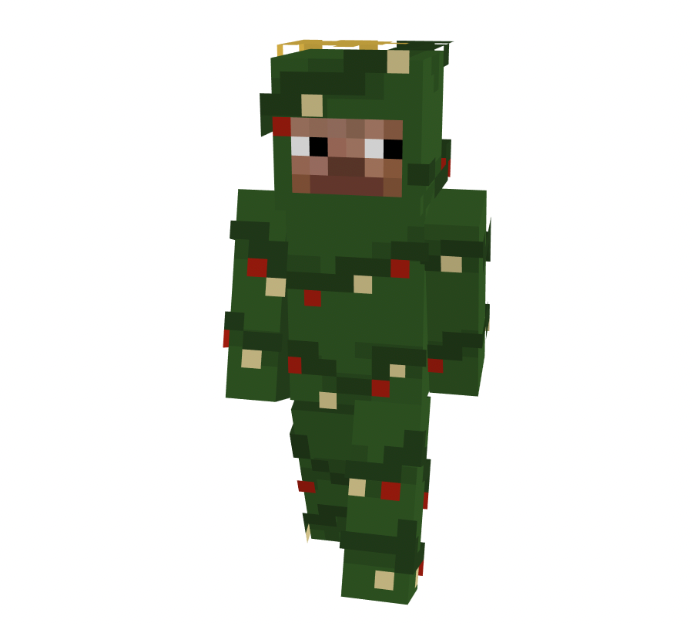
4. Tree Lights
Sometimes, you just want to wrap yourself in tons of tree lights - right? If lights and decorating make you feel festive, this skin is for you! Start with a green base, then use an overlay on the entire body to add dark green strings and a variety of brighter colors to create the lights. Shine on!
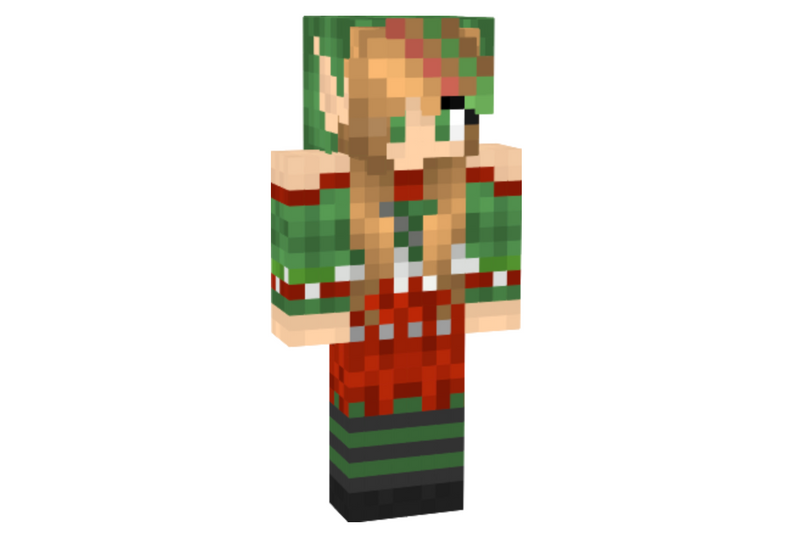
5. Elf skin
Everyone needs help sometimes, and Santa is no exception. An Elf is a great holiday skin customizable to your own design. Start with a classic green, red, and white color theme - stripes or checkers make for a holiday look. Add elf ears on each side of the head, then feel free to make the hair, eyes, and clothing any style you like.
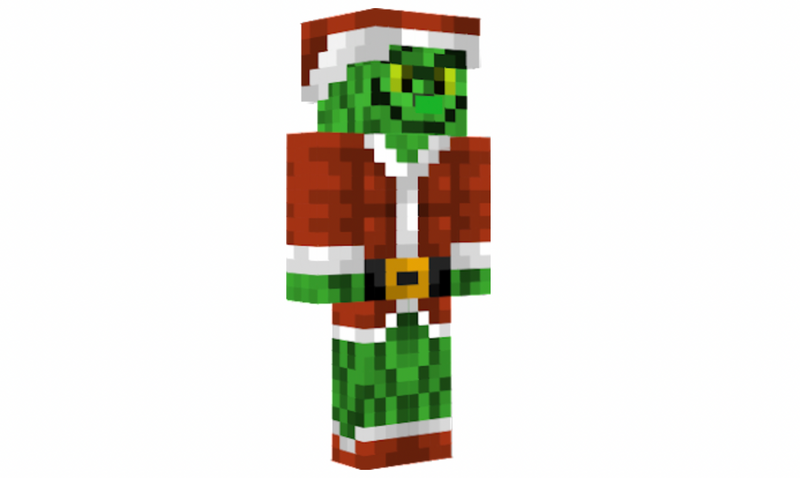
6. The Grinch skin
For now, his heart is two sizes too small and he’s out to ruin Christmas! Use bright green, dark red, and white to create the Grinch in this outfit. Make sure to add white fur trim on the jacket and hat, and a belt buckle on the coat. Finish off your Grinch with a mischievous smile. Watch out Whoville!
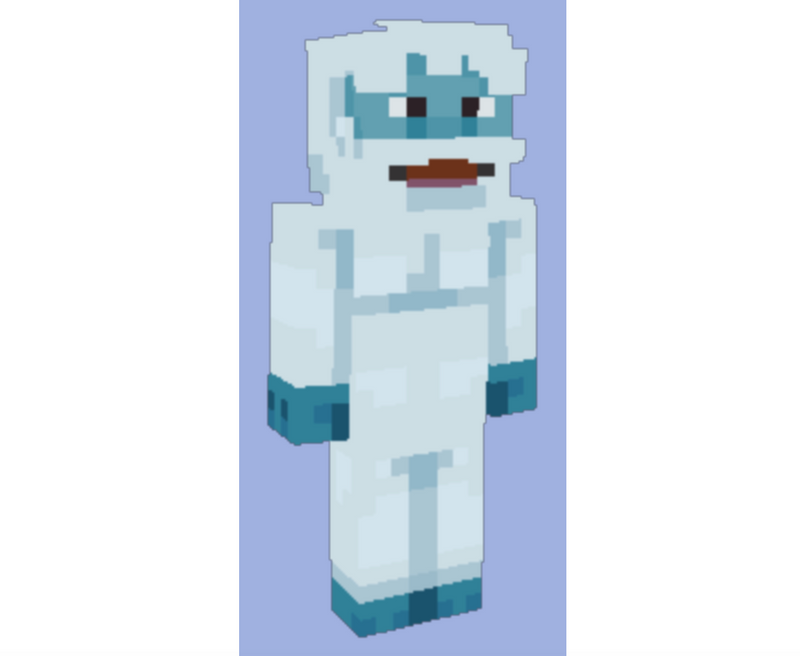
7. Abominable Snowman skin
Call him a Bumble, a Yeti, or the Abominable Snowman - he’s here to wreak havoc this winter! Start with a white base for this skin, then use a light blue for the details like the feet, hands, and face. Finally, add a red mouth and some fluffy white hair on an overlay. And remember, Bumbles bounce!
Discover the Coolest Minecraft Skins
Now we are going to look at some of the coolest skins and ones that are trending on a couple of websites. The trending pages are always good places to find some cool skins!
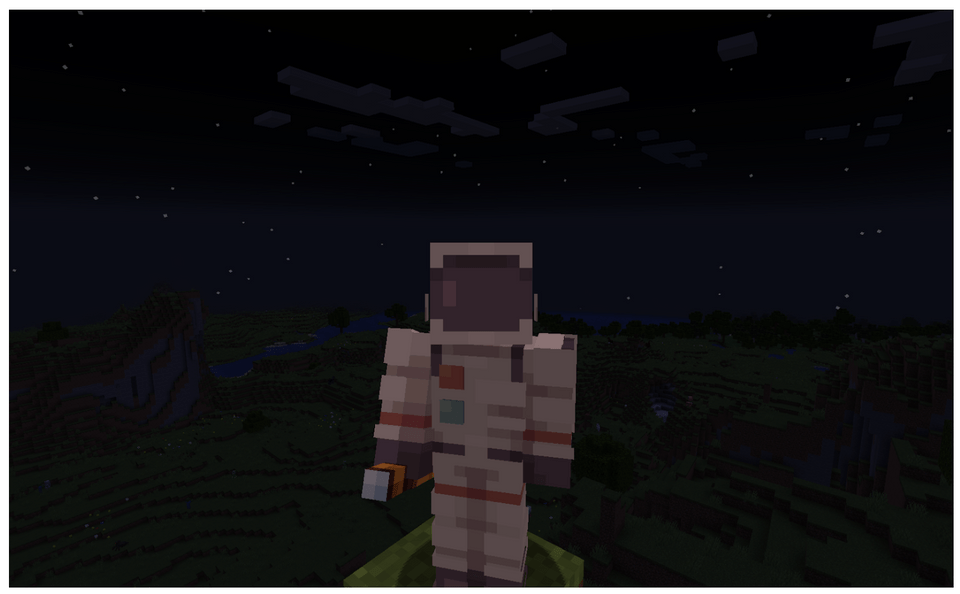
1. Minecraft Astronaut Skin
This is a very clean look to explore the stars, or maybe even a mineshaft!
How to get this Minecraft Skin: Link to Skindex
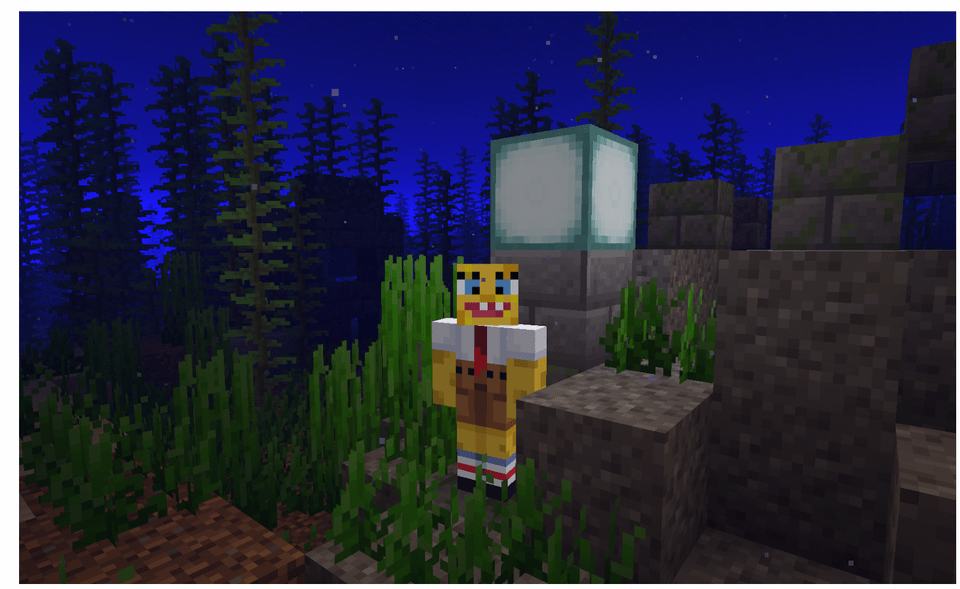
2. Minecraft Spongebob Skin
Who’s ready for this skin? Play as this classic cartoon character under the sea or even as a land lover. Don’t forget the pineapple house!
How to get this Minecraft Skin: Link to Planet Minecraft
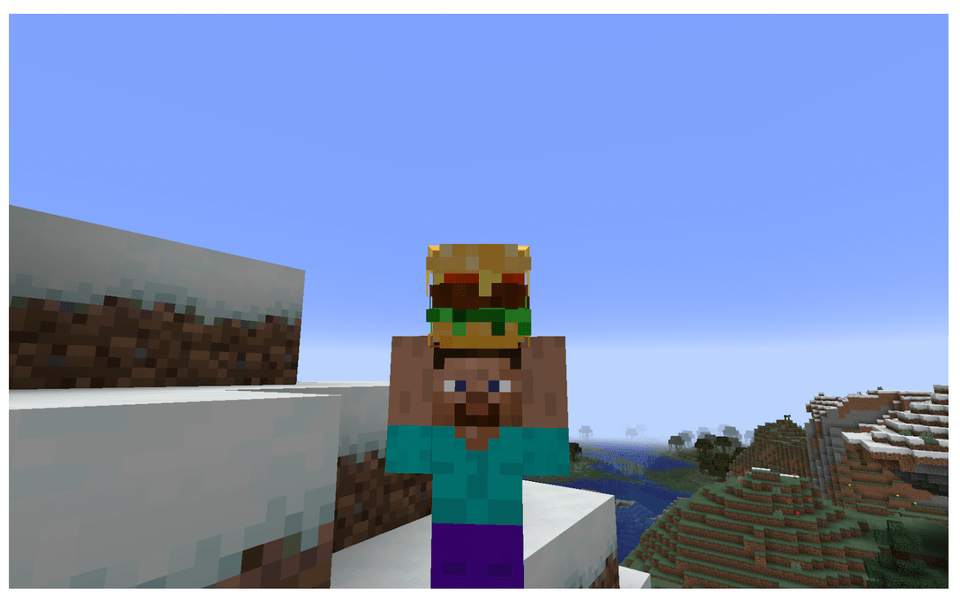
3. Steve Carrying a Hamburger Skin
Whoever came up with these type skins is a genius in our book. I mean look at it! It’s Steve carrying a hamburger! There are many cool skins that make it look like your character is carrying stuff but this one called out to us. Maybe we’re just hungry…
How to get this Minecraft Skin: Link to the Skindex
4. Chillin Capybara
This capybara looks like he is ready for a Hawaii vacation. His open floral shirt calls for a nice pool and beach house to relax at.
How to get this Minecraft Skin: Link to NameMC

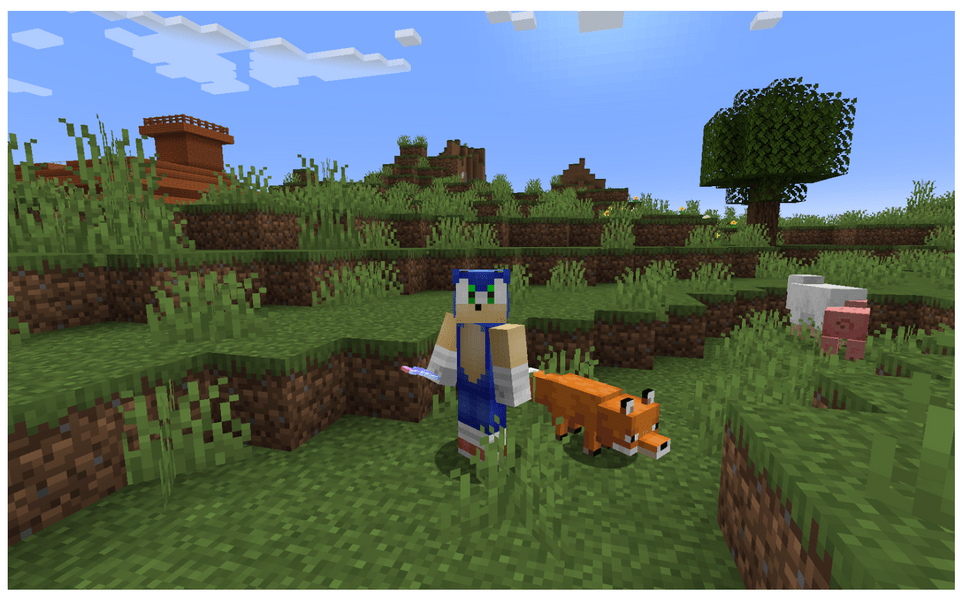
5. Sonic Minecraft Skin
Do you like to go fast? This Sonic skin is perfect for zipping around as you play. Want to learn how to go faster in Minecraft? Check out this blog.
How to get this Minecraft Skin: Link to the Skindex
6. Steve with Drip Minecraft Skin
This skin is for those who appreciate drip. Steve will always be a classic skin, but this updated version of Steve looks ready to party!
How to get this Minecraft Skin: Link to the Skindex

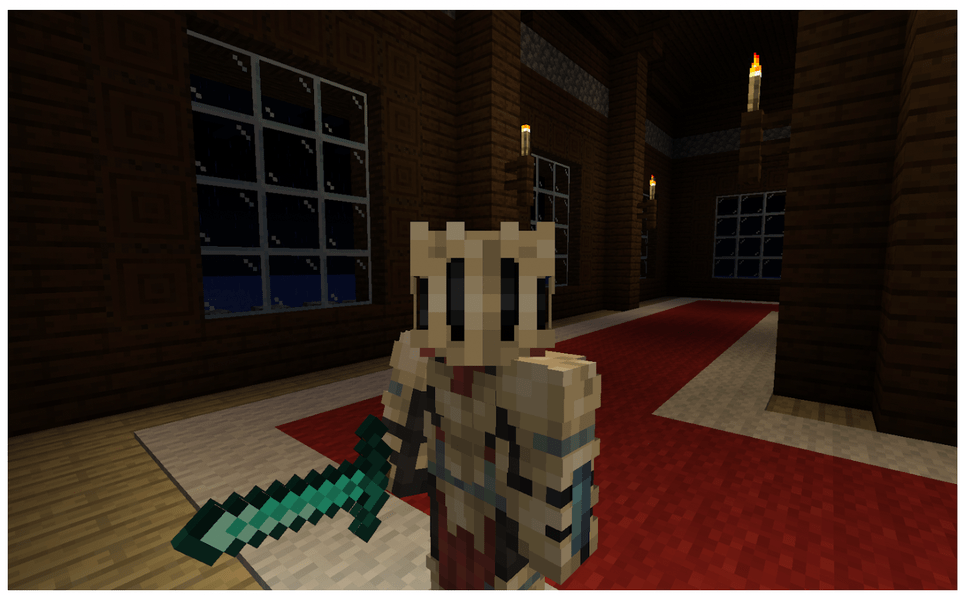
7. Astral Medieval Knight Skin
Created for the Astral Medieval skin and art palette event, this skin will definitely make you look distinctive. This regal skin would be perfect for slaying monsters or facing foes in PVP game modes.
How to get this Minecraft Skin: Link to Planet Minecraft
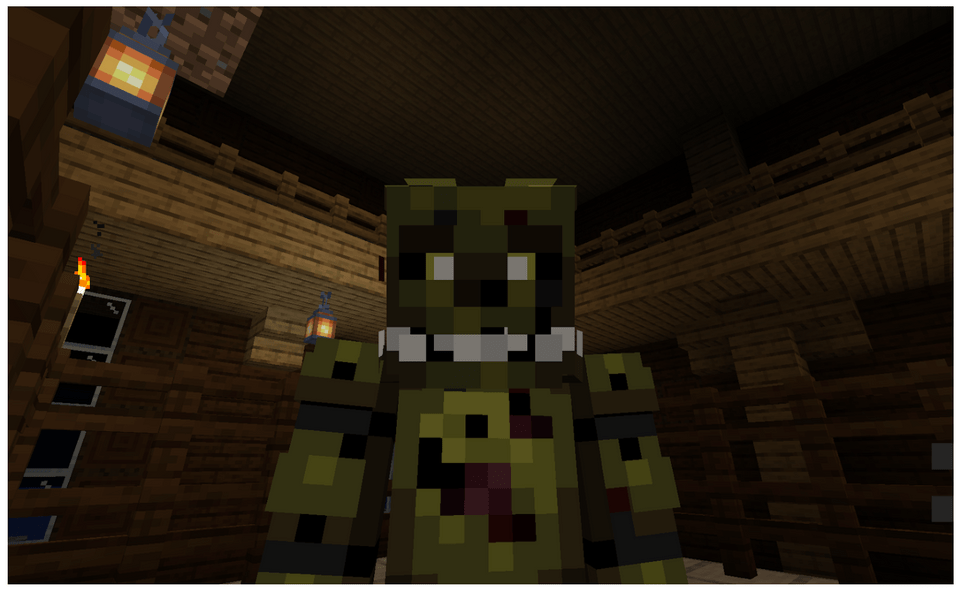
8. Springtrap
This skin gives a cool 3D effect letting you “see” into the springlock suit. Wait… does this mean your character is in the suit too?
How to get this Minecraft Skin: Link to Planet Minecraft
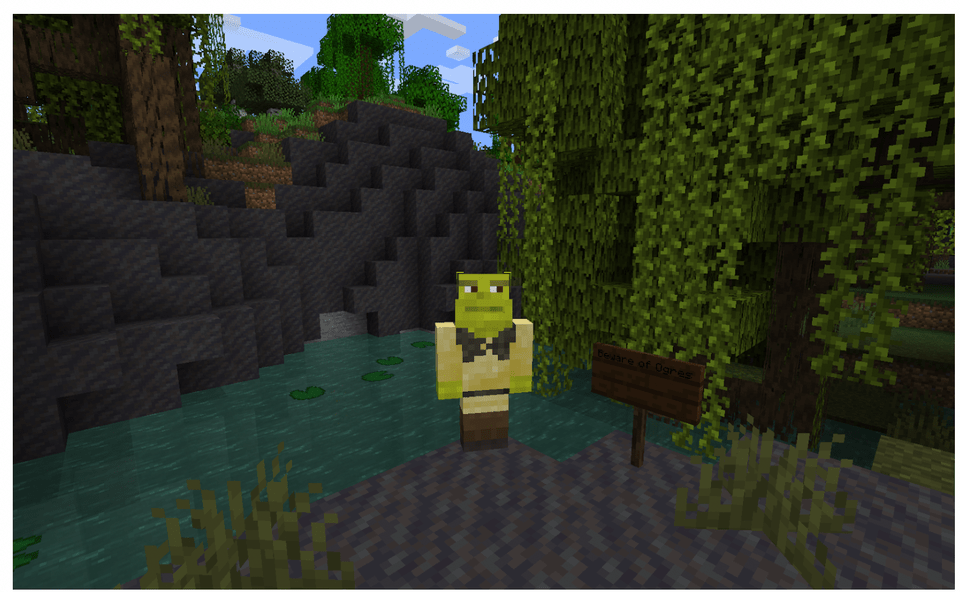
9. Shrek Minecraft Skin
You all know him, it’s Shrek! Slap this skin on and build a nice house in the swamp! Don’t forget your “Beware of Ogre” sign.
How to get this Minecraft Skin: Link to NameMC
10. Remembering Technoblade Skin
Technoblade had an amazing and loving community. His recent passing has inspired these awesome skins made in his honor. Technoblade never dies.
How to get this Minecraft Skin: Link to the Skindex

Minecraft Skins Girl
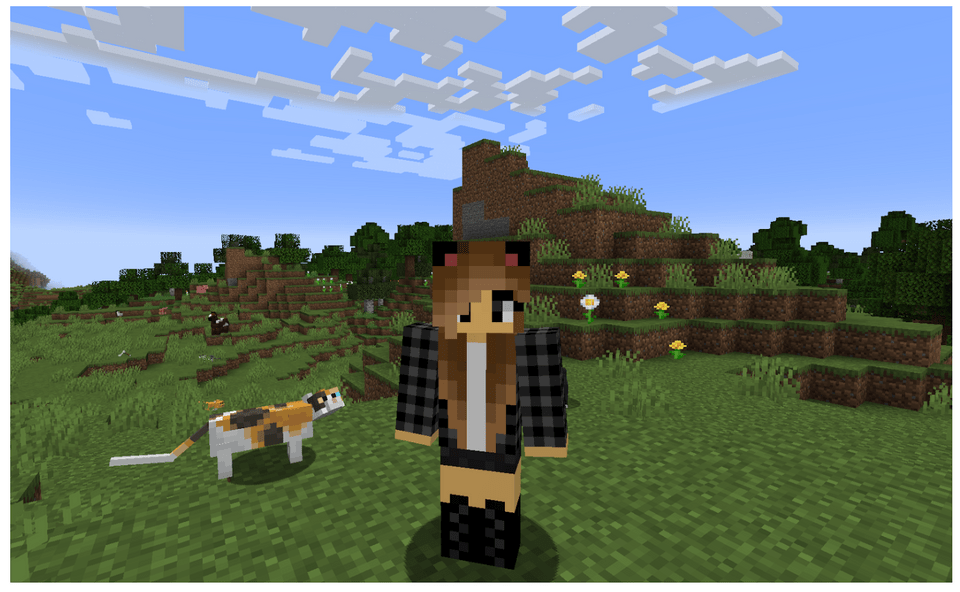
1. Anime Cat Girl Minecraft Skin
Cat lovers will appreciate this skin! Check out those cute cat ears, eyes, and tail.
How to get this Minecraft Skin: Link to Planet Minecraft
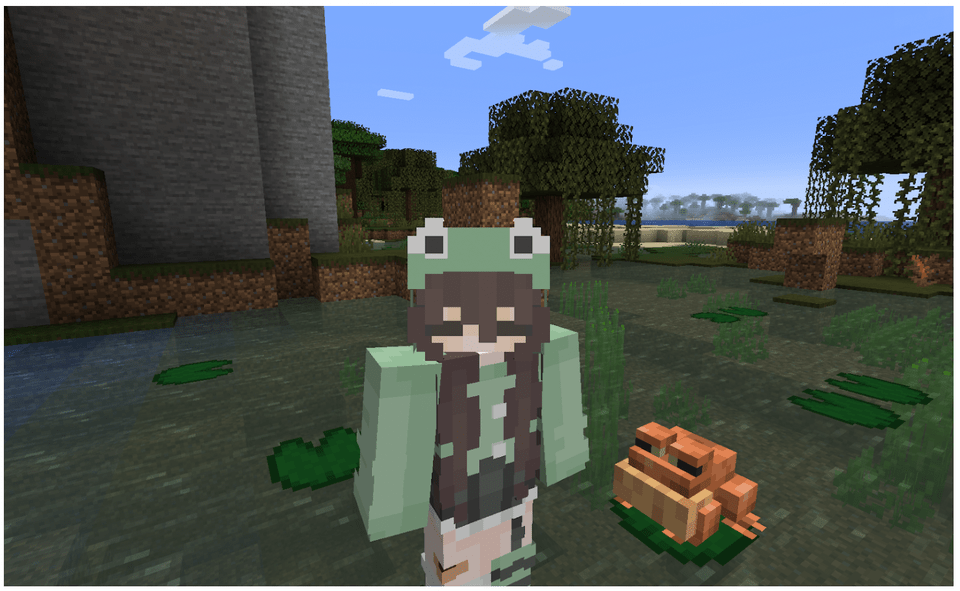
2. Frog Girl Skin
This skin reminds us of those comfy days snuggled in a warm hoodie. This frog girls looks calm and chill, perfect for hanging out with your friends in Minecraft.
How to get this Minecraft Skin: Link to Planet Minecraft
Minecraft Skins Boy
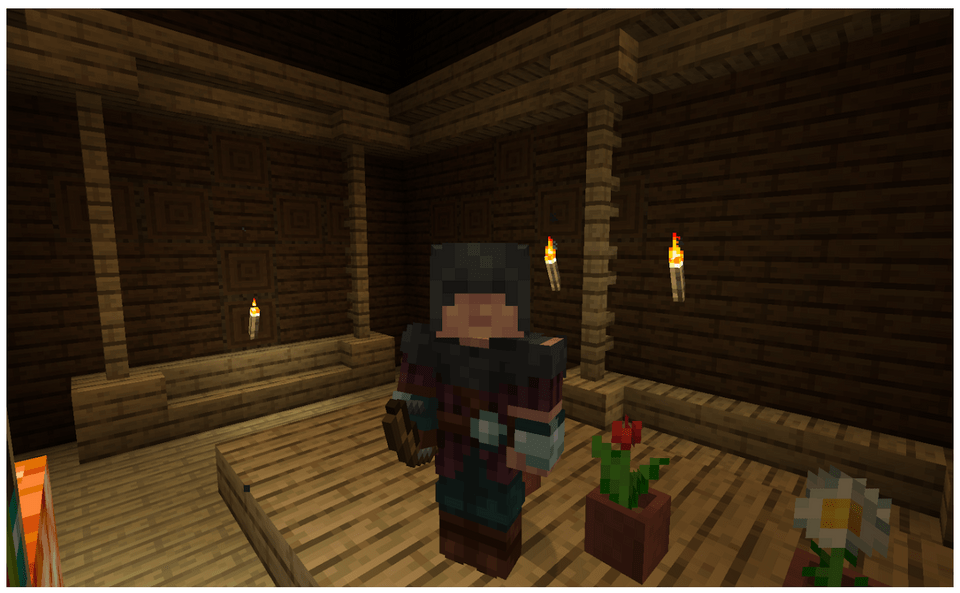
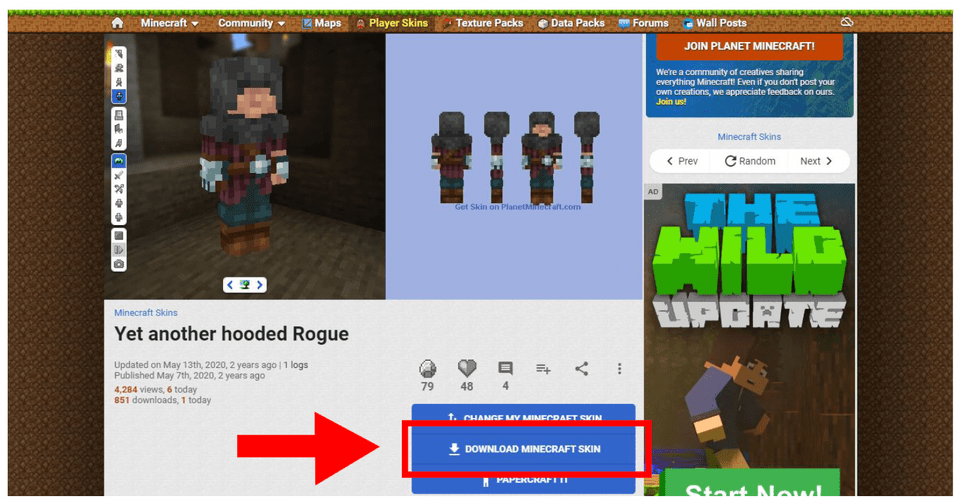
1. Hooded Rouge
This cool skin was designed to look like pillagers from Minecraft itself. The hood gives a mysterious vibe that would probably fit well in medieval worlds.
How to get this Minecraft skin: Link to Planet Minecraft
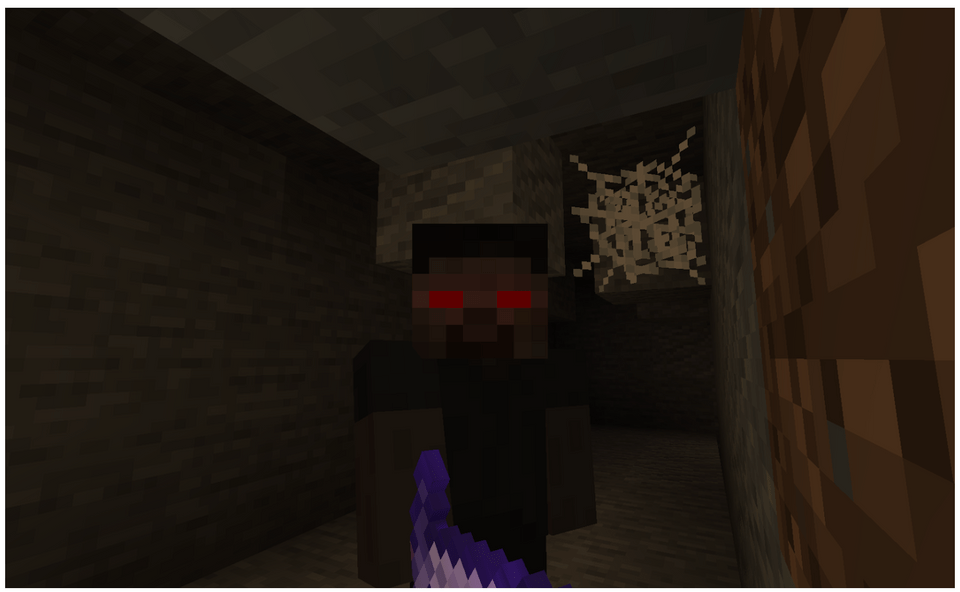
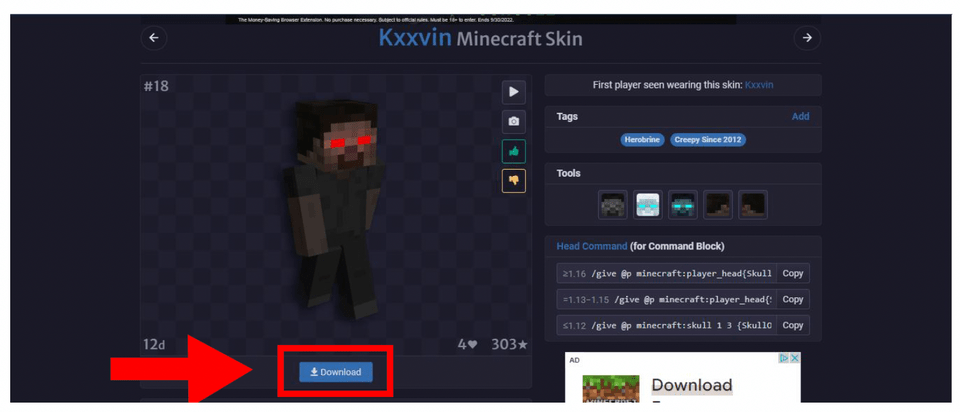
2. Herobrine
Imagine putting on this skin and prowling dark hallways to scare other players. At least that is what we would use it for. You could be as scary as an actual mob!
How to get this Minecraft skin: Link to NameMC
How To Download Minecraft Skins
Downloading the skins from the websites we used today are super easy. We will show you the location for each download button to make it even easier. Whenever you download these files make sure you can find them again when you get ready to import them into Minecraft.
For Planet Minecraft:
For NameMC:
Make Your Own Minecraft Skins
Now your child is ready to make any Minecraft skins they can imagine or change their character's skin! For your child to learn how to customize their Minecraft gaming experience all sorts of creative ways, enroll them in a fun online Minecraft Modding Quest class (Grades 2-5) or a beginner-friendly Minecraft Redstone Engineering class (Grades 2-5), led live by experts who can answer all of their questions. Kids can even earn a certificate upon class completion.
Written by Annie Schmitt, a Computer Science Teacher and Teaching Artist from Pennsylvania. She loves using art, technology, and science together to create exploratory hands-on learning experiences for students in grade K-12. As a Teaching Artist, she travels to schools and organizations in her state to teach children stop-motion animation, game design, and visual outdoor art. Annie has taught thousands of students from states all over the U.S. and countries around the world.