
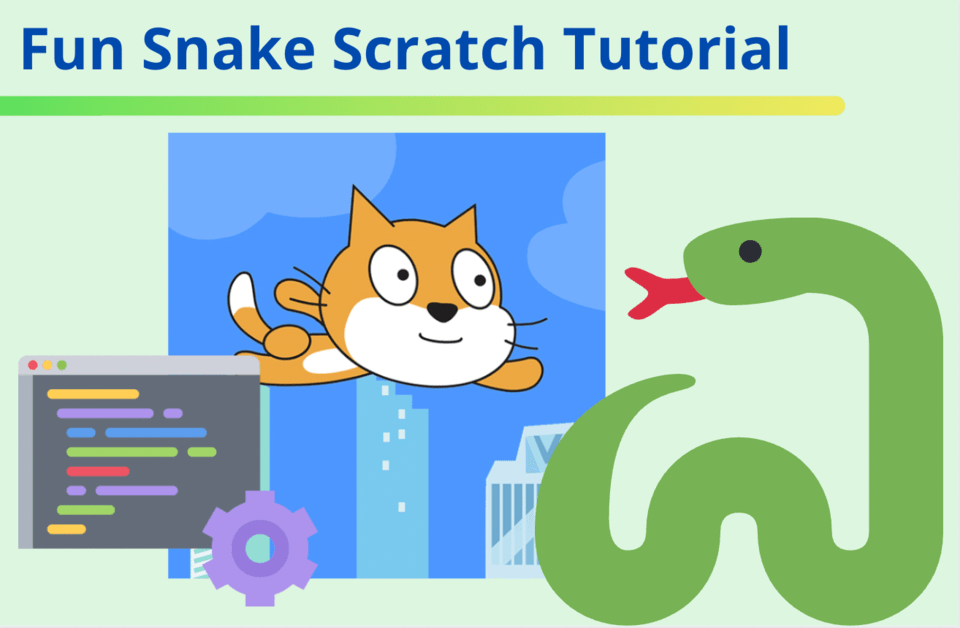
Today we're going to make a fun, fully functional Snake Game using blocks like clone and if/then, with our Snake Scratch tutorial. Step-by-step we’ll take you behind the logic of the old classic Snake Game from Tetris and use Scratch coding to bring it to life. We'll also reveal how to customize it in unique ways to make it your own.
Join an award-winning free Scratch class for kids, designed by professionals from Google, Stanford, and MIT, for live expert guidance.
About the Snake Game
The snake game has been around for decades. It was originally played on a battery-operated hand-held device known to the world as Tetris. But unlike the game of Tetris, the Snake game was a little less eventful. However, the world still got hooked!
When the Snake game was first released, the focus was everything but the design. The “snake” was nothing more or less than a chain of grey blocks that got longer every time the snake was “fed”.
It’s food: grey blocks – much like the ones of its body. And because the snake had a mind of its own, the player had to keep the snake from self-destruction. As it moved without a break, the walls and snakes own body were its biggest threat. Turning the snake away from getting on edges kept you in the game. The upside of the challenge: higher levels that offered the snake a “wall” immunity. And so, we kept playing then, as we do now!
Today, the Snake game comes in all shapes and forms, as well as colors, but the basics of the game stay the same.
In this tutorial, we’re sticking with the original look and feel of the Snake game — so get ready to embrace square blocks. Our focus is to show you how easy it is to take something as plane as an image of a square and make it into a moving, eating, growing, functioning Snake. Check out the finished project here.
To make a fun game in Scratch every week, join our expert-led live online Game Building club.
Snake Scratch Tutorial Step By Step
In this tutorial, we will show you the core blocks you’ll need to put together in order to get your Snake Game running. Follow along as we simplify the flow.
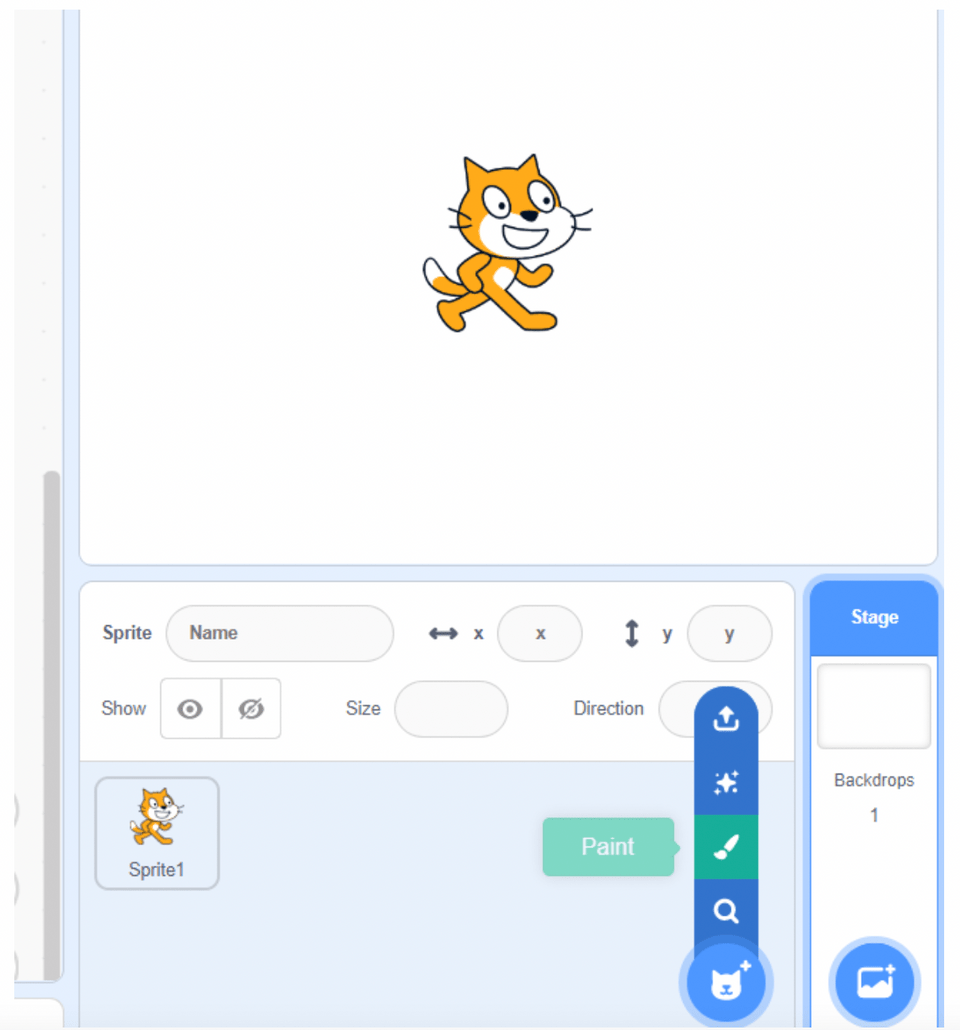
1. Make a custom Scratch Sprite
Instead of selecting a Sprite from the Sprite library on Scratch, we will make our own. Hover over the icon for Sprite Library and select Paint to get started:
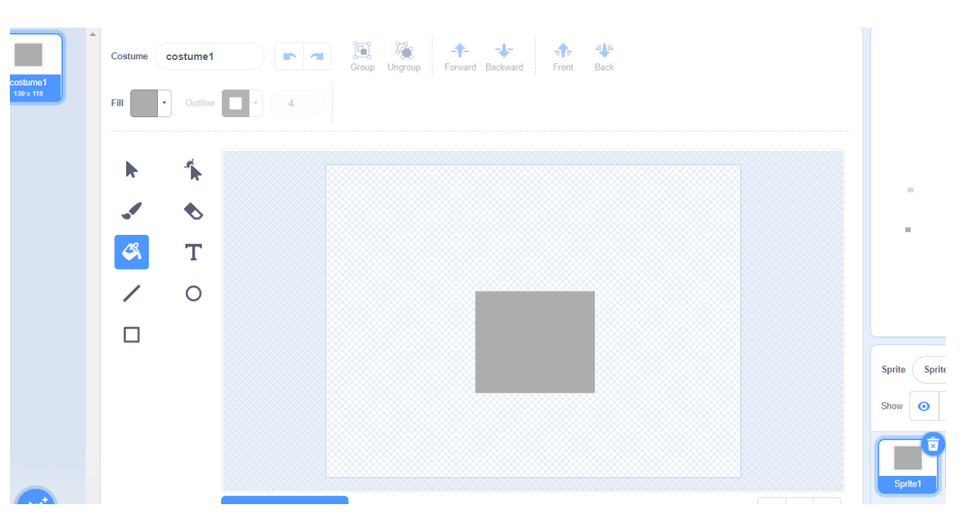
2. Draw a Square for your Snake Sprite
Click on the Rectangle tool to make a square. Click on the Fill (paint bucket icon) and then click inside your square to paint it one even color. Use Fill tool to choose your color.
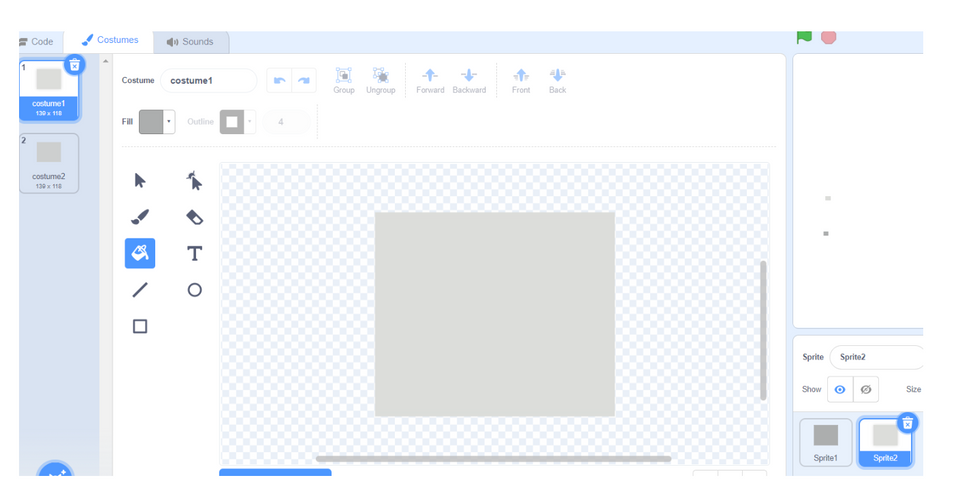
3. Food Sprites
Right click on the Sprite you just created and select duplicate. Then, inside of the Costumes tab, make another copy of that Sprite. We will have two costumes for the Food Sprite, and then we’ll program it to switch between the two just like in the original Snake Game. Be sure to choose a different color for both costumes.
Ensure the square size is consistent for both the snake and food sprites, and align them properly within the costume editor. Typically, a size of 10x10 pixels works well for grid-based movement.
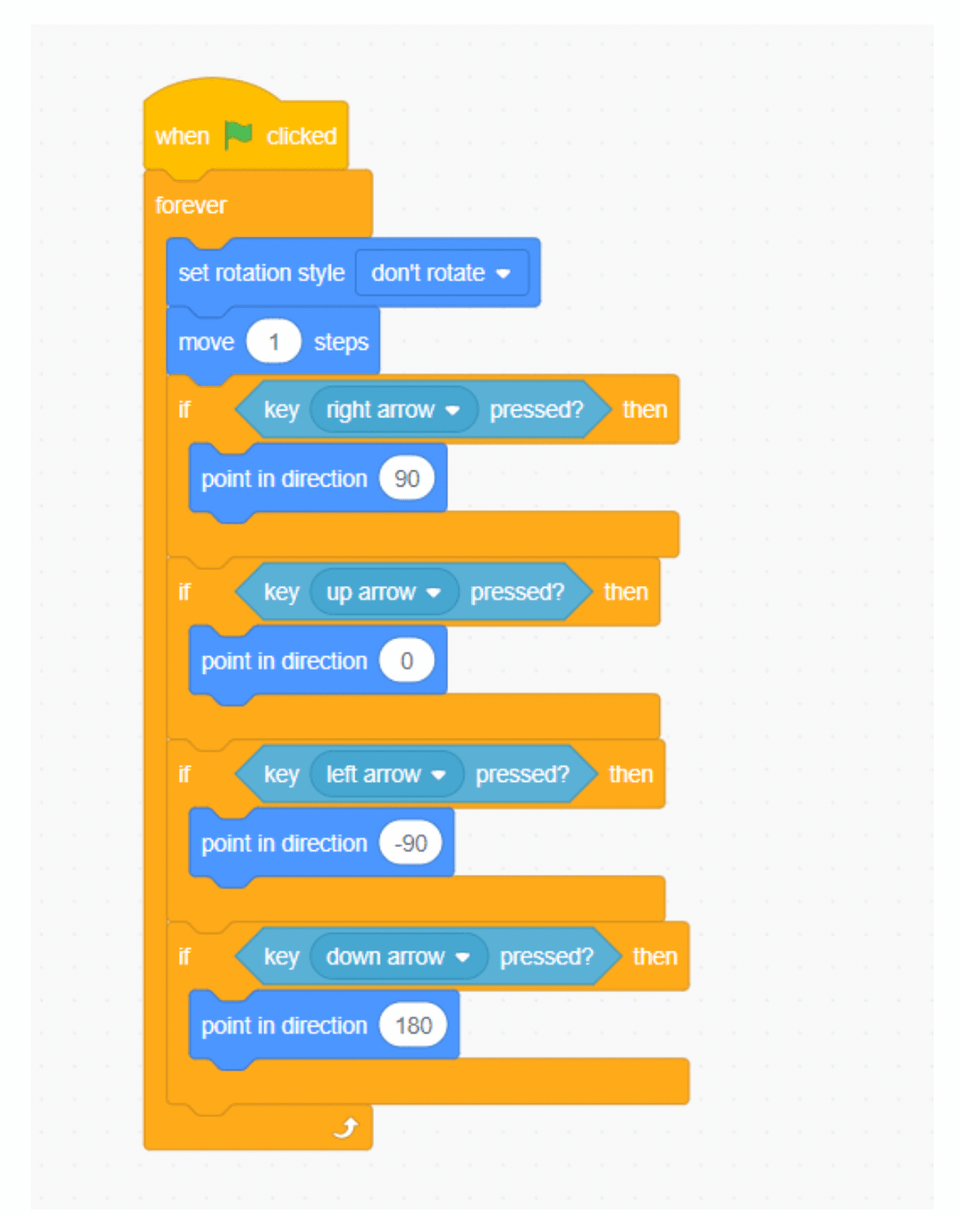
4. Make the Snake Move
Let’s program our Snake Sprite to get moving as soon as the game starts. The arrow keys should change the Snake's direction: we’ll use the up/down/left/right arrows.
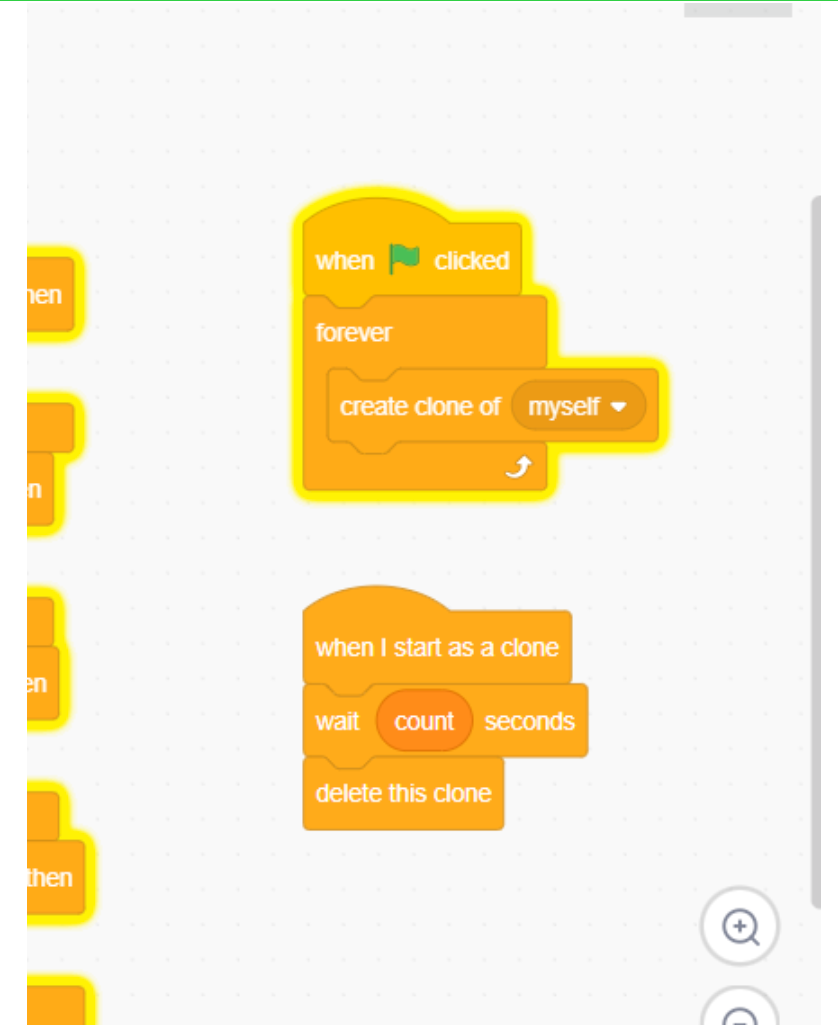
5. Clone for Length
We’ll first create a variable and then use it to keep track of how many times the Snake Sprite collides with the Food Sprite. Then we’ll use that same variable to control the length of the Snake. This will be done by deleting the clone after waiting so many seconds. The seconds become the value of the variable and the more the snake “eats” the longer it will take to delete the clones which makes the Snake Sprite bigger in length.
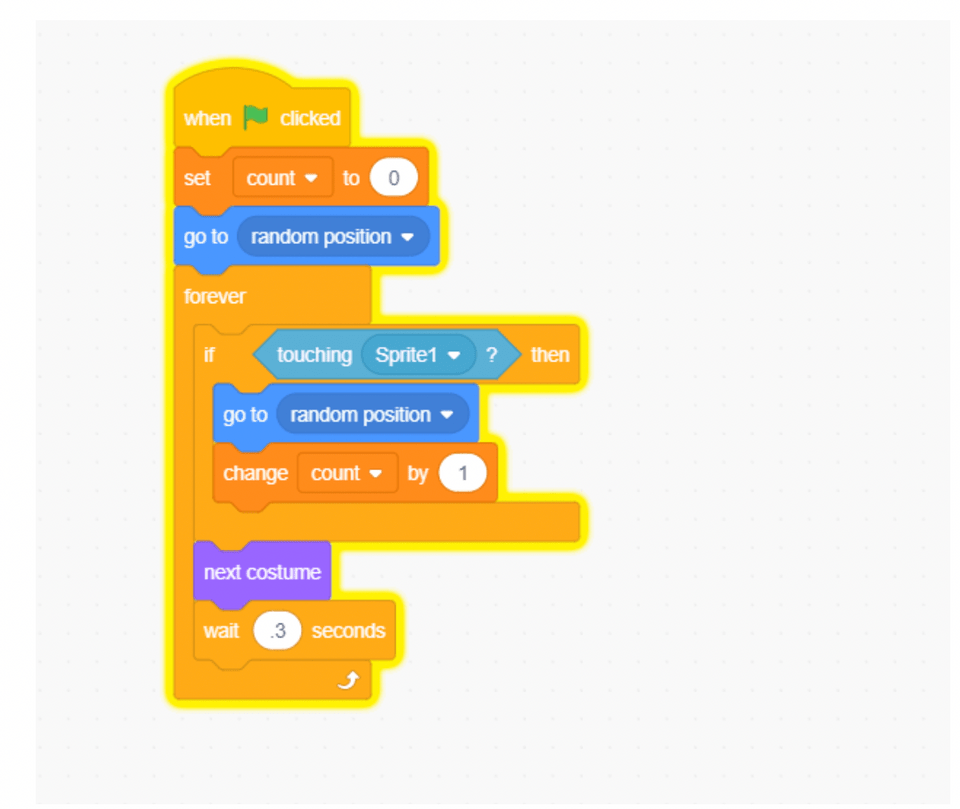
6. Set the Food Sprite’s Position and Function
Our Food Sprite will always go to a random position at the start of the game, as well as each time it collides with the Snake. It will also switch back and forth between the two costumes so that it appears as it is signaling the Snake to catch it at its new location. Lastly, we’ll keep track of its interaction with the Snake Sprite using our count variable:
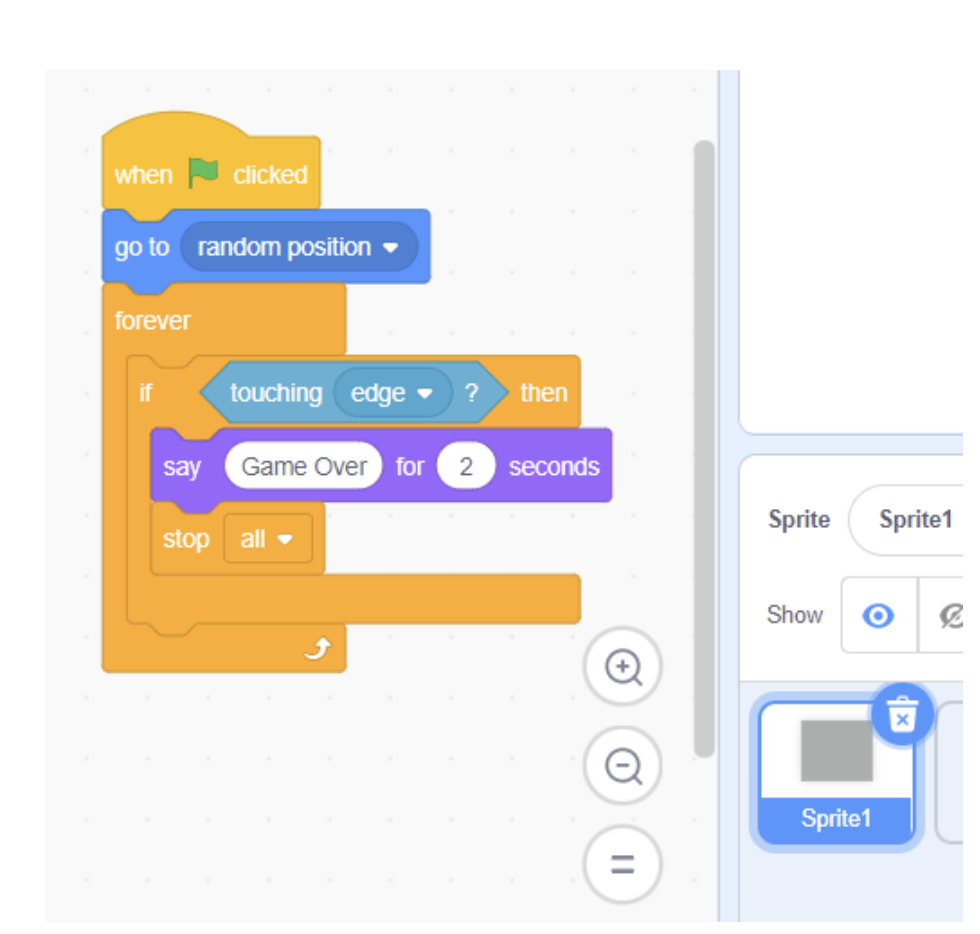
7. Ending the Snake Game
Since the rule of the game is to keep the Snake Sprite away from the walls/edges, we’ll use an if/then conditional block along with the sensing block to check for the edge. The game stops if the condition is true:
You did it!
Remixes and Examples of Snake Scratch Tutorials
There are numerous snake game remixes on Scratch. Most of them are customized but the concept is the same. For example, this Snake Game by Wodunne offers levels of difficulties and the snake itself resembles a real snake. Some game builders keep global scores such as this one made by FUNUT, where players all around the world can compete.
There are also some easy to follow YouTube tutorials like this one made by Daniel from Coder Prodigy, and this one by xamuil2 where a Pen Extension, My Block, and mouse pointer function is used to control the snake.
Key Programming Concepts You Used Today
- Sprites:
- Definition: Sprites are objects in Scratch that perform actions in the game. They can be characters, objects, or buttons that you can program to move, interact, and change.
- Usage: In the tutorial, we create custom sprites for the snake and the food. The snake sprite represents the player-controlled character, and the food sprite is the object the snake must collect.
- Costumes:
- Definition: Costumes are different appearances or states of a sprite. A sprite can switch between costumes to show different animations or states.
- Usage: We use costumes to represent different states of the buttons in the Tic Tac Toe game and to switch the appearance of the food sprite between two colors to make it more interactive.
- Variables:
- Definition: Variables are used to store information that can be changed and used throughout the program. They can store numbers, text, or other data types.
- Usage: Variables are used to keep track of the snake’s length, the player’s score, and whose turn it is in the Tic Tac Toe game. This helps manage game state and logic.
- Lists:
- Definition: Lists are collections of items that can be accessed and modified. They are useful for storing multiple values in a single variable.
- Usage: Lists are used to keep track of the positions of X’s and O’s in the Tic Tac Toe game. This helps determine the winner by checking combinations of values.
- Control Blocks:
- Definition: Control blocks are used to control the flow of the program. They include loops, conditional statements, and event listeners.
- Usage: In the tutorial, control blocks like “forever”, “if/then”, and “when this sprite clicked” are used to manage the game’s logic, such as moving the snake, checking for collisions, and determining when the game ends.
- Event Handling:
- Definition: Event handling involves responding to user actions or other events in the program. Common events include key presses, mouse clicks, and collisions.
- Usage: Event handling is used to start the snake’s movement when the green flag is clicked, change the snake’s direction with arrow keys, and detect collisions with the food sprite.
- Cloning:
- Definition: Cloning creates copies of a sprite that can be controlled independently. Each clone can perform the same or different actions from the original sprite.
- Usage: Cloning is used to extend the snake’s length each time it eats the food sprite. Clones follow the head of the snake, giving the appearance of a growing snake.
- Conditional Statements:
- Definition: Conditional statements, like “if/then” blocks, execute code only if a specified condition is true. They are essential for decision-making in the program.
- Usage: Conditional statements are used to check if the snake touches the edge of the screen or collides with the food sprite, triggering game over or increasing the score.
- Sensing Blocks:
- Definition: Sensing blocks detect various states or interactions, such as touching another sprite, key presses, or the mouse pointer’s position.
- Usage: Sensing blocks are used to detect when the snake sprite touches the food sprite or the edges of the screen, allowing the game to respond accordingly.
- Random Positioning:
- Definition: Random positioning places an object at a random location within specified boundaries.
- Usage: The food sprite’s position is set to a random location on the screen each time it is eaten, providing a new challenge for the player to find and collect it.
Make a Snake Scratch Game
In this tutorial, we showed you how to make a simple Snake Game on Scratch using clone blocks, variables, and arrow keys, in order to control snake’s behavior in the game. Want to learn more? Join us virtually at Create & Learn, where we offer the world’s best-in-class live STEM classes designed by Google and Stanford experts, including advanced Scratch, taught by passionate and engaging instructors.
Up next, find out how to make a game with levels on Scratch.
Written by Sandra Dizdarevic, a Create & Learn instructor with 6 years of experience teaching STEM to children in the 3rd through 11th grade. She has an Undergraduate as well as a Masters Degree in Management Information Systems from UNO.

