

Curious about graphic design for kids? Graphic design is all around us. Beyond our computers, design is found everywhere. From logos and fonts on stores, to billboards we drive past, our world as we know it is heavily impacted by the designs of others. Essentially, graphic design is just visual communication. It is how we speak to others and get messages across without actually having to say much.
With the rapid advancement of AI, design is playing an increasingly important role. Keep reading as we dig deeper into the world of design. We will discuss the different elements and methods of design, and how to help your child get started easily.
Enroll your child in online award-winning digital design and art classes led live by an expert, and designed by professionals from Apple and MIT to learn about digital art (grades 1-4), graphic design with Canva (grades 4-8), creating AI art (grades 4-8), website design (grades 5-12), as well as UI/UX design with Figma (grades 7-12).
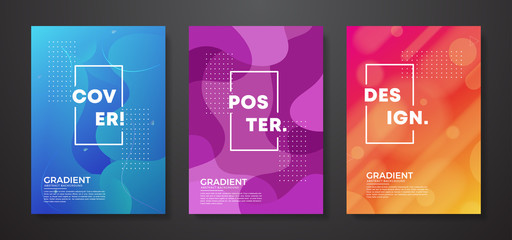
Explore Graphic Design For Kids - Digital Design, UI/UX Design, Digital Art
Today we'll reveal how kids can tap into their creative power and become the best graphic designer they can be. We will cover common questions beginners have, and provide resources and activities for parents and students interested in the world of design. Let's learn! First things first...
Can a kid be a graphic designer?
Yes, of course a kid can be a graphic designer! Graphic designers draw inspiration in many different ways - from real life experiences to how they view the world around them. Because kids see the world in an innovative and colorful way, there is no doubt that they can be a graphic designer, too!
Some people hear the words “graphic design” and think of it as something very intimidating; however, we are here today to tell you that graphic design is nothing to be afraid of at all. Graphic design is both fun and strategic, and it can be a newfound hobby and even a future career.
What are important techniques of graphic design?
The 6 elements that are important for every graphic designer to keep in mind are legibility, expressiveness, visual hierarchy, consistency, distinction, and intentionality. These techniques are talked about in more detail in Create & Learn’s class called Power of Color. But today we will talk more about the three graphic design techniques we think should be prioritized and mastered before others.
1. Legible
Whether it is a pamphlet with a whole bunch of paragraphs or a poster with nothing but a two word title, it is important that everything you design is legible. Designers are constantly communicating a message, so if something is difficult for people to read or understand, then the designs are not as effective as they should be. Legibility is key to making an effective design!
2. Hierarchical
The order in which people view the content in your designs is super important. This is especially true in designing websites and apps because designers create the flow for users to navigate on these platforms. If a button is hard to find or if text that should be bold is hidden somewhere on the page, it is really difficult for users to find the information they need.
Visual hierarchy can also be true for print designs such as posters. Imagine seeing a poster about a live music concert, but not being able to see the time of the event on the poster. If hierarchy is executed poorly in a design, people would have to view your designs a handful of times before comprehending it. Great hierarchy solves this issue!
3. Intentional
Every design choice must be intentional- meaning there are not really mistakes in graphic design. Sometimes things we do not plan happen and it ends up looking great- that is a happy accident! We love those! But when we say everything must be intentional, it means that you have thought about every choice and observed the final outcome of your design multiple times before finalizing it.
Choosing a font, a color, the placement of something must all be well thought out. By having intentionality in your designs, it shows people that you really know what you are doing and how to accurately convey your messages in your designs.
What are 3 methods of graphic design?
There are many different methods of graphic design. Graphic design is everywhere we look. Three of the most common methods of graphic design are visual identity graphic design, marketing and advertising graphic design, and user interface graphic design.
Marketing and Advertising
Graphic designers who work in marketing focus on how a company’s target audience sees their brand. They create lots of marketing materials including:
- Postcards, brochures, flyers
- Social media posts, emails, ads
- Presentations
User Interface (UI) & User Experience (UX)
The field of UI/UX design within graphic design focus on how people interact with an application or device. Modern UI design often utilizes professional tools like Figma and incorporates integrated AI features to prototype website and mobile app layouts, even using AI to help convert visual designs into functional code.
- App layouts
- Web page design
- Game interfaces
Publication
Graphic designers who work in publication often work with printed materials and work alongside publishers and editors.
- Newspapers, magazines, books
- Newsletters
- Directories
Explore Basic Graphic Design Skills for Children
Being a graphic designer, you learn a lot of different skills along the way. Because a lot of your designs will have a message, your communication skills grow immensely. You will try your best to make designs to speak to your target audience, and will most likely work with people of all different kinds of backgrounds; all of which, communicate differently themselves. Some people will know exactly how to explain their vision, while others have not even the slightest bit idea of what they want or how to say what they want.
Being a graphic designer really helps you learn how to not only communicate a message through your creativity, but also how to effectively bring other people’s ideas to life. You will become a better listener, speaker, and even your communication skills through emails, phone calls, and text messages will improve too!
Along with your communication skills, you will also learn time management skills while pursuing graphic design. You will most likely have a lot of deadlines- a time span in which you need to finish a project. You might even have multiple designs to do at the same time.
Even though it may seem overwhelming, this will help you learn how to prioritize what is most important. If you have a project due Friday and today is a Thursday, you will learn how to finish that project before starting another that is due much later. Being on a time crunch really allows for you to know where to put your time and energy, and when to scale back on certain projects.
Last but definitely not least, you will learn how to pay attention to details - an attribute that is admirable in not only graphic design, but also in everything that we do. Paying attention to details is important, because it shows that everything you create is intentional. Noticing the tiny things that others might not even notice is very common to all creatives and not just graphic designers. It displays a great sense of organizational skills and clearly proves that you are a very observant individual.
Graphic Design Activities For Kids
A common misconception is that one needs fancy programs in order to design; however, there are many graphic design projects that kids can do with little to no money spent, and all in the comfort of their own home. Here are a few fun graphic design activities for children.
1. Create a mood board
Creating mood boards on Pinterest, or even just finding images out of a magazine and making a collage, helps our creative juices flow. Mood boards made of different images that we like help us see what our style is by examining patterns in the images we choose.
2. Redesign a poster
Search images of a poster of a “favorite” such as your favorite cartoon, favorite band, favorite movie. How would this poster look if you were the one who got to design it? Redesigning a poster with Canva, kids can get the chance to apply their own style to something they love. Have a printer? Try printing it out and see your design go from screen to the physical world!
3. Design a business card
Using an index card and colored pencils, kids can design their very own business card. Not only will they get experience in designing a logo, but also they get the chance to dive deeper into brand design. Kids can come up with their very own company, its brand colors, and even make up its own phone number and address.
Take Advantage Of Graphic Design Resources For Kids
Kids can dive deeper into the world of design using all sorts of free resources on the web. Here are a few of our favorites.
1. Canva
Canva is a great alternative to Adobe Illustrator, Photoshop, and Indesign. This website makes it easy to create both print and digital materials such as posters, Instagram posts, Meta posts, and much more with the use of various templates.
We also offer an online Canva Design & Video Creation class led live by an expert that teaches kids how to harness the power of Canva.
2. Pinterest
Pinterest is a website with pictures of all different kinds of styles and aesthetics. This site is perfect for creating mood boards, gathering visual research, and drawing inspiration.
3. Pexels and PixaBay
Sites like Pexels and PixaBay have millions of stock photos and videos. You can use Pixels to add media in our designs, while still ensuring that you are following licensing guidelines.
4. Color Hunt
Color Hunt is filled with color palettes to inspire and to lend a helping hand whenever we have trouble choosing how to color our designs.
5. YouTube
YouTube has a great video selection of tutorials, project suggestions, and documentaries about design.
6. Wix
Wix is a free website builder your student can use to design a site they love. With over 200 millions users world wide, Wix is the leading website builder for designing, creating, and managing websites, and it it is also easy to use.
Our Modern Website Design class cover a wide range of topics in web design, starting from the basics of how to use Wix and how to structure a website, to designing layout, choosing color schemes, and even to creating a web store to sell products.
7. FIGMA
Figma is an industry-standard tool for UI/UX design for building prototypes for websites and mobile apps. It is a powerful platform for creating beautiful designs efficiently. Latest development in AI enables makes it is a lot faster to create and iterate on the designs and placing focuses ultimately on user experiences.
Explore our UI/UX Design with FIGMA course for teens to master Figma and its integrated AI features.
Join Graphic Design Courses For Kids
Create & Learn offers fun and interactive courses about graphic design that are perfect for curious kids who love to learn! Check out some of the best online art classes for kids here:
1. Budding Digital Artist
This is a great opportunity for students in grades 1-4 to have fun being creative with a variety of interesting digital art projects and mediums. Create pattern designs, stop-motion animation, and even design your own emojis.
2. Discovering Design
Students will gain basic core skills to design effectively in two-dimensional design for screens and print. This class is filled with videos and fun and clever activities about color and logos! Kids will also learn how to define and organize color, and how to combine colors to create moods, effects, understanding, and meaning. With exciting hands-on exercises in each session, we explore how to apply colors in different contexts in the real world, from brand logos to paintings, and apps, games, websites, movies, product design and more.
3. Canva for Kids: Design & Video Editing
Learn how to create beautiful graphic designs and videos with beginner-friendly Canva. This course explores examples of great graphic design and video storytelling. Your child will learn to use the intuitive drag-and-drop tool in Canva to create their own design.
4. Imagine and Create Art with AI
Delve into the mesmerizing world of AI, exploring state of art tools such as Adobe Firefly, Canva, DALL·E-3 by OpenAI, and Runway ML. From abstract compositions to vibrant illustrations, each session will empower your child to experiment with diverse styles and subjects. AI art will help students polish images, add creative touches, generate unique art elements, and expand their design capabilities significantly.
5. Easy Website Design with Wix
Design beautiful websites, fast! This fun live online class covers a wide range of topics in Web Design, starting from basics of how to use WIX and how to structure your web site, to designing layout, choosing color schemes, and even to creating a web store to sell products.
6. UI/UX Design with Figma & AI
Perfect for grades 7-12, this course teaches teens to leverage Figma and its AI features to create beautiful websites and mobile apps designs, prototypes, and even generate code quickly with AI.. Students also learn broad UI/UX design principles and component-based workflows while using AI to convert designs into code.
Get Started With Digital Design For Kids
We hope that reading this helped you learn more about graphic design and the many resources out there to get started. We all see the world in a unique way, and we all have the power of being a designer who can someday change the world.
Equip your child with the tools they need to showcase their amazing graphic design capabilities! Up next, explore Procreate tips for beginners.
Written by Marielle Cruz Cabillo, a Create & Learn instructor who has a BS in Visual Communication Design with a Minor in Marketing, and has taught children for 6 years.

