

If your child or student has already tried our fun Scratch exercises for kids and is ready for another series of challenges, we have just the thing! In this post, we will cover five beginner Scratch challenges that include more sophisticated concepts such as loops, variables, and Scratch extensions. Read on to find fun challenges including a translator and a story-based game!
Learn Scratch coding with the help of a live expert in an award-winning beginner-friendly class designed by professionals from Google, Stanford, and MIT:
More advanced Scratchers will enjoy our Scratch game building class.
Try Beginner Scratch Challenges
Our challenges below will help your child or student continue to improve their mastery of Scratch and coding. Let’s begin!
1. Create a countdown timer
This countdown timer is a great addition to any game you may wish to create in Scratch. Follow the instructions below to create it! (Model project here).
The first step, of course, will be to create a new project. Navigate to Scratch and click “Create” to create a new project. Delete the cat sprite that will load in by default.
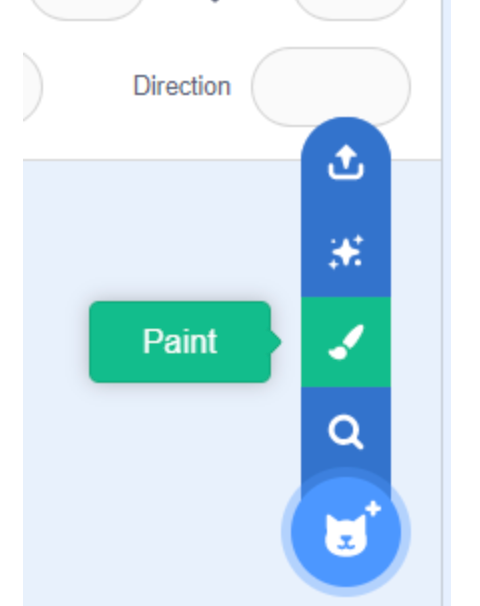
Next, you will need to create your “Game Over” sprite. To do so, mouse over the button in the bottom-right corner and click “Paint.”
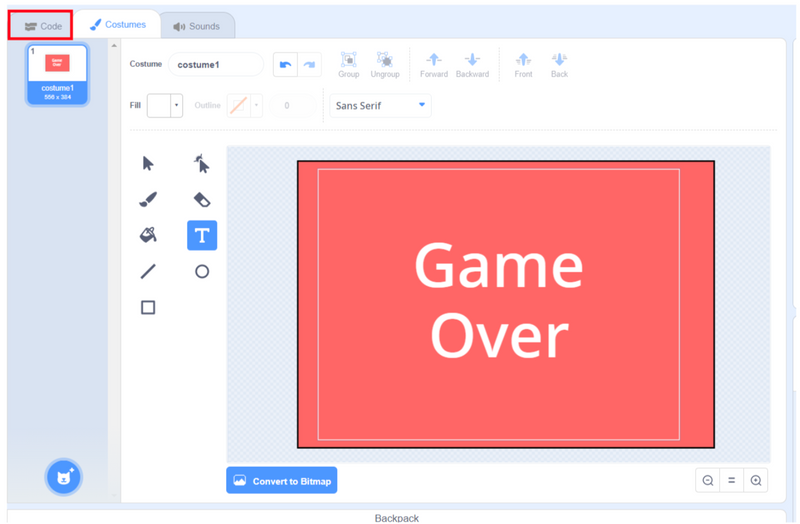
Design your “Game Over” sprite to your liking, and then click the “code” tab to code the project.
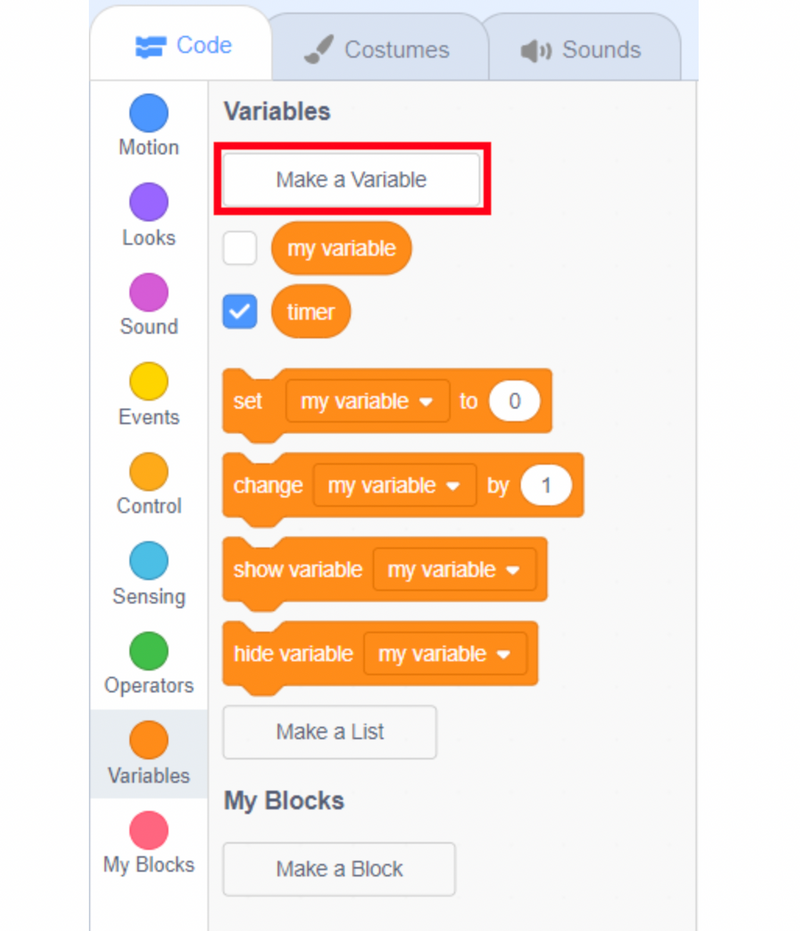
We will need a new variable called “timer” - create it by clicking “Make a Variable” in the “Variables” section
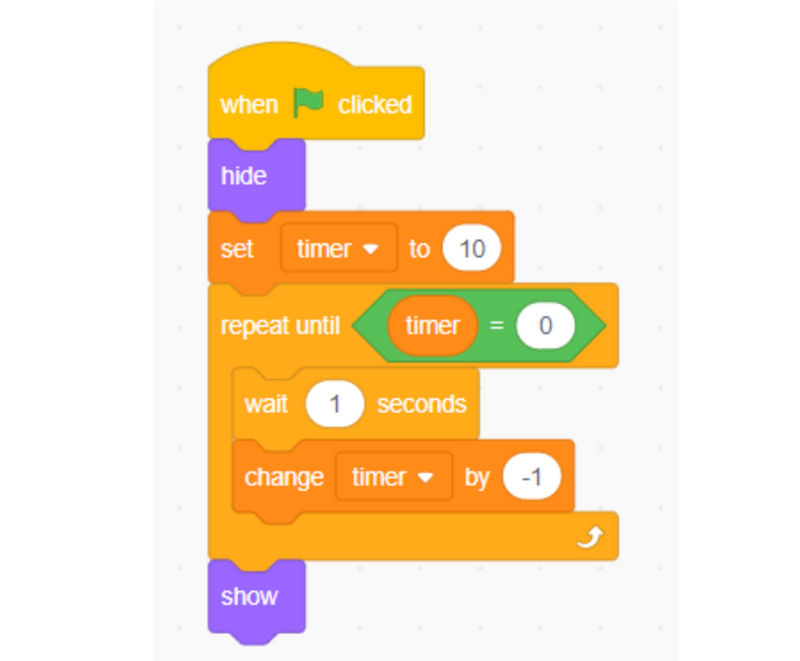
With the sprite and variable created, the last thing to do is code the timer. Add the code above to your project after taking a look below at what each block of code does:
- When green flag clicked: The code below this block will run every time the green flag is clicked.
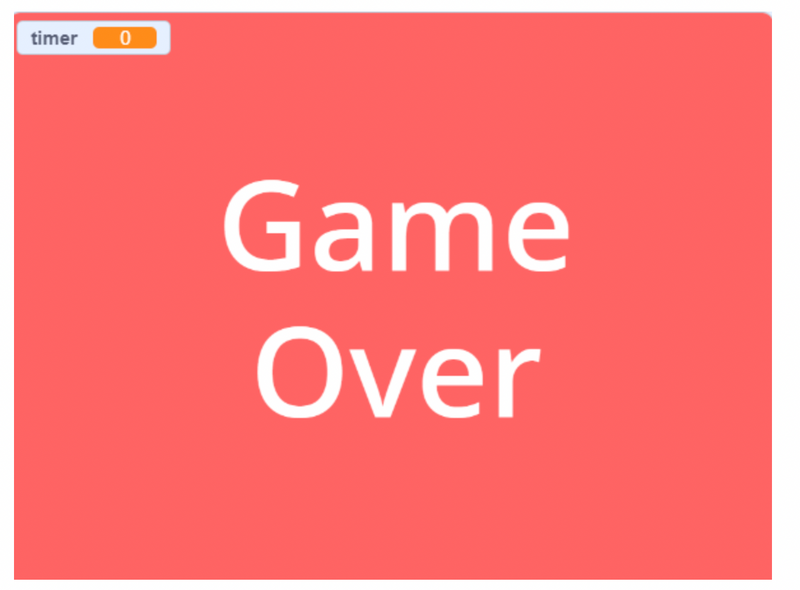
- Hide: We only want our “game over” sprite to appear after the timer runs out, so we will hide it from view for now
- Set (timer) to (30): We will set our timer’s original value to however long we would like it to last for. For this example, we did 30 seconds, but you can make it as long or as short as you wish.
- Repeat until <(timer) = (0)>: The code within this loop will run until our “timer” variable reaches 0
- Wait (1) seconds: Our program will pause for 1 second before moving on
- Change (timer) by (-1): Now that we have waited one second, we can decrease our timer. This will result in our timer decreasing by 1 every 1 second, effectively counting.
- Show: Once the timer has reached 0, we will break out of the loop above and finally reach this block, which will show that the game is over
2. Create falling objects

In many instances, such as game development or animation, it can be helpful to have objects falling from the sky. Follow the steps below to complete this fun and useful project! (Model project here).
To begin, create a new project as explained above. Delete the cat sprite that loads in by default and choose the sprite that you would like to fall from the sky. We also recommend selecting a background, but it’s not mandatory for this project. (For our project, we chose “star” as our sprite and “galaxy” as our background).
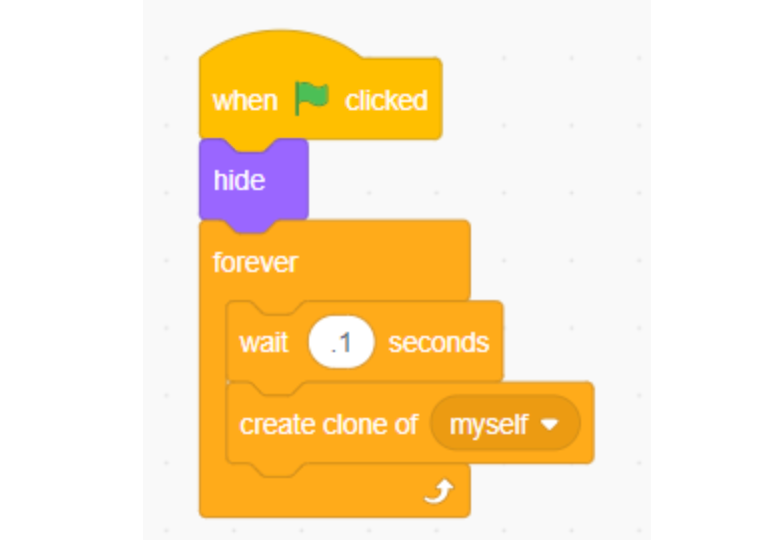
Next, we will use the clone feature to create infinite copies of our original sprite. We can do so with the code above. Let’s see how it works:
- When “green flag” clicked: This block will cause the blocks below to run when the green flag is clicked.
- Hide: Although we want our original sprite to exist so that it can be cloned, we don’t actually want it to be visible. Without this hide block, our original sprite would stand still in the middle of our project. By hiding it, we are still able to clone it, but it is not visible.
- Forever: This creates a loop that will run forever. This suits our needs, because we want our sprites to fall forever (or, at least until the stop sign is clicked to end the program).
- Wait .1 seconds: This block controls how often a new sprite appears on the screen. The .1 value can be increased or decreased to control the quantity of sprites; a value of 0 will create many sprites, while a value of 1 will create occasional sprites.
- Create a clone of myself: This block tells the program to create a copy of the original sprite.
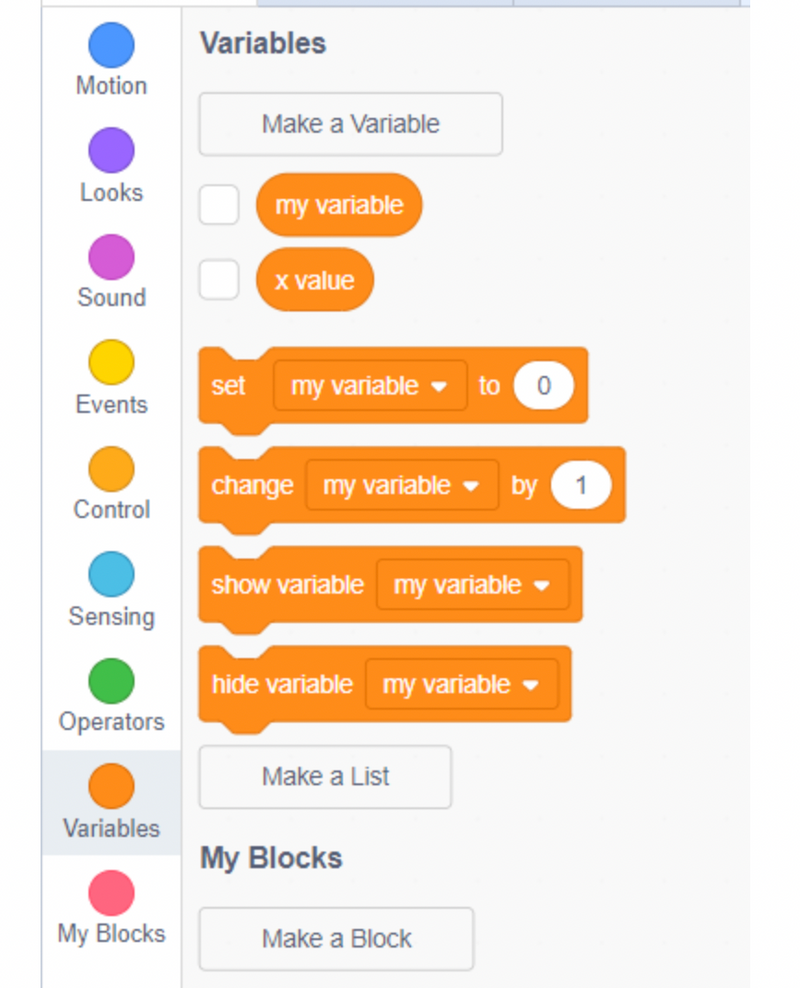
For the next step, we will need a new variable called “x value.” Create this variable as in the previous project. Once you’ve created the variable, you can uncheck the box to hide it from the project.
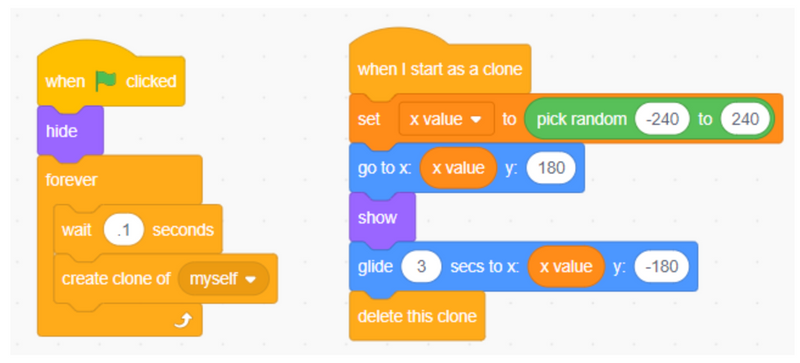
With the variable created, we can add the final set of code to our program:
- When I start as a clone: This block makes it so that the following blocks will run every time a new clone is created.
- Set x value to (pick random -240 to 240): Sprite placement in the Scratch canvas is controlled by an invisible grid, and you can place things around the grid by giving them an x value and a y value. The x value controls placement left to right, and the y value controls placement up and down. X values can range from -240 to 240; the closer to -240, the further left, and the closer to 240, the further right. Y values range from -180 to 180, with -180 being at the bottom of the screen and 180 being at the top. All that said, this block of code randomly chooses and stores an x value that will be somewhere between the left and right of the screen.
- Go to x: x value y: 180: This block of code moves our clone to the appropriate location. The x value was determined in the previous step, and the y value is set to 180 so the clone will appear at the top of the screen.
- Show: As you’ll remember, in the previous code we set up, we made our original sprite invisible with a “hide” block. If we want our new clones to be visible, we will have to make them appear with a “show” block.
- Glide (3) secs to x: x value y: -180: The glide block will make our clone glide across the screen to a specified location. You can increase or decrease the number of seconds to make the clones fall more slowly or more quickly. Since our clone will be falling straight down, we can use the same x value as before. You can change the y value depending on how far down you want the clones to fall, but we have found -180 to work well.
- Delete this clone: This block of code deletes the clone once it reaches the bottom of the screen.
3. Draw with your sprite

One of the coolest features of Scratch is that it can create art! Follow the instructions below to create a fun program that will allow you to draw with your sprite. (Model project here).
Create a new project following the instructions in the projects above.
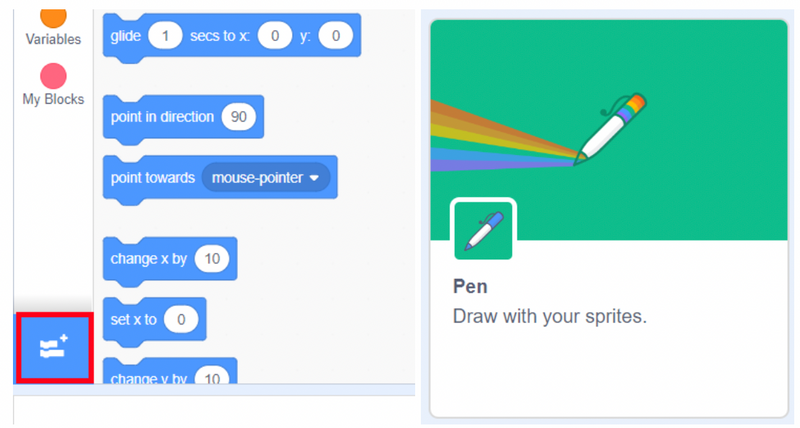
Click the “Add Extension” button in the bottom-left corner and click “Pen” - this will give you access to the blocks related to drawing.
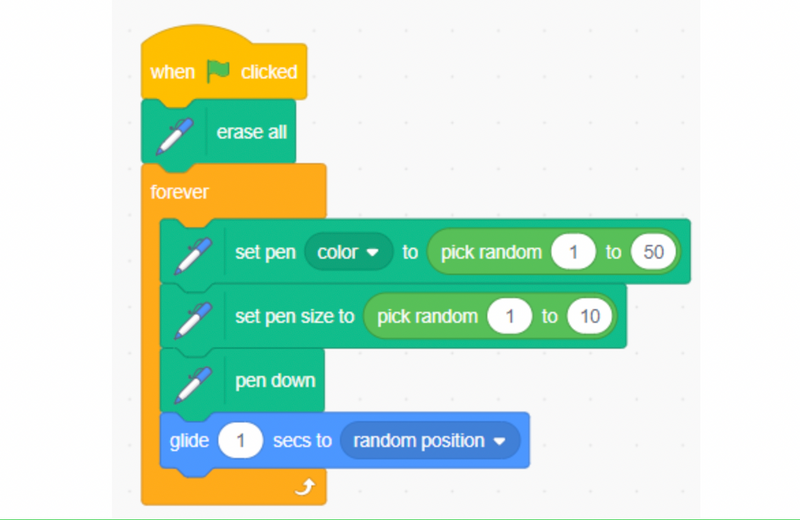
Add the code above to your program - read below to see the purpose of each block!
- When green flag clicked: The code below this block will run whenever the green flag is clicked
- Erase all: If the program was previously run, we want to erase everything from the last time and start fresh
- Forever: The code inside this loop will run forever
- Set pen (color) to (pick random <1> to <50>): This block sets our pen to a random color. You can adjust the numbers as you wish; a smaller range will result in a smaller variety of colors.
- Set pen size to (pick random <1> to <10>): This block sets our pen to a random size.
- Pen down: This tells the program to put the pen down and start drawing
- Glide (1) secs to (random position): This block makes our sprite glide to a random spot on the screen. Since our pen is down, it will draw wherever the sprite goes.
If you let this program run for 20 seconds or so, you’ll start to see some interesting, abstract art appear on the screen!
4. Create a translator
Another cool extension in Scratch is the Google Translate extension. Follow along to create an interactive translator inside Scratch! (Model project here).
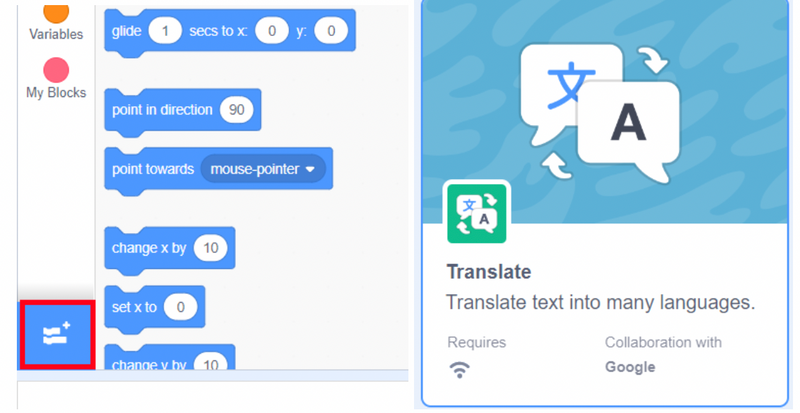
Create a new project. Then, as before, click the “Add Extension” button; this time, select the “Translate” extension.

We will need two variables for this project. As in previous projects, navigate to the “variables” section and click “Make a variable.” Make one variable named “language” and one named “message.” You can leave them checked or unchecked, depending on if you would like them to appear in your finished project.
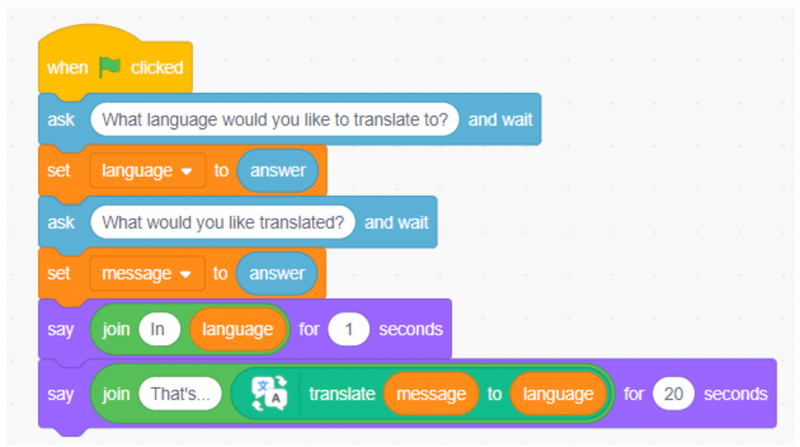
The code above will create a program that prompts the user for what language they would like to translate to, as well as the message they would like translated, and then translates the message from English to their chosen language. Read below to see how each block works!
- When green flag clicked: The blocks below will run every time the green flag is clicked.
- Ask (What language would you like to translate to?) and wait: This block will pose the question, “What language would you like to translate to?” and wait until the user types an answer before continuing. The answer will be stored in a temporary variable called “answer,” which is automatically created.
- Set (language) to (answer): As mentioned before, “answer” is a temporary variable, and it will be overwritten the next time a question is asked. To save the language preference the user has specified, we will save “answer” to “language” so we can keep it permanently.
- Ask (What would you like translated?) and wait: As before, our sprite will ask the question “What would you like translated?” and wait for the user to type a response. The response will then be stored in the “answer” variable (this will overwrite what was previously stored here, which is why it was important to create a copy in the previous step)
- Set (message) to (answer): As before, we want to save what is stored in “answer” permanently, so we will copy it to our “message” variable
- Say (join <in> <language>) for (1) seconds: The join block will combine the word “In” with the language the user specified. For example, if a user typed “Spanish,” the final product after this join block would be “In Spanish.” The say block will make the sprite say “In Spanish.”
- Say (join <That’s…> <translate {message} to {language}>) for (20) seconds): There’s quite a bit going on in this block, so let’s unpack it! The language block takes two inputs - the message in English to be translated, and the language it is to be translated to. Since the user’s message is stored in “message” and their preferred language is stored in “language,” we feed these variables to the translate block so that it can translate our message. Then, we join “That’s…” with that result to create a final result of “Thats…(translated message).” Finally, the say block makes our sprite say this for 20 seconds.
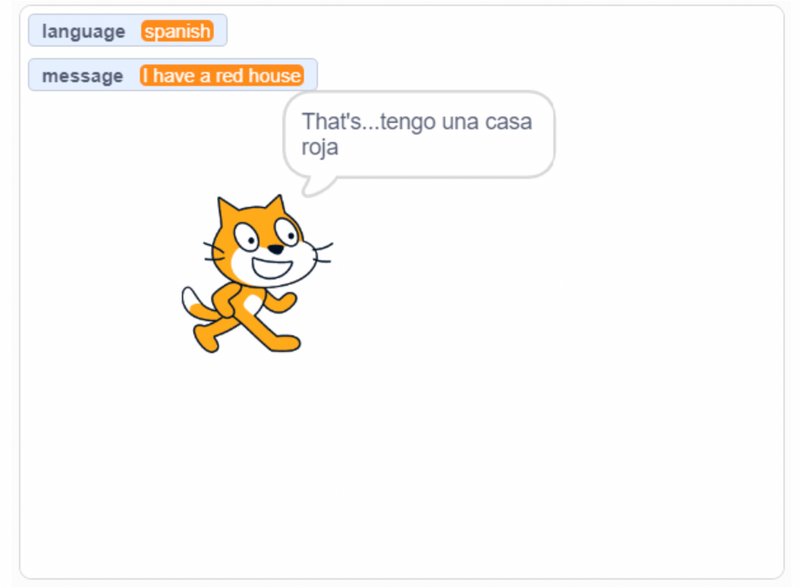
To give an example of what this program may look like in practice, assume the user types in “Spanish” as their language and “I have a red house” as their message. The final dialogue from our sprite would be “In Spanish that’s…tengo una casa roja.” Voila, a fully functional translator embedded inside Scratch!
5. Make a Story-Based Game
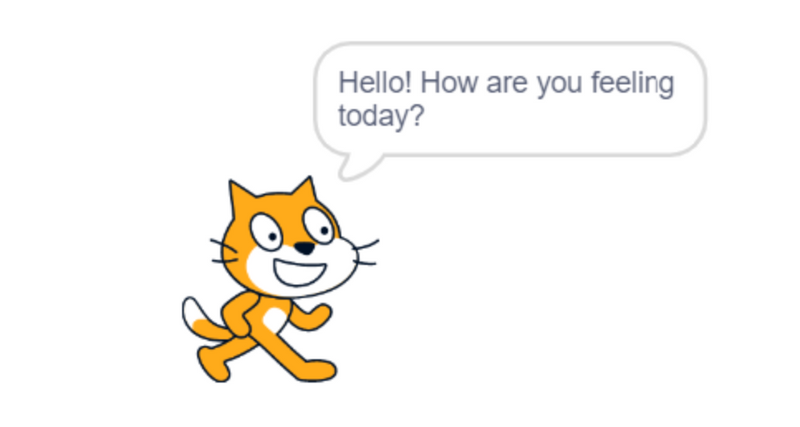
Our final project is to create a story-based game, where the user will be asked questions, and the outcome of the program will depend on their answer. Let’s begin! (Model project here).
Create a new project and choose a sprite of your choice. You can also choose a background if you wish.
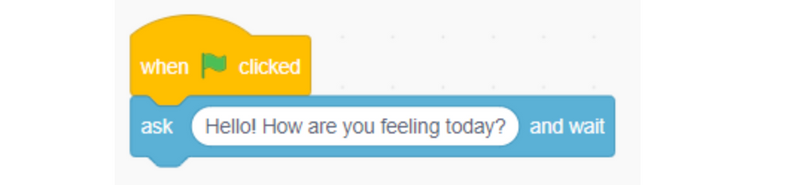
This project has a lot of code, so it’s best to take it in small steps. Add the code above, and read below to see what each block does:
- When green flag clicked: The code below this block will run when the green flag is clicked.
- Ask (Hello! How are you feeling today?) and wait: This block will ask the question to the user, and store their answer in a system-generated “answer” variable.
We will need a custom variable for this project - following the steps from the previous projects, create a new variable called “question answered?” Note that, when a variable is created, its original value is 0 - this will be important to help you understand the next step.
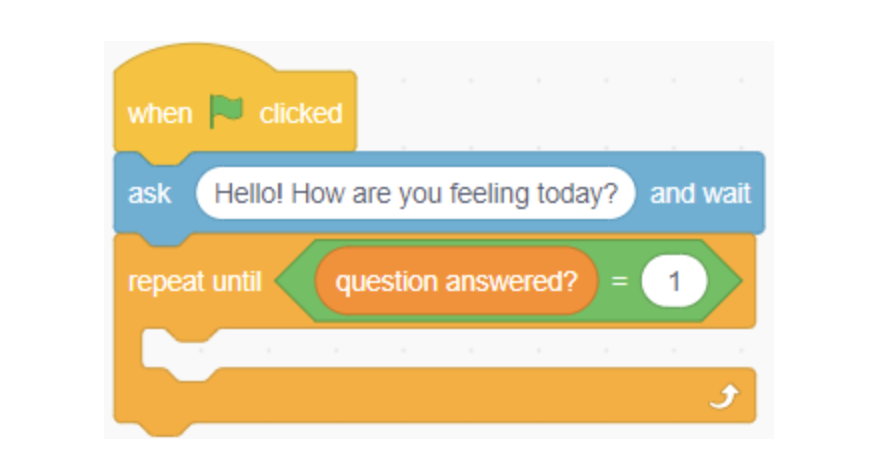
Repeat until <(question answered?) = (1)>: For this program, we’re going to want our sprite to continue asking the question until the user provides an answer we can work with. For this project, we will assume that, when our “question answered?” variable is equal to 1, we have received an answer that works, and if the variable is equal to 0, we have not yet received an answer that will work. Therefore, this block will run the code contained within (which we will add in the next step) until the user has provided an answer we can work with. Since our “question answered” variable is currently equal to 0, as explained before, the code is guaranteed to run at least once, and may run more times than that if the user doesn’t provide a workable response.
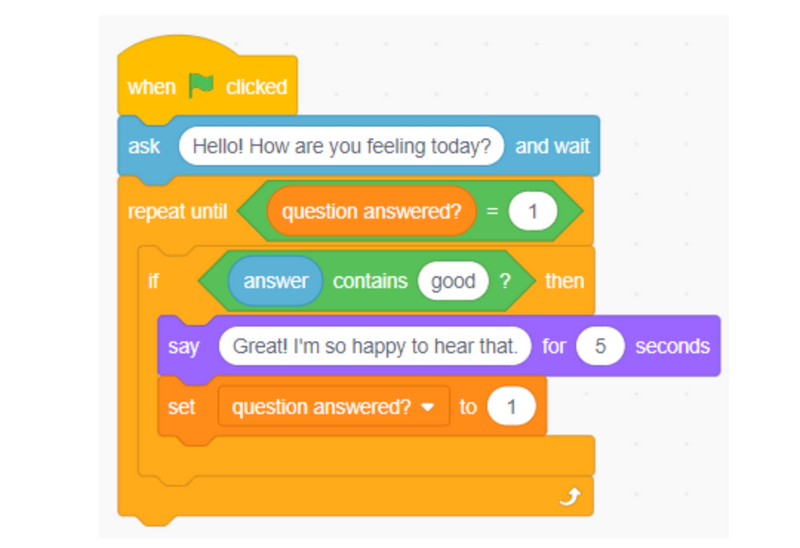
Add this new code to your existing code, and take a look below to understand each block:
- If <(answer) contains (good)?> then: If the user’s answer contains the word “good,” we can assume they had a positive response. Therefore, we will run the code contained within this block. You can use “or” blocks to expand the words to check for; consider adding “great” and “happy.”
- Say (“Great! I’m so happy to hear that”) for (5) seconds: This block will make our sprite say this message for 5 seconds.
- Set (question answered?) to (1): As explained before, we set “question answered?” to 1 to show that a valid response has been received. Since we received a valid response, we can set our variable to 1 to show that the code doesn’t need to loop any more.

The code for a negative response will be very similar:
- If <(answer) contains (bad)?> then: If the user’s answer contains the word “bad,” we can assume they had a negative response. Therefore, we will run the code contained within this block. You can use “or” blocks to expand the words to check for; consider adding “sad” and “terrible.”
- Say (“I’m sorry to hear that! I hope things get better for you”) for (5) seconds: This block will make our sprite say this message for 5 seconds.
- Set (question answered?) to (1): As explained before, we set “question answered?” to 1 to show that a valid response has been received. Since we received a valid response, we can set our variable to 1 to show that the code doesn’t need to loop any more.
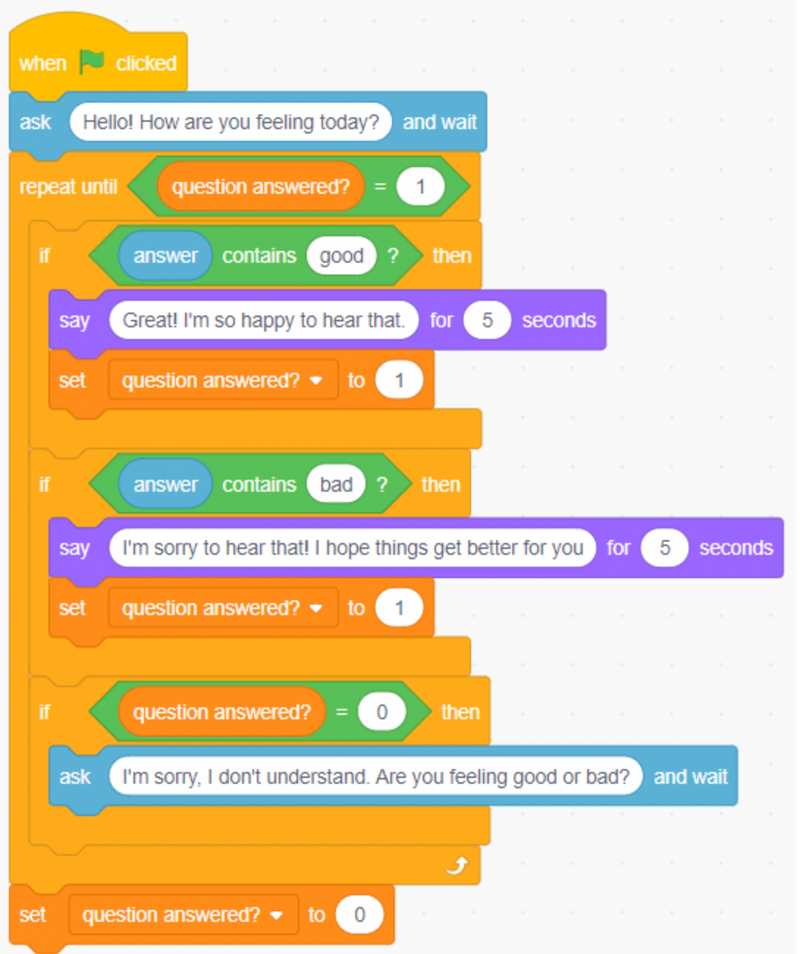
Finally, we need to add some code in case the user doesn’t answer “good” or “bad”:
- If <(question answered?) = 0>: We only want to run the code contained within this block if a usable answer hasn’t yet been provided, so we will check for that condition. We will enter the loop if “question answered?” is equal to 0.
- Ask (“I’m sorry, I don’t understand. Are you feeling good or bad?”) and wait: These instructions let the user know the type of answer we’re looking for. After the user answers, our code will loop to the top, and our code will run through again using the user’s new answer. This will happen again and again until a user enters an answer that contains either “good” or “bad.”
- Set (question answered?) to (0): At the very bottom of our program, outside of our repeat loop, will set “question answered?” to 0 so that, if the user runs the program again by clicking the green flag, our variable is reset and ready to be used again.
Get Started with Beginner Scratch Challenges
That was a lot of coding, so your child or student should feel very proud if they were able to complete every challenge! If they thought this was fun and would like to learn more about Scratch, check out our incredible library of fun online Scratch courses led live by experts and designed by professionals from Google, Stanford, and MIT. Thanks for reading, and happy coding!
Written by Matt Schofield, an educator and avid coder. After studying Spanish at the University of Pennsylvania, Matt began teaching English as a second language to elementary students in Baltimore. In addition to his full-time teaching position, Matt enjoys teaching computer science in the evenings and weekends with Create & Learn.

