Imagine you have taken your first coding class in Python, and have learned the print() command. Maybe your teacher repeatedly shared the pattern: “ACTION WORD. Parentheses. Information!” to help you learn the pattern of how Python functions look. And you wonder: "Do Python messages always have to look simple and plain? Does coding have to be routine?"
Well, we are here to tell you…no! Python is awesome, because of the amazing community around it – people around the world build cool packages, and you have the power at your fingertips to use their code. And today we will be able to experience that.
So let’s dive right into learning how to make awesome Python turtle art! Here is an example of a complete code project you will be able to make at the end of this tutorial.
To enjoy live expert guidance learning Python, enroll your student our online Python For AI class and award-winning coding classes for teens designed by professionals from Google, Stanford, and MIT.
Let's Make Python Turtle Art
Follow along with the video tutorial here if you prefer:
1. Pick a code platform
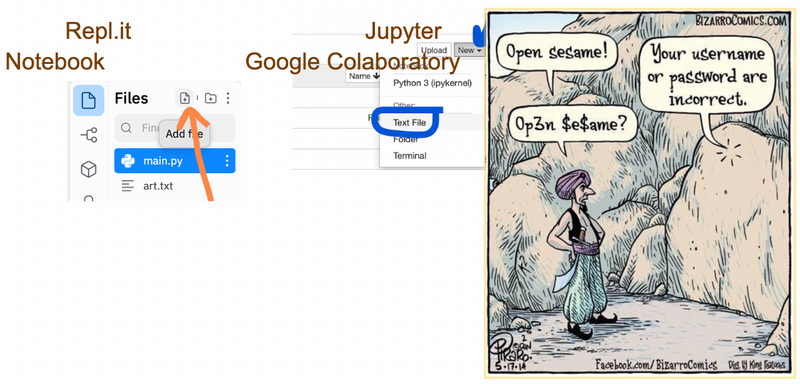
Option A: Today, you can choose to simply use Repl.it to follow along – simply create a free account here and log in! Click on Create. Select Python, name your code, and click Create Repl!
Option B: If you want to try out a ‘notebook’ environment for coding you can use a Jupyter Notebook: simply download the Anaconda Distribution from here. Then, open up Anaconda Navigator app on your computer! Click on the Launch button in Jupyter Notebook. Click on New > Python3. Rename your notebook, and finally make sure to save as you code today.
Option C: If you like Google Drive, you can follow along using Google Colaboratory. You need a gmail account, and can simply login here. Click on File > New notebook. Rename your notebook, and make sure to save as you code today!
2. Install your basics
If you are using Google Colaboratory, or Jupyter Notebook, make sure you install these 2 special tools today. It’s really easy. Simply type !pip install art and !pip install cowsay (fun name, right?). Remember, if you are using Repl.it no need to do the below.
Now, for the steps below, all the following code will be identical no matter which code platform you are using. So let’s begin!
3. Import, import!
Today, we will need to import the time, random, and art Python package. Simply use the import command.

4. File away!
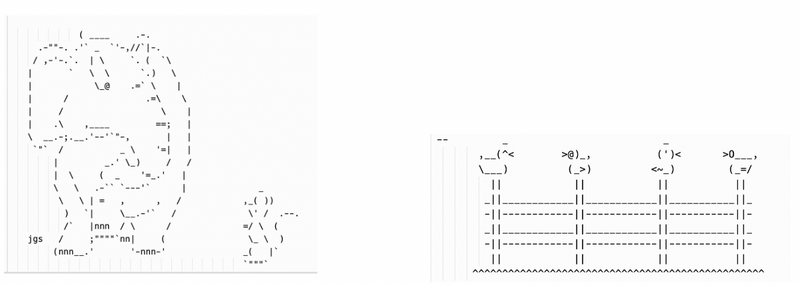
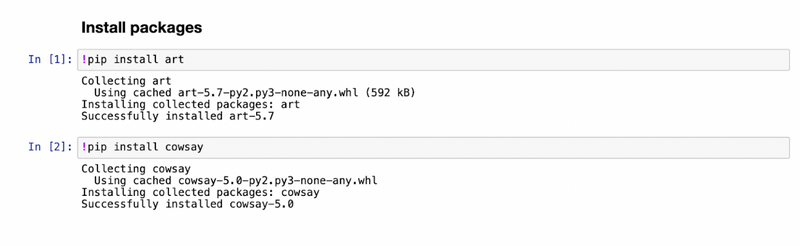
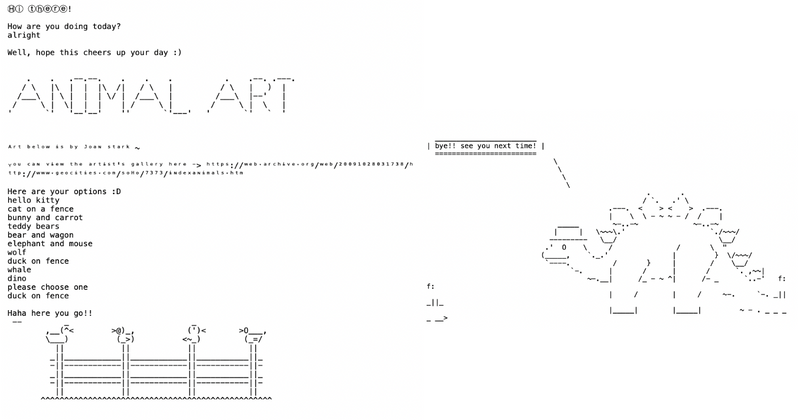
- Explore this amazing artist (Joan Stark)’s gallery here.
- Choose one of your favorite animal drawings. Then simply highlight the drawing text, and copy it using Control-C or Command-C.
- On your computer, open up an app that allows you to store simple .txt files. You can use TextEdit in a Macbook, or Notepad in Windows!
- Think of a label for the art you chose.
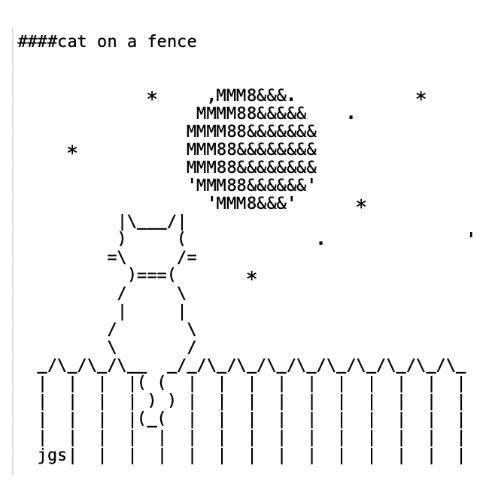
- Now, write your label adding special characters before it. We will be using ####. Here is an example! ####cat on a fence
- Hit enter.
- Now paste the art content using Control-V or Command-V, so it is directly underneath the label.
- Save your text file, naming it art.txt
- Repeat steps A-G 9 more times so you have a total of 10 favorite images added to art.txt. You can see an example here.
- Add the file to the code space you are using.
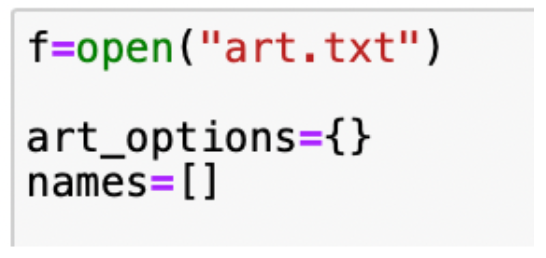
5. Use the open command in Python
Great job! What we want to do is somehow store the art from art.txt in Python. Remember we labeled every ASCII drawing? Well, this means we created pairs of information: labels, and the ASCII drawings! Do you remember what works super well with pairs of information in Python? [hint** hint** …dictionaries! ]
So we need to do the following: magically teleport all of the contents from art.txt, and store it in a Python dictionary.
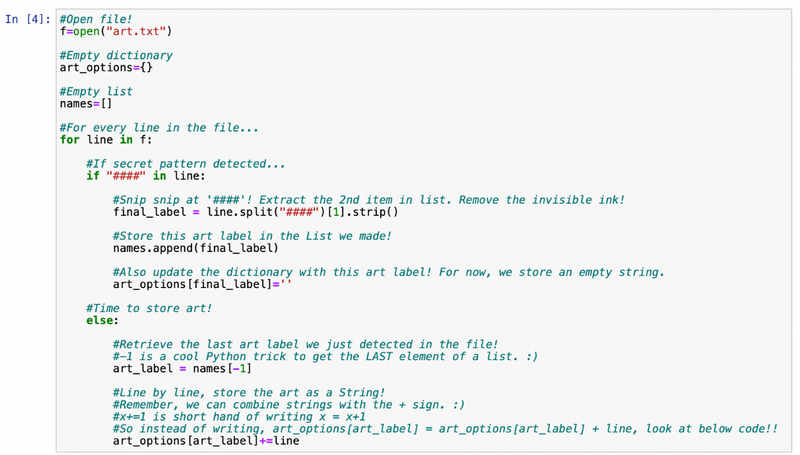
Turns out ‘magical teleportation’ in Python with files, it’s actually really easy. We will use the open() command. Then, to set up the teleportation we will create an empty dictionary, and an empty list.
Simply add the following code:
6. Secret patterns
Now, we will go line by line of the text file. For this we can use a for loop.
Then we will use the .split() command to use the secret pattern we set up so Python can tell the difference from a label, and a line for the ASCII art.
.split() returns a List, and takes a String as input. But wait…what?! Secret pattern? Remember, it was when we labeled every image using ####<label>. When Python goes line by line in the file, all it has to look for is the 4 hashtags #### to know that ‘Oh! This is a label, and not art’.
Think of it like the bright yellow lines on the crosswalk on a busy street light. Just like how the lines help us know where we can safely cross the street, the #### help Python not get lost. Every time Python detects #### it knows to store the label. We’ll store the label in the list and dictionary we made.
When Python does not detect #### in the current line, it has to store the current art, linked to the previous label we just wrote down! For this we will simply retrieve the last label we added to the list. Did you know that a position of -1 means the end of a list?
Hint:
x = [‘ice cream’, ‘cookies’, ‘marshmallows’]
print(x[-1]) will print out…you guessed it! marshmallows!
Snip snip! ✂
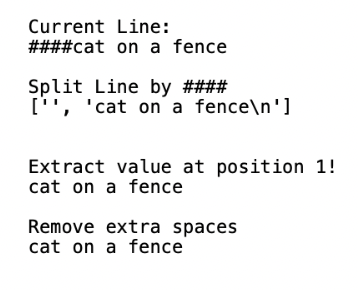
Suppose we have a String variable x that holds the value ‘####cat on a fence\n’
x=‘####cat on a fence\n’
y = x.split(‘####’) will give us a List y, as if someone took scissors and cut up the String into chunks, cutting wherever there is a ####. Notice below, how the art label ends up being the second item of the list! This means we need to access position 1 of List y to store the art label. Remember, Python starts counting from zero.
7. Invisible ink
Finally, notice how there was an ‘\n’ above. What does this mean? Well this is the computer’s way of saying a ‘new line’. Imagine as if invisible ink was added every time we hit the Enter key in the .txt file. ‘\n’ is the invisible ink. And we want to get rid of this extra ink. We will use the .strip() command!
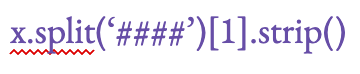
Phew! All these functions! .split(), .strip(), and we even have to remember to extract position 1 of the list! Can we avoid writing lots of lines of code you may wonder… Well, if you have a sequential step by step idea of multiple commands, you can simply use this pattern:

If command1() returns a List, and we want the 2nd position in the List to be provided as input to command2(), easy!

And for our situation, we might want something like this:
8. Bring it all together
In the steps above we didn’t code – why not? Why are they labeled as steps if we didn’t write any code? Well, what we did is think through and mentally map out steps we want to do. This is called pseudocode, and is one of the fundamental secrets of success for coding. Once you know what tools to use, why you want to use them, and their purpose, you are ready to code!
Here, below, simply apply all the knowledge above, to write the following code. Notice how we have added lots of comments. This is good practice, always add notes and explanations to your code so you are clear about what is going on, and remember it later.
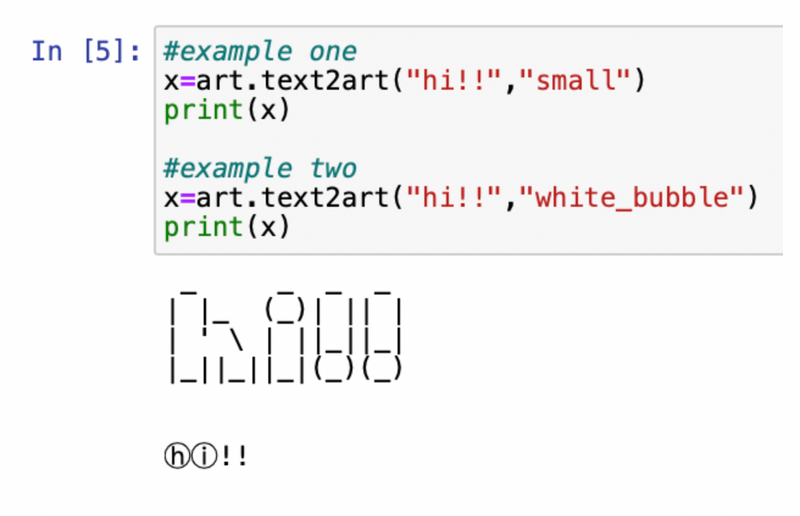
9. Practice with TIME, Text2ART & COWSAY!
Now, let’s interact with the user, the person who will run our code, and ask them which animal ASCII art drawing they would like to see. We could just use print() and input() to do this. But why stick to simple, plain text? Why not bubble letters, fun fonts, and cool characters that say the messages instead?
- Choose your favorite font(s) from here.
- Practice the .text2art() command. Notice it is from the art package we imported earlier! The first input of this command is a String message, and the second input is a String value of the font you chose with the link above!!
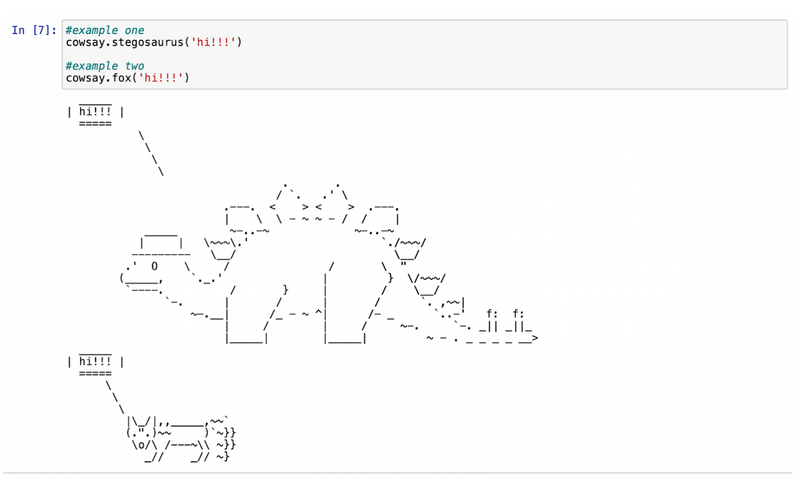
3. Now, let’s practice allowing fun characters to speak. First, choose a favorite character from this list:

4. Then, simply use the name of the character as the name of the command, from the cowsay package. Here are some examples for you so you can see the pattern of <name of imported code package>.<name of character>()
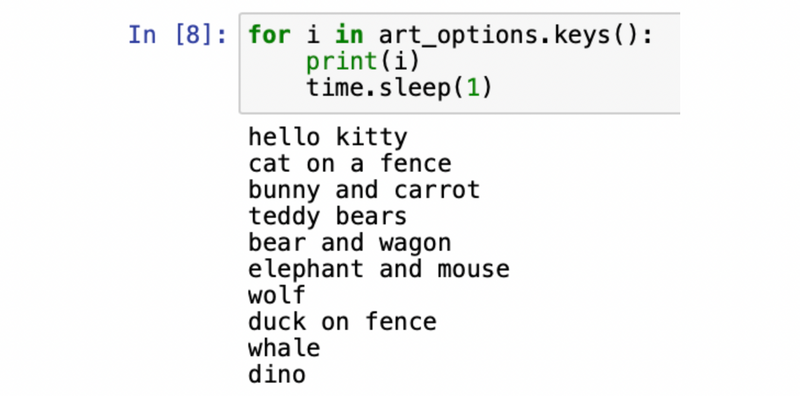
5. Lastly, how do we allow our code to be more interactive? Sometimes, we may wish the computer to take a pause before each message…and not speak everything super fast! Is there a way for this? Yes! The time package allows us to use a cool function called .sleep() that takes as input the # of seconds you want the computer to pause. Practice the time.sleep() command with a dictionary. Remember, we can loop through a dictionary’s keys! Try the code below. Your code output will look different since you chose different images of course, and used your own labels!
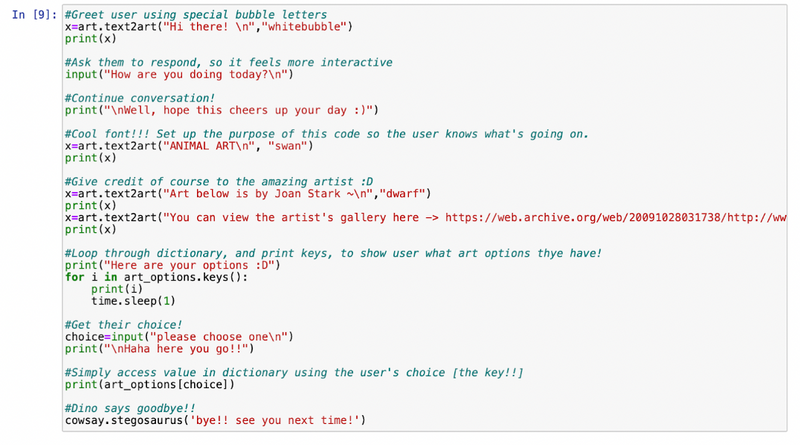
10. Practice pays off. Now the fun stuff!
You’ve done the hard part – practice. Now simply put your magic at your fingertips in action! The basic steps would be:
- Greet the user!
- Tell them they can choose from different images by printing out the image labels!
- Show ASCII art based on their choice :) But the cool part here is that you can use bubble letters, cool fonts - even a stegosaurus to speak to the user! Have fun.
Here Is Our Python Turtle Graphics Code Example
Code:
Output:
Enjoy This Fun Python Turtle Art Tutorial To Make Cool Graphics
Awesome job! Which art was your favorite? Ours is the cat on a fence. Hope your child enjoyed this tutorial, and if they want to learn more awesome things about Python, we would love to welcome them to our live online Python for AI class. Next, your student might enjoy trying these interesting Python exercises for kids.
Written by Pavithra Nagarajan, a Create & Learn instructor. Pavithra is a bioinformatician and completed her master's degree from Harvard T.H. Chan School of Public Health. She finds computational biology awesome (code-ception she wishes it were called), and is the curriculum designer for these classes here at Create & Learn. She truly loves teaching, and is a dancer.