Canva is a wonderful accessible tool that anyone can learn to use to make an array of graphic assets. From posters, presentations and video editing, Canva is a versatile tool for beginners learning the basics of design. Many companies use it for social media marketing and campaigns. In today’s Canva beginner tutorial for kids, we will dip our toes into the basics of Canva, and how you and your child can make stunning creations for their next project by making a poster. We'll also reveal a few creative ways your child can use Canva for school projects, their sports clubs, and more. And take a look at ways to build an impressive school presentation using some of Canva's unique features.
For live online guidance, enroll your child in an online digital design class led by an expert, and designed by professionals from Apple and Stanford: Canva for Kids: Design, Video Creation, AI Art Class.
Follow A Fun Canva Beginner Tutorial For Kids
There are many reasons people make posters. It can be to engage in an action, deliver a message, or promote an event. Although you may not have a business or event currently, you can make one up for the sake of this exercise. The skills you learn here can be used to make future birthday invitations, save the dates, and small business promotions - for example, if your child wants to start a dog walking business or lemonade stand. Today we're going to make a small business poster.
1. Create a new design
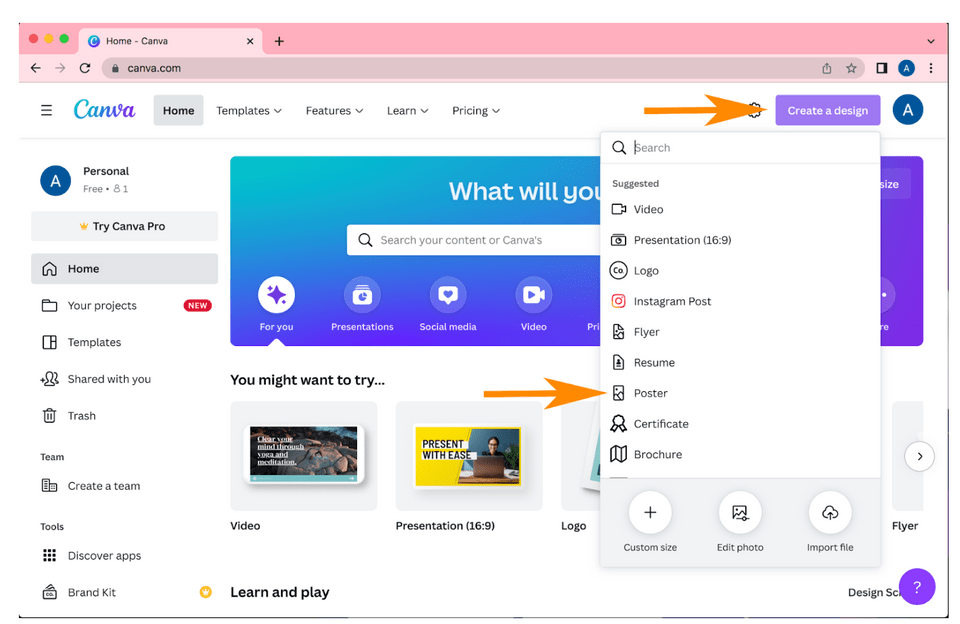
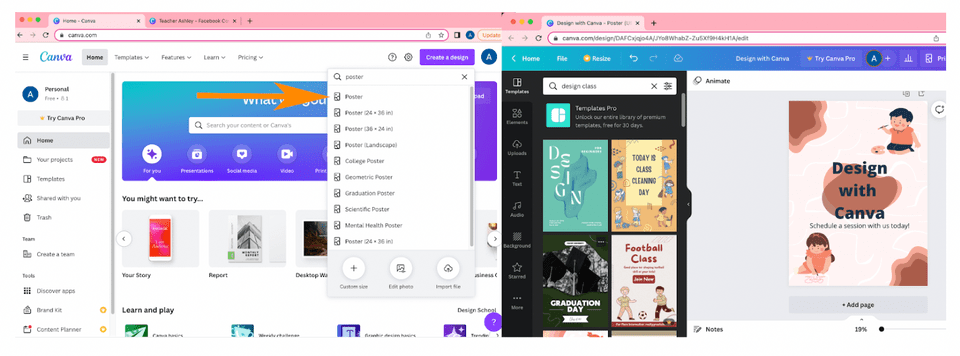
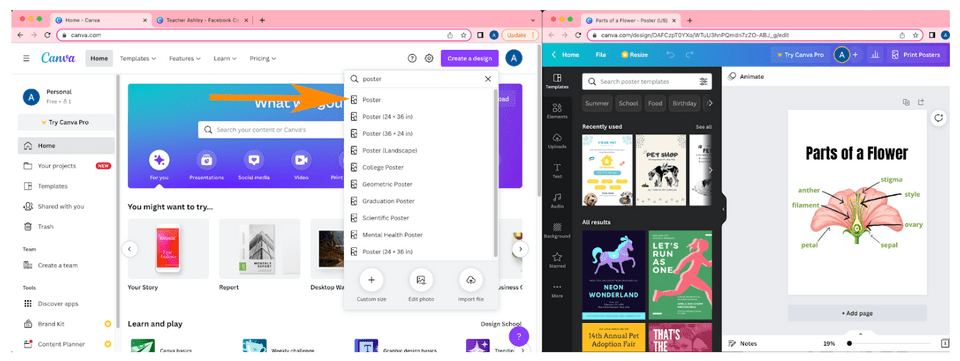
First, go to Canva. Then log in (or sign up for a free account), and click on the purple button that says “create a design”. You can then scroll down to the poster option or type “poster” in the search bar that pops up after you click the purple button.
2. Find inspiration
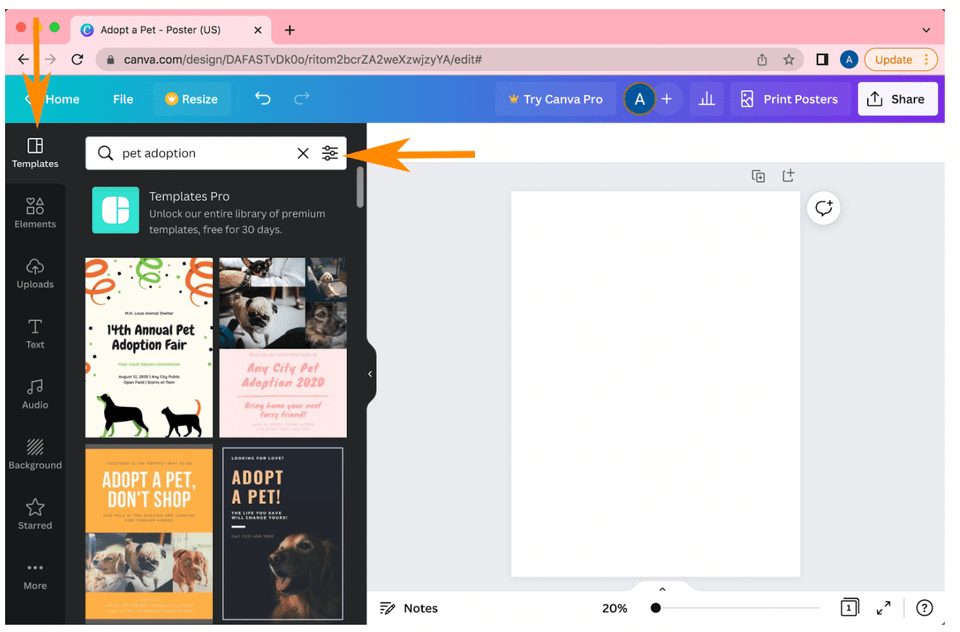
Look through the pre-made ‘templates’ section that can be found in the black toolbar to the left. There are many to choose from that are categorized into different sections. If your child already has a specific event or business in mind they can look up templates relating to their topic in the search bar at the top of the template section. Notice what they like about these posters.
3. Find frames for your photos
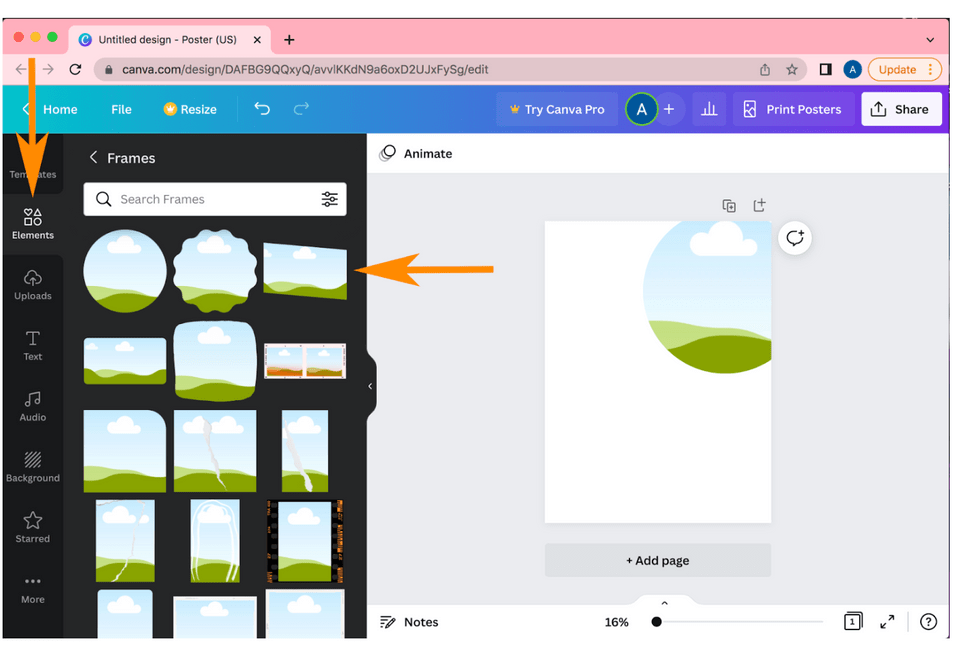
Looking at our black toolbar to the left, we look down the list to click on ‘elements’. Once there , choose the frame option.
4. Find images to focus the poster around
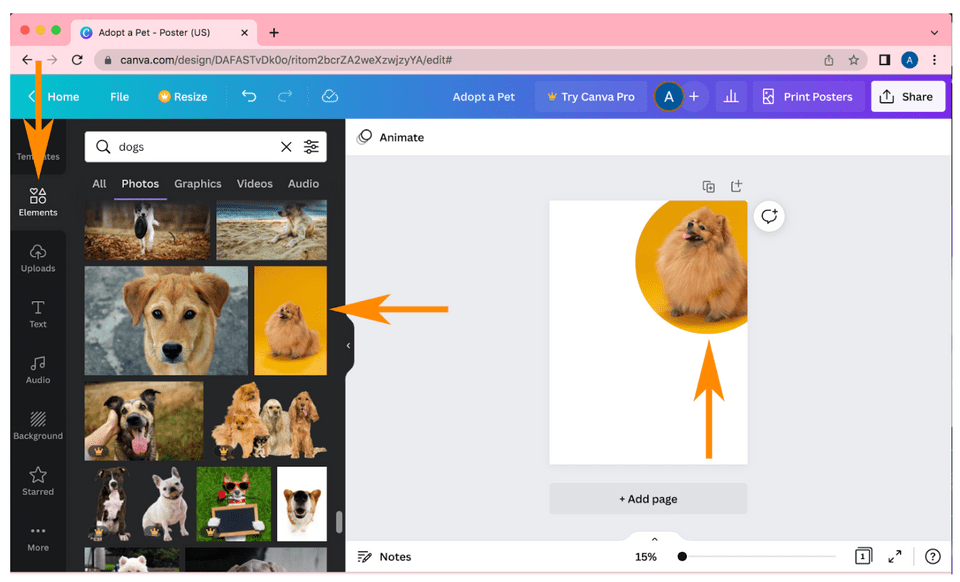
From here you can choose what shape or frame you would like your photo to fill. Once you have selected your frames, go back to the main menu for elements and find photos. You can find a photo here to drag and drop into frame or you can upload your own photo under ‘uploads’ in the black toolbar to the left.
5. Add text
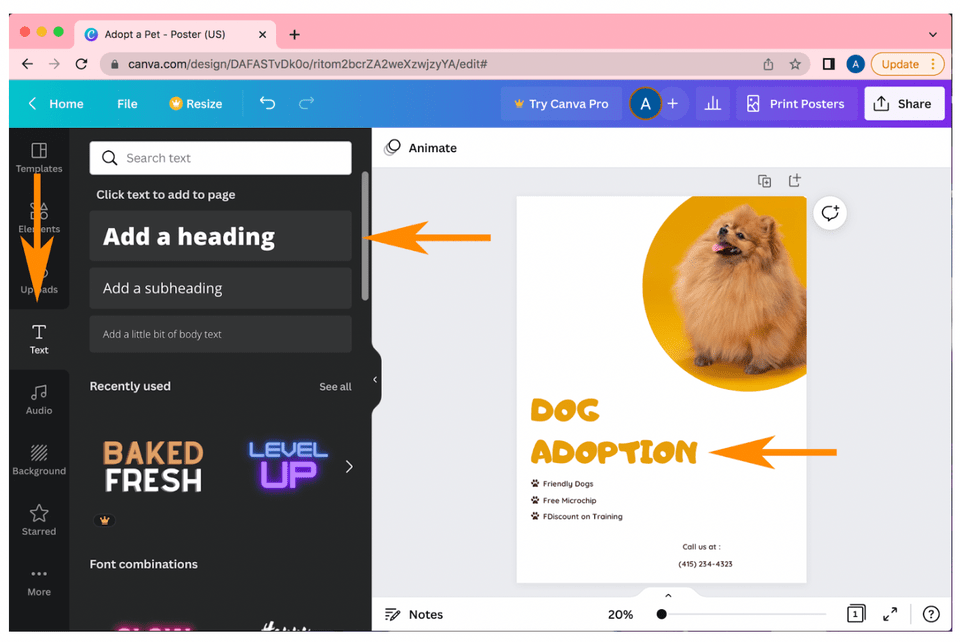
In the toolbar to the left, there is a ‘text’ option. Once clicked, you’ll have your choice at a variety of different fonts for titles and body text.
6. Add graphics
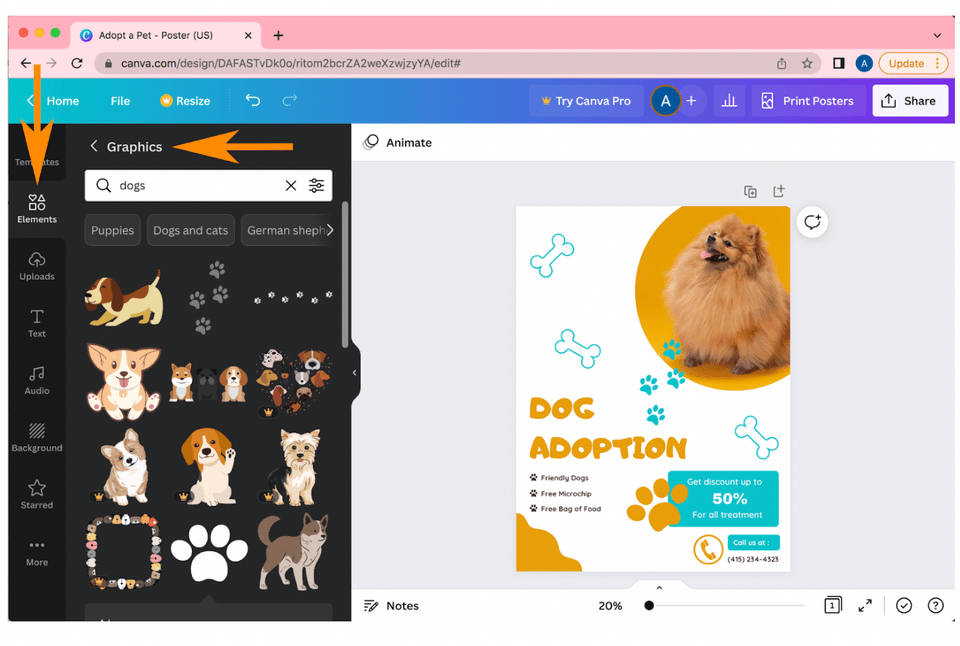
To add graphics, go back to the ‘elements’ section . Once clicked you’ll find the ‘graphics’ section. You may need to scroll to find some of these options. Within ‘elements’ you can search for graphics to accent your poster by topic.
7. Add a background
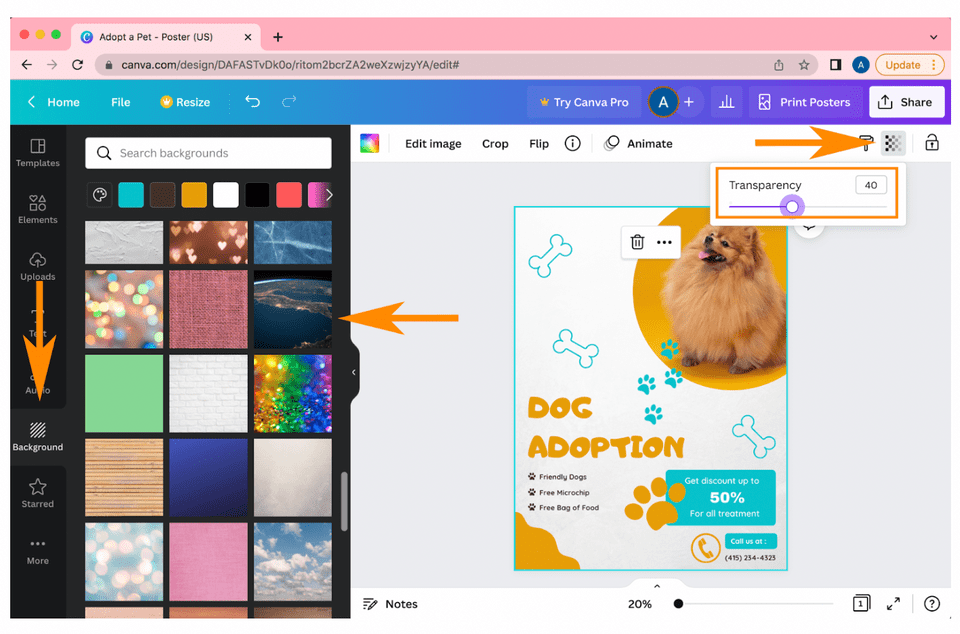
You could either add an image or a color for your background. The location of the background option may vary depending on your browser, on my screen the background section is an option on the black toolbar. Here you can either choose a color or image that will be your new background.
Additional Canva Design Challenges For Kids
Why not put your child's new Canva skills to the test with some fun design challenges? Here are a few ideas to spark their creativity:
- Fictional Event Poster: Challenge your child to design a poster for an imaginary event, like a "Space Adventure Fair" or a "Dinosaur Dance Party." This task encourages them to think creatively while practicing layout and design principles.
- Birthday Card for a Family Member: Have them create a personalized birthday card for a family member or friend. They can experiment with fonts, colors, and images to make it special and unique.
- Social Media Graphic for an Imaginary Business: Ask your child to design a social media graphic for a pretend business, like a "Pet Café" or "Eco-Friendly Toy Store." This challenge not only reinforces design skills but also introduces them to the concept of branding and marketing.
Discover Creative Ways To Use Canva For Kids
There are many different projects to create with Canva, but which one to choose? This guide will help you and your child choose the best layout to fit their design needs, and show you all sorts of creative things you can make with this free tool!
1. Create Social Media Cover Photos
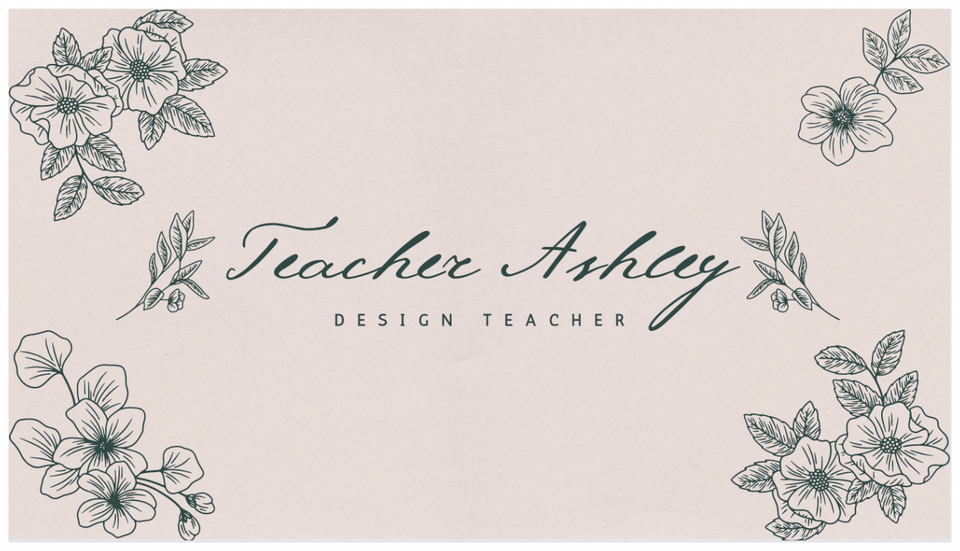
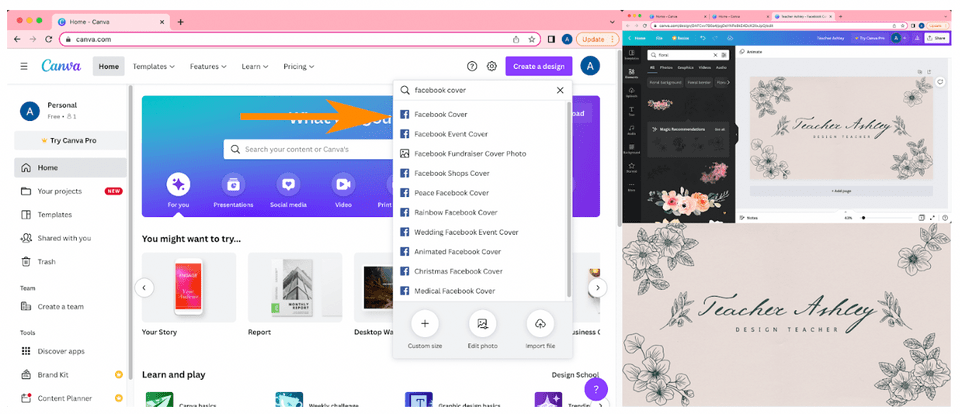
You can create a banner that provides a first impression for you and your profile. From Facebook to Twitter to Twitch, almost every social media site has a cover photo you can feature and customize alongside your profile to show off your personality. Canva has some presets of professionally made Facebook covers you can change up in just a few clicks and make your own. Or you can flex your creative muscles! Get some inspiration from Canva’s temples, add some graphics that describe what you do or your personality and you got yourself a personalized banner! On a streak to create more? Create a banner for every occasion and holiday!
2. Create Event Posters
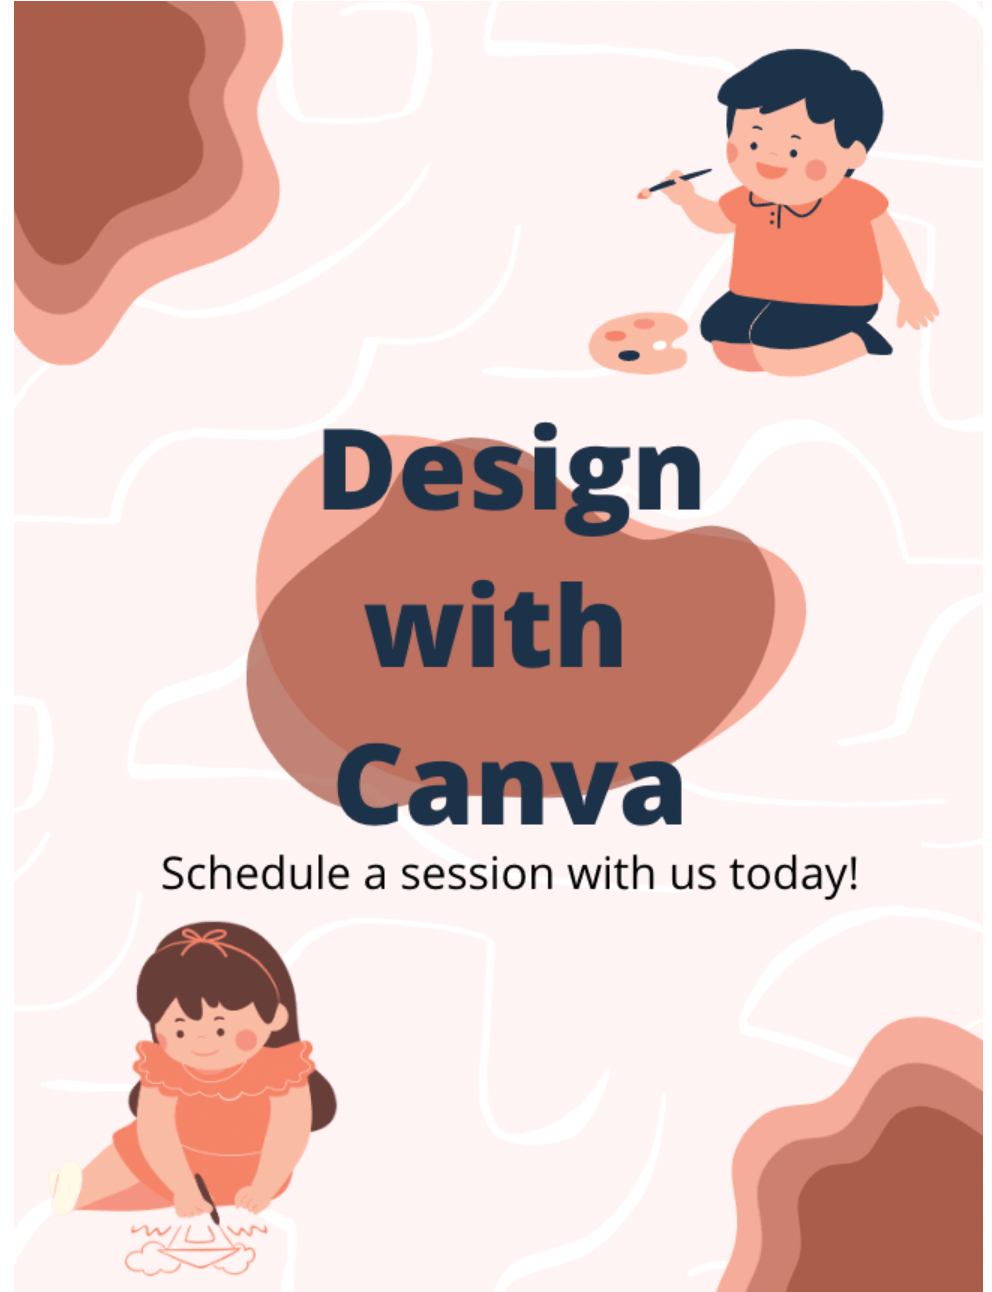
If you or your school or sports team have an event going on and you want your friends and family to come, what better way to let them know then by making a poster?! Luckily Canva also has a template for this. Add one or two images to define your design, text, some small elements of design and you have made your poster! Text should include the title, the when and where of your event, and some important details like where to get tickets or what the event will be about. You can also reflect this within your images and graphics.
3. Create Presentations for Your Next School Assignment
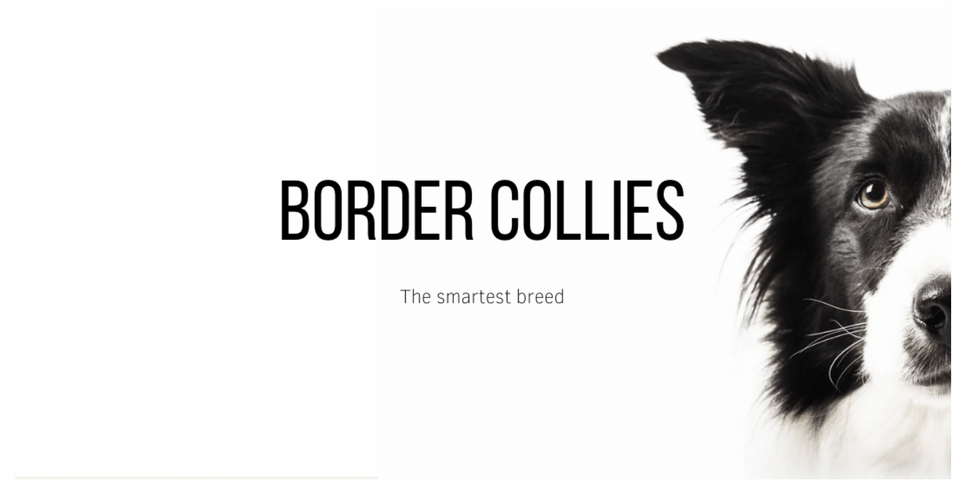
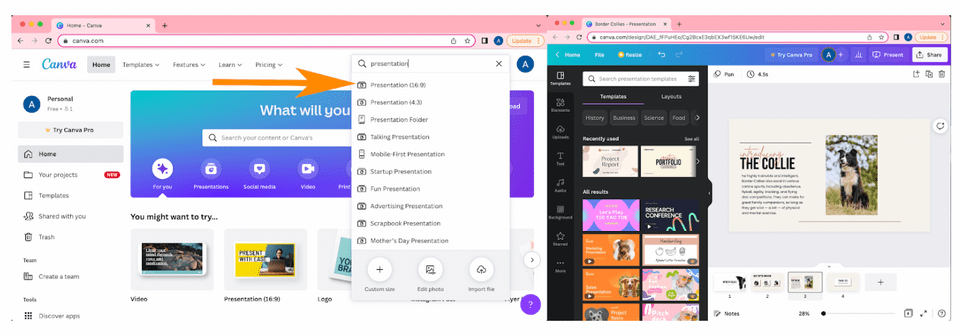
A lot of classes will require you to create a presentation for a topic. So why not blow it out of the water by not only making it well informed, but beautiful too! Presentations teach people something, share general information, tell a story, showcase collections, share a memory or assist in making a decision. A good way to make a cohesive design is to create a plain background across all slides, build a simple template you can follow across all slides and populate your slides with your information. Quality but limited and cohesive pictures/graphics that pertain to the text can make your presentation go the extra mile. Here are a few more tips for making a standout school presentation with Canva.
4. Create Diagrams
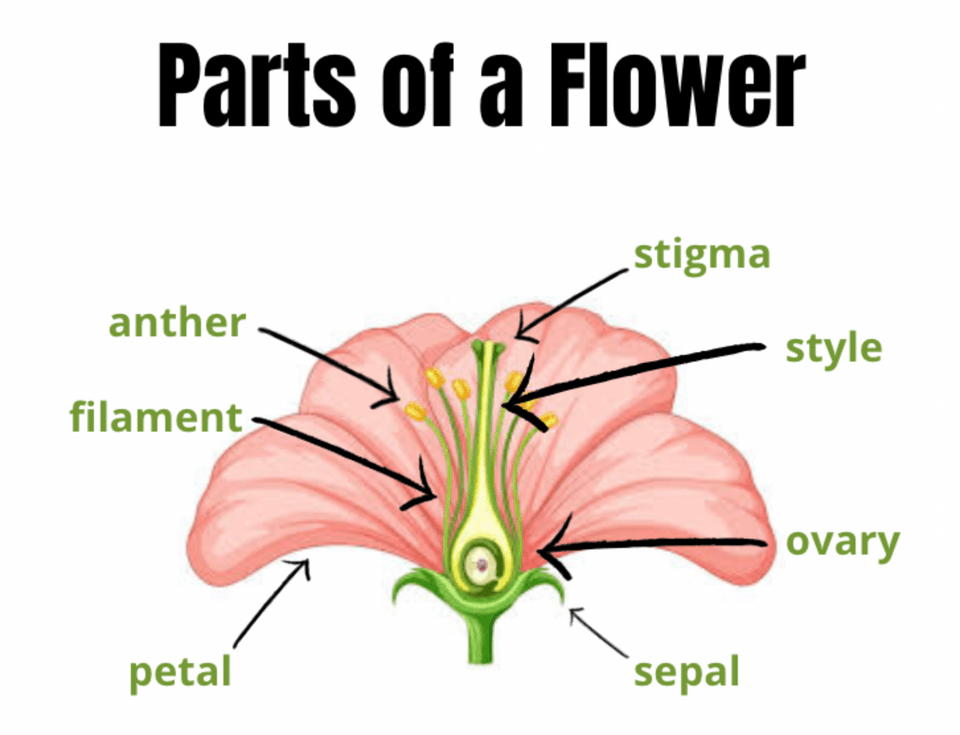
Diagrams can be helpful for science projects or to explain complex concepts. You can create beautiful diagrams to make your point with Canva! Find a .png photo with a transparent background or chose a graphic or photo from Canva and label it up! Make the label text colors from the title and other detailed text to differentiate information.
5. Make Infographics
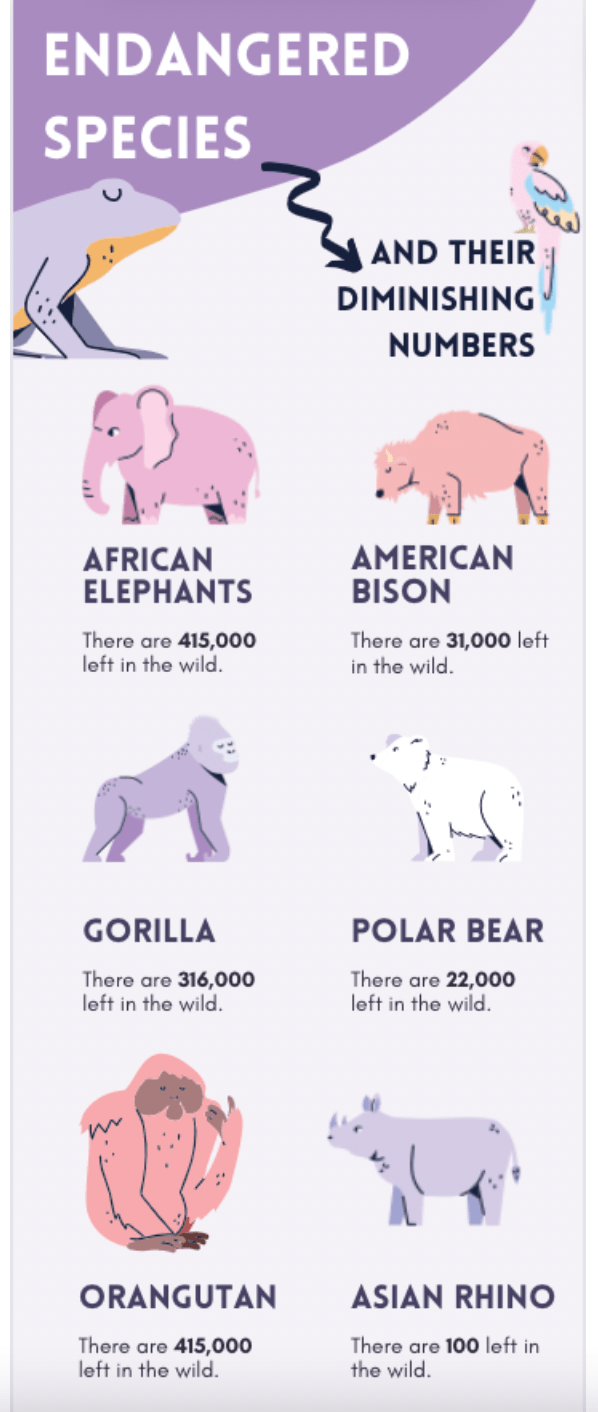
What better way to make your point but by illustrating it?! As they say, a picture is worth a thousand words. Canva has many different templates for infographics, a visual way to represent data, information and knowledge. You can take inspiration from those templates or add your own flare to existing ones to save time. Find some number based facts, add some graphics or graphics making your point in the theme of your topic and stick to a consistent color palette and you’ll be wowing people with visual information!
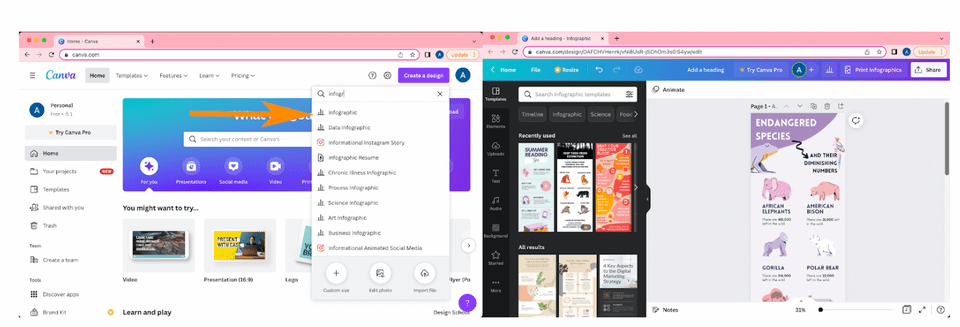
6. Edit videos for Instagram Stories or TikTok

There are many templates that Canva has to offer, and Instagram video is included! Using a template and nice text and simple graphics, you can take your club's TikToks and Instagram Stories to the next level.
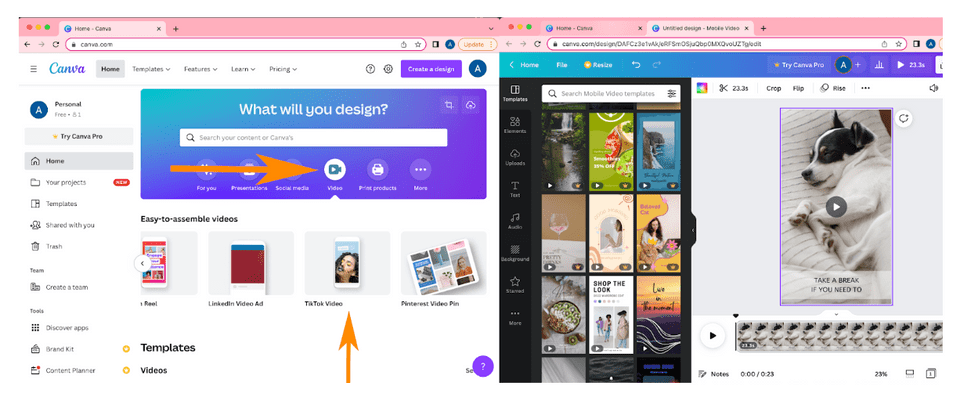
7. Videos for YouTube

Videos are something you can utilize with surface level video editing available on Canva. So moving away from static images, you can make videos about things you like to do, or are good at doing. Tutorials, unboxing, travel, the possibilities are endless when it comes to video ideas. Canva can clip videos, add music, stitch videos together, add graphics, add text and share to youtube. Canva even has its own library of videos, music and images you can use if you do not have your own assets yet.
Canva Tips To Make A School Presentation Stand Out
In a crowd of presentations, how can your child make theirs stand out? There are many boring pre-made templates that don’t use enough pictures out there, and if you’re in a time crunch there’s no problem using these. This tutorial wants to challenge you and your child to create a stunning presentation from scratch rather than copying and pasting into a carbon-copied template. Here you will learn a few tricks to turning your school presentation to an eye-catching work of art.
1. Have a stunning opener

First impressions are important and that counts for school presentations too! Make that first opening slide memorable but remember to keep it relevant to your topic. Remember, keep the aesthetic for the rest of your presentation, because the opening slide sets the tone for the rest of the presentation.
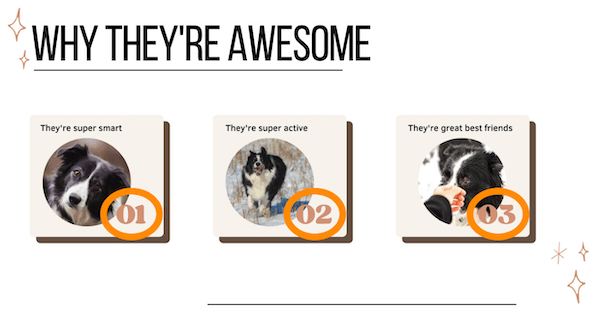
Make sure not to overcrowd your opening slide with pictures, graphics, or words. In this case, less is more. You can even make one image frame your text for an effortless but professional look. Just make sure to have all the important information on there.
2. Limit the colors in your presentation
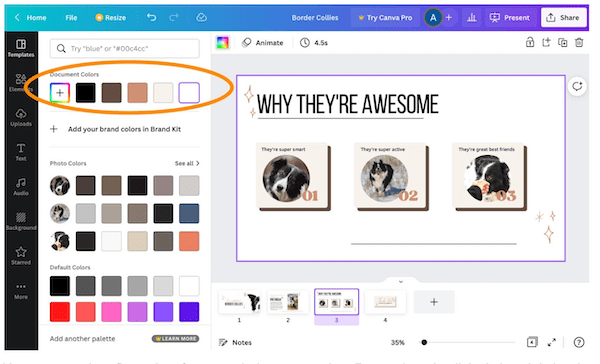
Use no more than five colors for your whole presentation. Remember simplicity is key. It is hard to know which words or information is important if every word is a different color! Use color sparingly, consistently and to highlight important information. Use your colors as accents, not the main stars of your presentation.
3. Have consistent slides
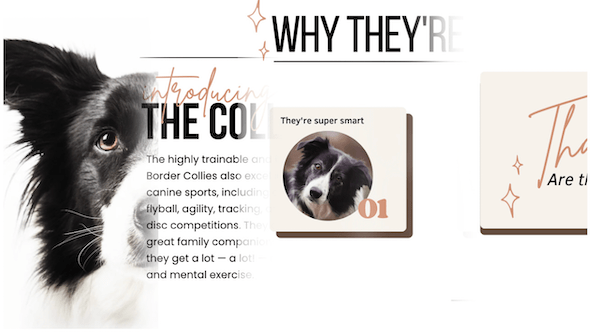
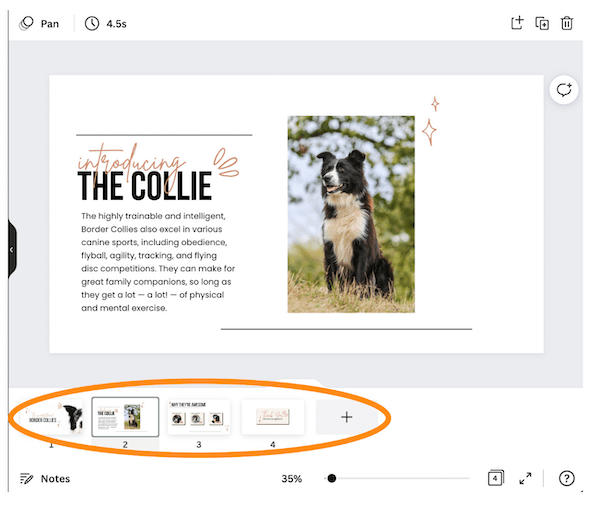
Build a template you can follow throughout your presentation. Or chose any of Canva's existing templates from the toolbar on the left. Then adapt the colors to make it uniquely your own by clicking on each object in the template, clicking on the color box near the top left of your slide window, and changing the color.
Add visual interest by using a second font. Pair different fonts and styles for body copy and titles in your slides and stick with it with all of your slides. In terms of fonts, also try to stick to a sans-serif font, as it will be easier for audience members to read. Pick a similar background and use the same colors throughout your presentation and make them indicate similar things throughout your presentation to create a design language with your audience and solidify information rapidly.
4. Add interesting photos
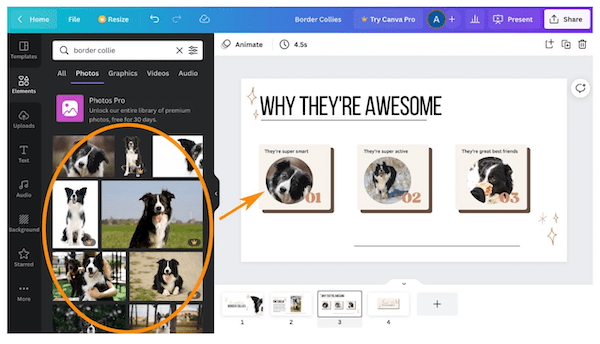
Have you noticed the most boring presentations lack any visual elements and pictures? Although some may think it distracting from the information at hand, visuals can help solidify information in your presentation. A lot of people learn in different ways, so by keeping it entertaining and visually appealing for those visual learners, you can broaden the interest of your audience. In fact, visuals are processed 60,000 times faster in the brain than text!
To add photos or graphics in Canva, use the toolbar on the left to click on Elements. Then search for the item you're hoping to add. Next click on Photos, Graphics or Videos to see relevant results for each type of content. Once you find the image you like, just click on it and drag it onto your slide. You can also upload your own images by clicking Upload in the left-hand toolbar.
5. Write short, direct bullet points
Presentations are all about information so we want the message to be clear. Remember, less means more! Like in the title page, only put the most important information on your slides and make them short and easy to understand sentences. Visuals can help where words can fail.
6. Add some finishing flourish
You can add simple animations and transitions between slides to really make your presentation come to life! To add animations simply click on the objects on your slide you want to animate, and then click Animate above your working window. You'll have to option to chose how those objects move onto the slide, such as from the left side, from the bottom, and so on. You can also use animation to make items get larger or smaller (select under Scale), and really pop out by tumbling (select under Exaggerate), and more.
7. Don’t forget to research!
Now that you have a visually stunning presentation, hit it out of the ball park by having accurate facts fill in those short bullet points. What your teacher will care about is facts, making it look pretty is the icing on the cake. Research your topic online, reference your textbook, and ask your teacher for more information if needed.
Beginner Canva Tutorial For Kids
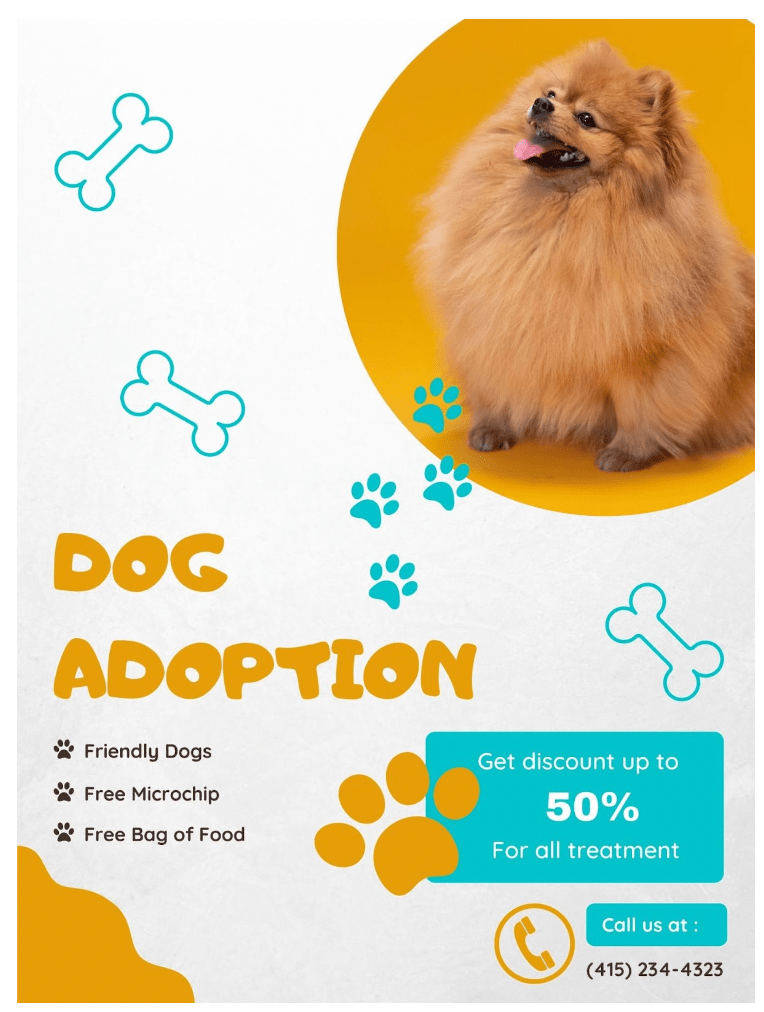
Now your child has made their very own poster in Canva in a matter of minutes. They can easily replicate this process for a variety of afterschool clubs, business ideas they want to start, birthday parties, or sports events, in the future. Help your child learn more about how to navigate and create with Canva, when you enroll them in an award-winning Canva for Kids online class, led live by an expert and designed by professionals from Apple and Stanford.
Your child might also enjoy following a Procreate beginner tutorial to continue to build their digital design skills.
Written by Ashley Velasquez. As a visual learner growing up in the age of technology, she was fascinated by the graphics and videos that would dance on early computer screens. As she started pursuing Visual Communications in college, she found that design involved in translating information, ideas and opinions onto endless platforms.


